14 Owner Service
15148 (Rev. 2/9/2007)
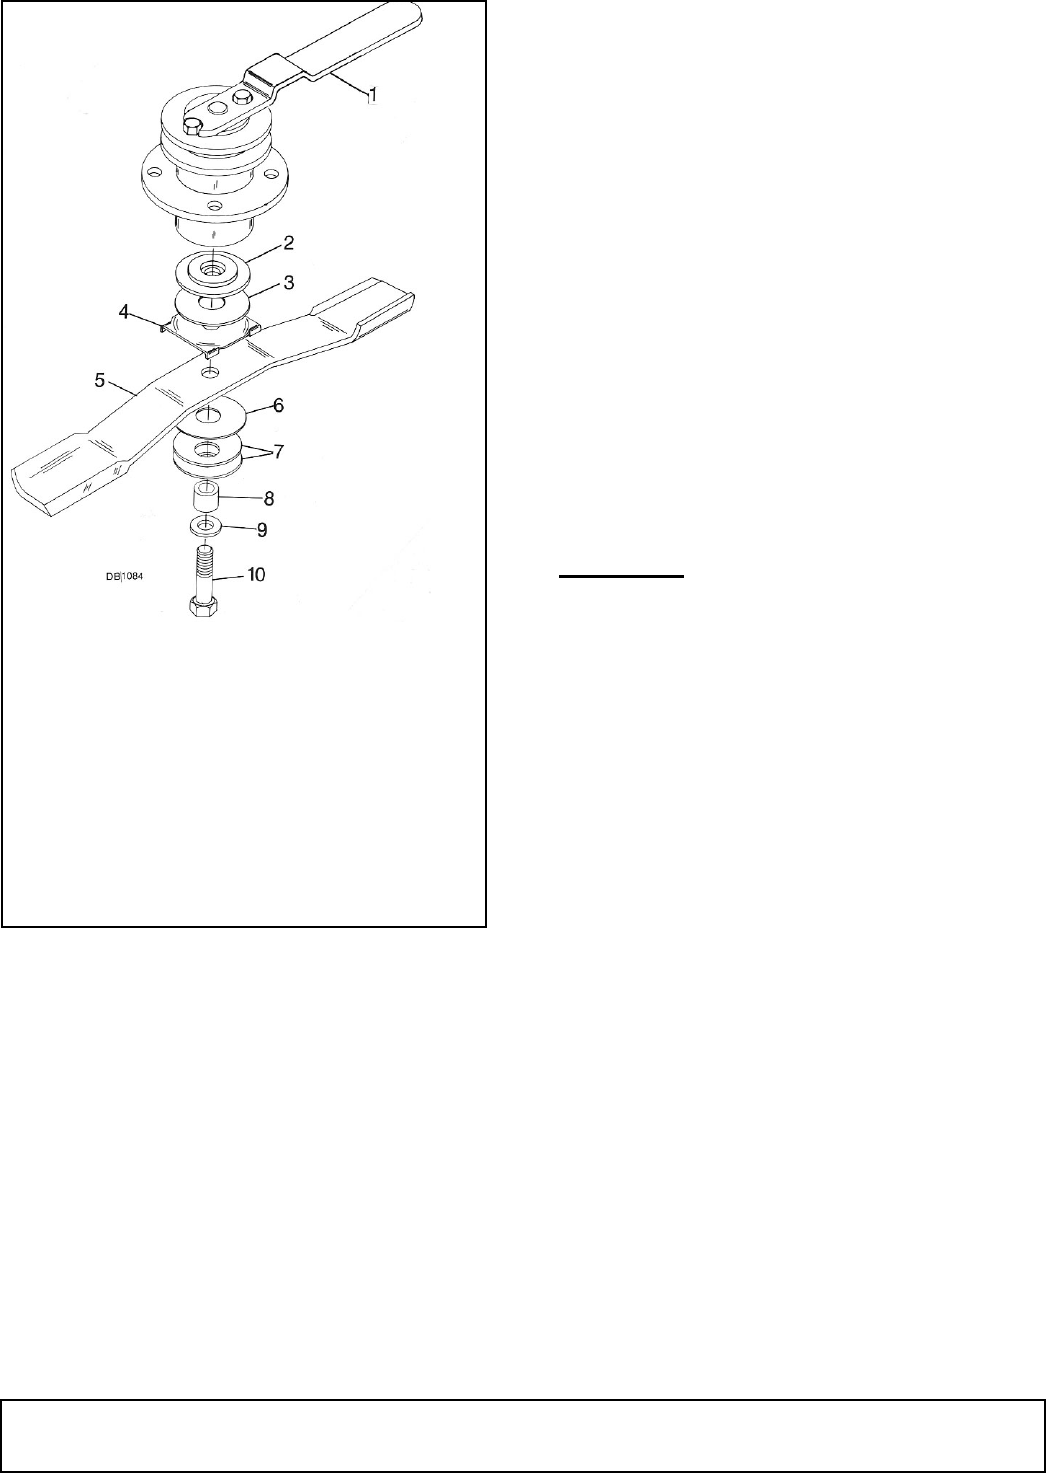
Figure 7. Blade Assembly L306
L306 Installation
Assemble shoulder washer (small end up, if removed),
clutch disc, blade stop and blade. Ensure cutting edge
is positioned to lead in counter-clockwise rotation, as
viewed from top of mower.
Position shim under blade. Install cup washers sleeve,
special heat-treated washer, and special Nylok bolt.
Shims should be added to blade installation to leave
approximately 1/32" cup in the cup washers when
blade bolt is torqued to 170 lbs-ft.
Excessive blade slipping can cause the cup washers to
burn and lose their clamping force. If this happens, the
cup washers must be replaced.
The L306 mower blades have friction clutch discs. The
clutch is designed to slip only when striking a solid
object. If slippage occurs during normal mowing, it may
be necessary to add a thin shim washer over sleeve.
Belt Replacement
One of the major causes of belt failure is improper
installation. Before a new belt is installed, check pulley
shafts and bearings for wear. Check pulley grooves for
cleanliness. Make sure spindles turn freely and without
wobble.
If grooves require cleaning, moisten a cloth with a non-
flammable, non-toxic degreasing agent or commercial
detergent and water.
Avoid excessive force during installation.
Do not use tools to pry belt into pulley groove. Do not
roll belt over pulleys to install. This can cause hidden
damage and premature belt failure.
Refer to Assembly instructions section, page 20, for
belt installation.
CLEANING
After Each Use
● Remove large debris such as clumps of dirt, grass,
crop residue, etc. from machine.
● Inspect machine and replace worn or damaged
parts.
● Replace any safety decals that are missing or not
readable.
Periodically or Before Extended Storage
● Clean large debris such as clumps of dirt, grass,
crop residue, etc. from machine.
● Remove the remainder using a low-pressure water
spray.
1. Be careful when spraying near scratched or torn
safety decals or near edges of decals as water
spray can peel decal off surface.
2. Be careful when spraying near chipped or
scratched paint as water spray can lift paint.
3. If a pressure washer is used, follow the advice
of the pressure washer manufacturer.
● Inspect machine and replace worn or damaged
parts.
● Sand down scratches and the edges of areas of
missing paint and coat with Woods spray paint of
matching color (purchase from your Woods
dealer).
● Replace any safety decals that are missing or not
readable (supplied free by your Woods dealer).
See Safety Decals section for location drawing.
1. Blade Wrench
2. Shoulder Washer
3. Clutch Disc
4. Blade Stop
5. Blade
6. Shim Washer
7. Cup Washers
8. Sleeve
9. Washer (special)
10. Bolt (special,
left hand threads
)


