22 Dealer Service
MAN0875 (2/8/2011)
• If there is voltage at both pink/black wires men-
tioned in the previous paragraph, check voltage
at yellow/red parking brake wires with the park
brake off.
• If voltage is not present, the wire between the
seat relay and parking brake switch is uncon-
nected or the seat relay is defective and must be
replaced.
• If voltage is present at one wire but not the other,
the parking brake switch is defective and must be
replaced.
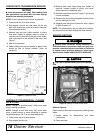
Troubleshooting Deck Safety Switch
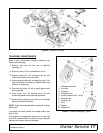
1. Pull handlebars in with deck in lowest cutting
height position (1), see Figure 11.
2. Check that switch is making contact with the height
gauge.
3. Check that the wires are properly hooked up to
power unit.
4. Adjust switch bracket location on actuator if
needed (four screws). Make sure height screw
does not bottom out on slot in either direction when
raising or lowering deck.
5. Check that screws holding switch to bracket are
not too tight and holding lever open.
6. Adjust safety switch lever or replace switch if
necessary.
7. After adjustments, check that engine cuts out with
deck partially raised.
HYDROSTATIC PUMP REMOVAL
NOTE: Removal procedures are the same for both
right and left hydrostatic pumps.
1. Place power unit on a level surface and remove
key.
2. Place power unit on stands to allow access to
bottom of the machine.
3. Drain hydraulic reservoir and hydrostatic pumps.
4. Remove steering linkage from control arm on
hydrostatic pump.
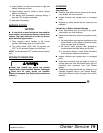
5. Loosen J-bolt and remove belts.
6. Remove hoses from hydrostatic pump. Plug and
cap all fittings on hoses and pump to prevent
contamination.
7. Remove sheaves from hydrostatic pump. Remove
1/4 NC x 3/4 bolts from bushing/sheave. Use new
1/4 NC x 3/4 GR5 bolts in holes located 90° from
previously occupied holes, to separate the bushing
from the sheaves.
8. Remove two bolts holding hydrostatic pump to
frame and remove pump from frame. Hydrostatic
pump weighs approximately 8 lbs.; use care when
removing.
HYDROSTATIC PUMP INSTALLATION
1. Position hydrostatic pump into power unit frame
and secure with two bolts. Apply Loctite® 242 to
threads of the two mounting bolts and torque to 35
lbs-ft.
2. Install sheave onto hydrostatic pump and secure
with taper lock and cap screws. Alternate
tightening each cap screw to 8 ft-lbs. Align sheave
with spring idler to allow for proper belt alignment.
3. Install hoses to hydrostatic pump.
4. Install belts and tighten J-bolt for proper belt
tension.
5. Install steering linkage to control arm on
hydrostatic pump.
6. Fill hydraulic reservoir with new fluid. Use 20W-50
motor oil.
7. Start engine and disengage parking brake.
8. Open pump dump valve.
9. Slowly push steering levers back and forth 5 to 6
times to bleed the hydraulic system.
10. Close pump dump valve.
11. Adjust neutral position of steering linkage as
necessary.
12. Stop engine. Check level of hydraulic reservoir and
check for leaks.
13. Remove power unit from stands.
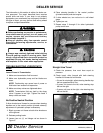
BELT REMOVAL
1. Remove key from switch.
2. Remove belt shield, if necessary.
3. Remove clutch anti-rotation cable, if necessary.
4. Loosen idler spring bolt (J-bolt), and derail belt
from pulleys.
5. Remove belts.
ENGINE REMOVAL
1. Disconnect throttle cable, battery cables, hoses,
fuel line, and electrical wires from engine.
2. Remove the four engine mounting bolts from
bottom of power unit frame.
3. Remove belts from the front and rear engine
pulleys. See Belt Removal.
4. Lift engine from the power unit frame.
NOTE: Contact your authorized engine dealer for
parts and repairs.


