


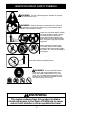
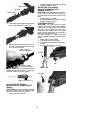
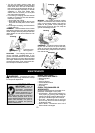
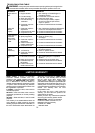

6
Upper Shaft
Lower Shaft
Grooves
2. Pushthetwo shafts togetheruntilthelower
shaft is fully seated in the upper shaft.
3. Slidelowerlockingsleeveassemblyover
upperlockingsleeveassembly andtight-
en by turning clockwise.
Upper
Locking
Sleeve Assembly
Lower Locking
Sleeve Assembly
NOTE:
Iflower lockingsleeve assemblywill
not tighten (gap is more than 1/4″), the upper
and lower shafts are not fully seated.
Gap is more than 1/4″
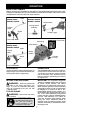
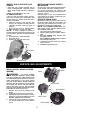
ADJUSTING THE HANDLE
(Models W25CB, W25SB, W25CF,
W25SF)
CAUTION:
Whenadjustingtheassisthandle,
be sure it remains above the safety label and
below the mark or arrow on the shaft.
1. Loosen wing nut on handle.
2. Rotatethehandleontheshafttoanupright
position; retighten wing nut.
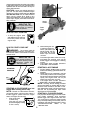
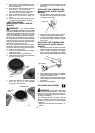
ADJUSTING THE HANDLE
(Models W25CBK, W25CFK,
W25SBK, W25SFK)
CAUTION:
When adjusting the assist han-
dle, be sure it remains above the upper lock-
ingsleeveandbelowthemark orarrowonthe
shaft.
1. Loosen wing nut on handle.
2. Rotatethehandleontheshafttoanupright
position; retighten wing nut.
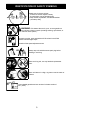
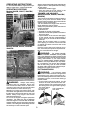
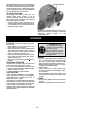
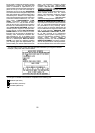
ATTACHING SHIELD
CAUTION:
The shield must be properly
installed. The shield provides partial protection
from the risk of thrown objects to the operator
and others and is equipped with a line limiter
blade which cuts excess line to the proper
length. The line limiter blade (on underside of
shield) is sharp and can cut you.
For proper orientation of shield, see KNOW
YOUR TRIMMER illustration in OPERATION
section.
1. Remove wing nut from shield.
2. Insert bracket into slot as shown.
3. Pivotshielduntilboltpassesthroughholein
bracket.
4. Securely tighten wing nut onto bolt.
Bracket
Shield
Slot
Wing Nut