


Model LG & LD Pool and Spa Heater
Page 19
6. Use compressed air to blow out any standing
water remaining in the heat exchanger.
7. Grease the threads on the drain plugs and rein-
stall plugs, but do not tighten.
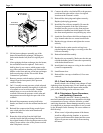
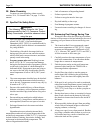
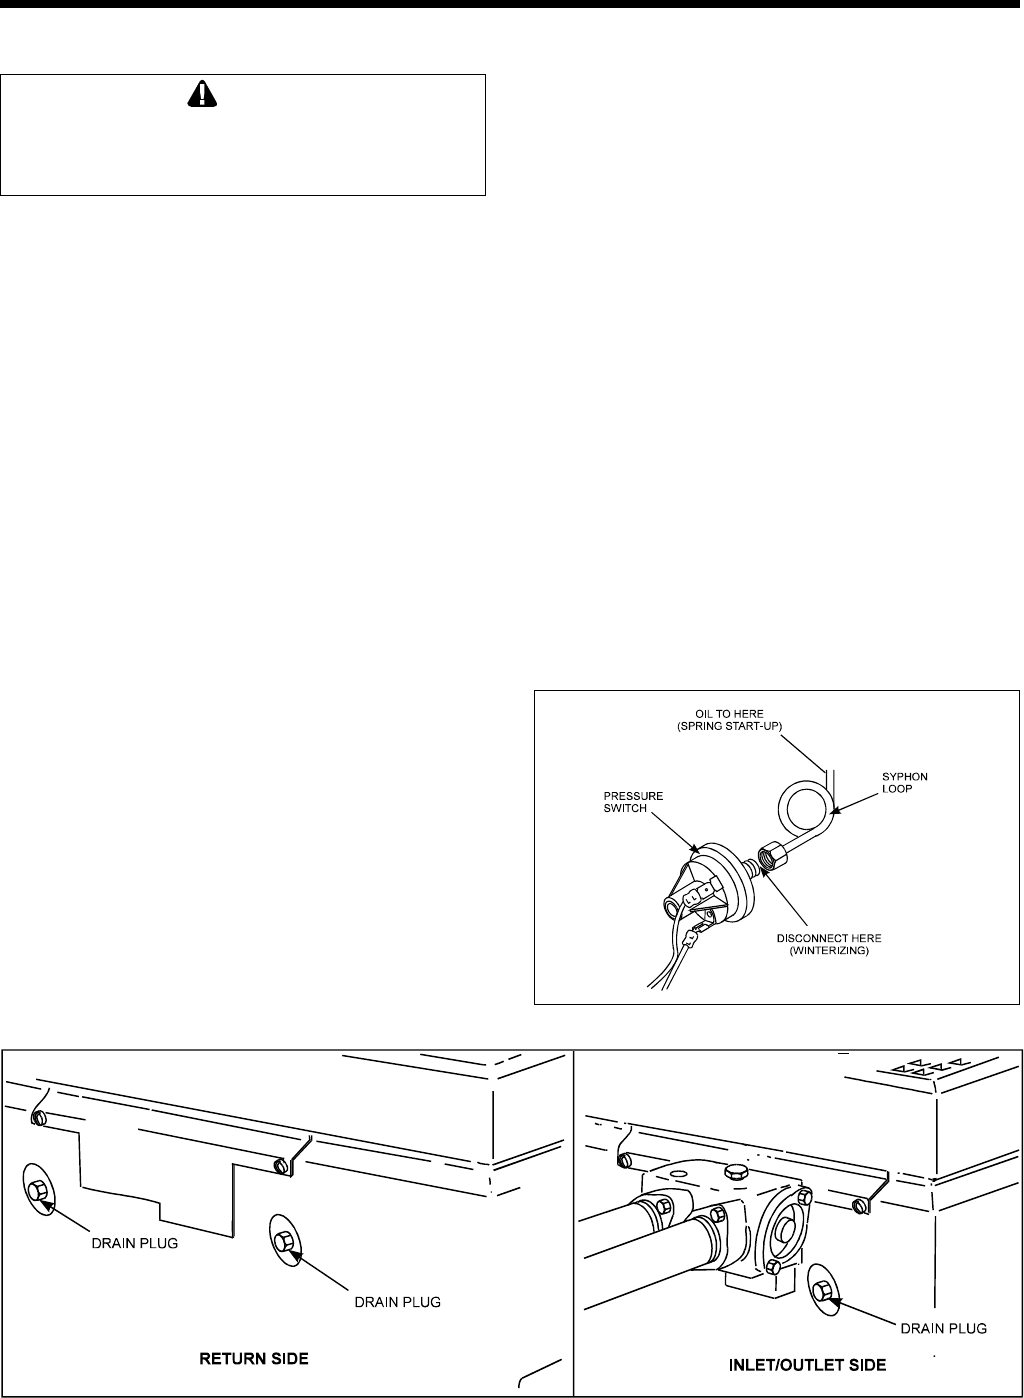
8. Disconnect the pressure switch from the siphon
loop (copper tubing) (see Figure 22).
3D-3. Spring Start-up
To restart the heater in the Spring, have a profes-
sional service technician reassemble the heater as
follows:
1. Fill the siphon loop with approximately 5cc of
SAE 50, non-detergent oil. Attach the copper
tubing to the pressure switch (see Figure 22).
2. Tighten the drain plugs.
3. Turn on the filter pump and circulate water
through the heater for 5 minutes. Check for leaks
while circulating.
4. Turn on the main gas supply valve to the heater,
outside the heater jacket.
5. Turn on the heater following the lighting instruc-
tions found on the inside of the heater, or pages
17(LD) or 18(LG) of this manual.
3D. Seasonal Care
Caution
Do not operate this heater outdoors at
temperatures below 20 degrees Fahrenheit
(°F) (-7 degrees Celsius [°C]).
3D-1. Spring and Fall Operation
During periods when the pool is only going to be
used occasionally, turn the temperature control down
to the MIN setting. This prevents the pool from water
from becoming chilled, and minimizes the time re-
quired to raise the pool water back up to the desired
temperature.
In areas subject to only short freeze periods, turn
off the heater and run the pump continuously for the
length of the freeze period.
If the heater is not going to be used for a long
period of time, shut it down completely. Follow the
instructions found on the inside of the heater, or pages
17(LD) or 18(LG) of this manual.
3D-2. Winterizing
In areas where freezing temperatures occur in
winter, and the pool or spa will not be used, have your
service technician perform the following steps:
1. Turn off the main gas supply valve to the heater,
outside the heater jacket.
2. Remove heater door.
3. Shut down the heater following the shutdown
instructions found on the inside of the heater.
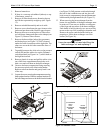
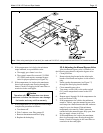
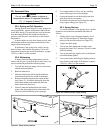
4. Remove the drain plug from the return header
(see Figure 21), loosen the drain plug from the
inlet/outlet header, and completely drain the
heater before the first frost.
5. After all water has drained from the heater,
remove the drain plug from the inlet/outlet side.
Check for mineral buildup in the openings.
Figure 21. Heater drain locations.
Figure 22. Pressure switch copper tubing.