


NOTE: This spark ignition system meets
all requirements of the Canadian Interfer
-
ence-Causing Equipment Regulations.
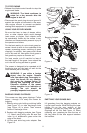
Clean the engine regularly with a cloth or
brush. Keep the cooling system (blower hous
-
ing area) clean to permit proper air circulation
which is essential to engine performance and
life. Be certain to remove all grass, dirt and
combustible debris from muffler area.
DECK
The underside of the mower deck should be
cleaned after each use to prevent a buildup of
grass clippings, leaves, dirt or other matter. If
this debris is allowed to accumulate, it will in
-
vite rust and corrosion, and may prevent
proper mulching.
The deck may be cleaned by tilting the mower
and scraping clean with a suitable tool (make
certain the spark plug wire is disconnected).
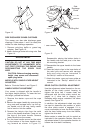
CUTTING BLADE
WARNING: Be sure to disconnect
and ground the spark plug wire and
remove ignition key before working
on the cutting blade to prevent acci-
dental engine starting. Protect hands
by using heavy gloves or a rag to
grasp the cutting blades.
Tip mower as specified in separate engine
manual. If it is not specified tip with carburetor
up.
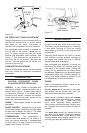
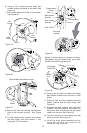
Remove the bolt and blade support which
holds the blade and adapter to the engine
crankshaft. Remove the blade and adapter
from the crankshaft.
WARNING: Periodically inspect the
blade adapter for cracks, especially if
you strike a foreign object. Replace
when necessary.
For best results your blade should be sharp.
The blade may be resharpened by removing it
and either grinding or filing the cutting edge
keeping as close to the original bevel as pos
-
sible. It is extremely important that each
cutting edge receives an equal amount of
grinding to prevent an unbalanced blade. Im
-
proper blade balance will result in excessive
vibration causing eventual damage to the en
-
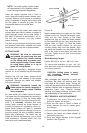
gine and mower. Be sure to carefully balance
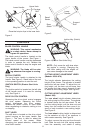
blade after sharpening. The blade can be
tested for balance by balancing it on a round
shaft screwdriver. Remove metal from the
heavy side until it balances evenly.
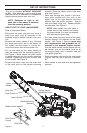
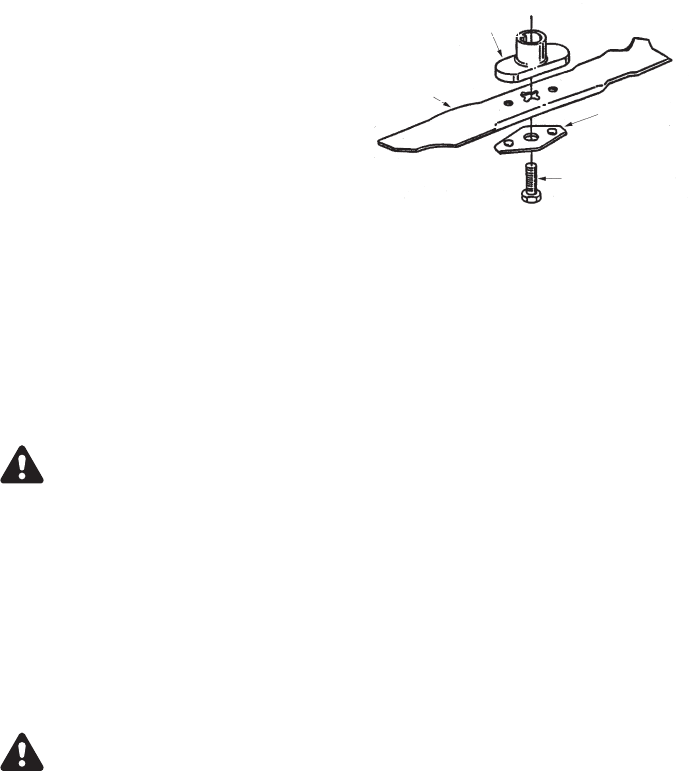
Before reassembling the blade and the blade
adapter to the unit, lubricate the engine crank
-
shaft and the inner surface of the blade
adapter with light oil. Install the blade adapter
on the crankshaft with the “star” away from the
engine. Refer to Figure 18. Place the blade
with the side marked bottom (or with part
number) facing away from the adapter. Align
the blade bell support over the blade with the
tabs in the holes of the blade and insert the
hex bolt. Tighten the hex bolt to the torque
listed below:
Blade Mounting Torque
Center Bolt 450 in. lb. min., 600 in.lb. max.
To insure safe operation of your unit, ALL
nuts and bolts must be checked periodically
for correct tightness.
CAUTION: Cutting grass in sandy
soil conditions causes abrasive
wear to the blade.
After prolonged use, especially in sandy soil
conditions, the blade will become worn and
lose some of the original shape. Cutting effi
-
ciently will be reduced and the blade should be
replaced. Replace with an approved factory re
-
placement blade only. Possible damage
resulting from blade unbalance condition is not
the responsibility of the manufacturer.
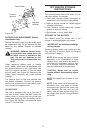
BELT REMOVAL AND REPLACEMENT
1. Disconnect the spark plug wire and
ground it against the engine.
2. Drain the fuel tank or place a piece of
plastic beneath the cap to prevent gaso
-
line leakage.
3. Tip the mower on its side. Block securely.
4. Remove the blade and blade adapter as
described previously.
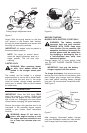
5. Move rear height adjuster to the highest
position. See Figure 21.
14
Figure 18
Blade Adapter
Blade
Hex Bolt
Blade Bell
Support