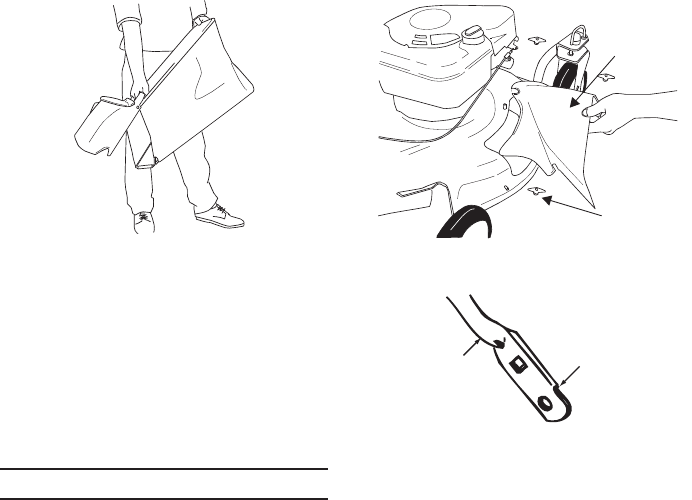
SIDE DISCHARGE GRASS CLIPPINGS
This mower can also side discharge grass
clippings. Follow steps 1 and 2 to ready this
mower for side discharge operation.
1. Remove mulching baffle or grass bag
adapter. See Figure 10.
2. Attach discharge chute with wing nuts. See
Figure 14.
ADJUSTMENT
CAUTION: DO NOT AT ANY TIME MAKE
ADJUSTMENTS TO LAWNMOWER WITH-
OUT FIRST STOPPING THE ENGINE AND
DISCONNECTING THE SPARK PLUG
WIRE
CAUTION: Before changing mowing
height, stop mower and disconnect
spark plug cable.
MODELS WITH SINGLE LEVER HEIGHT
ADJUSTERS:
Refer to “Controls Section” and Figure 5.
HANDLE HEIGHT ADJUSTMENT
Your mower is shipped with the handle in
the higher height position. To lower the han
-
dle height, proceed as follows.
1. Remove the starter rope and the rope
guide.
2. Remove the upper handle by removing the
wing nuts and carriage bolts. Lay the up
-
per handle out of the way, being careful
not to bend or kink the cables.
3. Remove the hairpin clips from the weld
pins on the handle brackets. Press out on
the legs of the lower handle. Remove
lower handle from the mower.
4. Turn the lower handle around so the notch
on the bottom of the lower handle is fac
-
ing forward as shown in Figure 15.
Reassemble, placing the bottom holes in
the handle over the weld pins in the han-
dle mounting bracket.
5. Reassemble the upper handle to the lower
handle.
6. Place the hairpin clips in the inner holes of
the weld pins and secure with carriage
bolts and wing nuts as instructed in
the“Set-Up” section of this manual.
7. Attach the starter rope and rope guide as
instructed in the “Set-Up” section of this
manual.
DRIVE CLUTCH CONTROL ADJUSTMENT
Use the adjustment wheel located on the un
-
derside of the clutch control housing to
tighten the drive belt if mower does not
self-propel with the drive clutch control en
-
gaged, or if drive belt is slipping (unit
hesitates while engine maintains the same
speed). See Figure 16.
In addition, the adjustment wheel may also
be used to determine the position in which
the drive clutch control is engaged. If it is
more comfortable to have the drive engaged
with the lever further away from the handle,
tighten the drive belt.
Make certain to retest the unit for neutral as
instructed in the operation Section. Move the
adjustment wheel in the opposite direction to
loosen the drive belt if necessary.
12
Figure 15
Lower Handle
Notch
Figure 14
Side
Discharge
Chute
Wing Nut
Figure 13


