


14
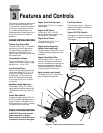
Section 5: Maintenance/Repairs
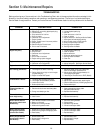
BELT PERFORMANCE
TROUBLESHOOTING
Sub-par belt performance (noise,
overheating, cracking, etc.), can be
caused by several situations. Follow
the steps below to correct belt perfor-
mance problems. Also use these
checks after installing a new belt. After
shutting the engine off and disconnect-
ing the spark plug wire, remove the
rear belt cover on the underside of the
machine (refer to previous page). The
handlebar control bail must be released
to remove all belt tension.
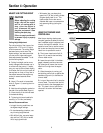
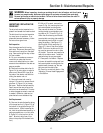
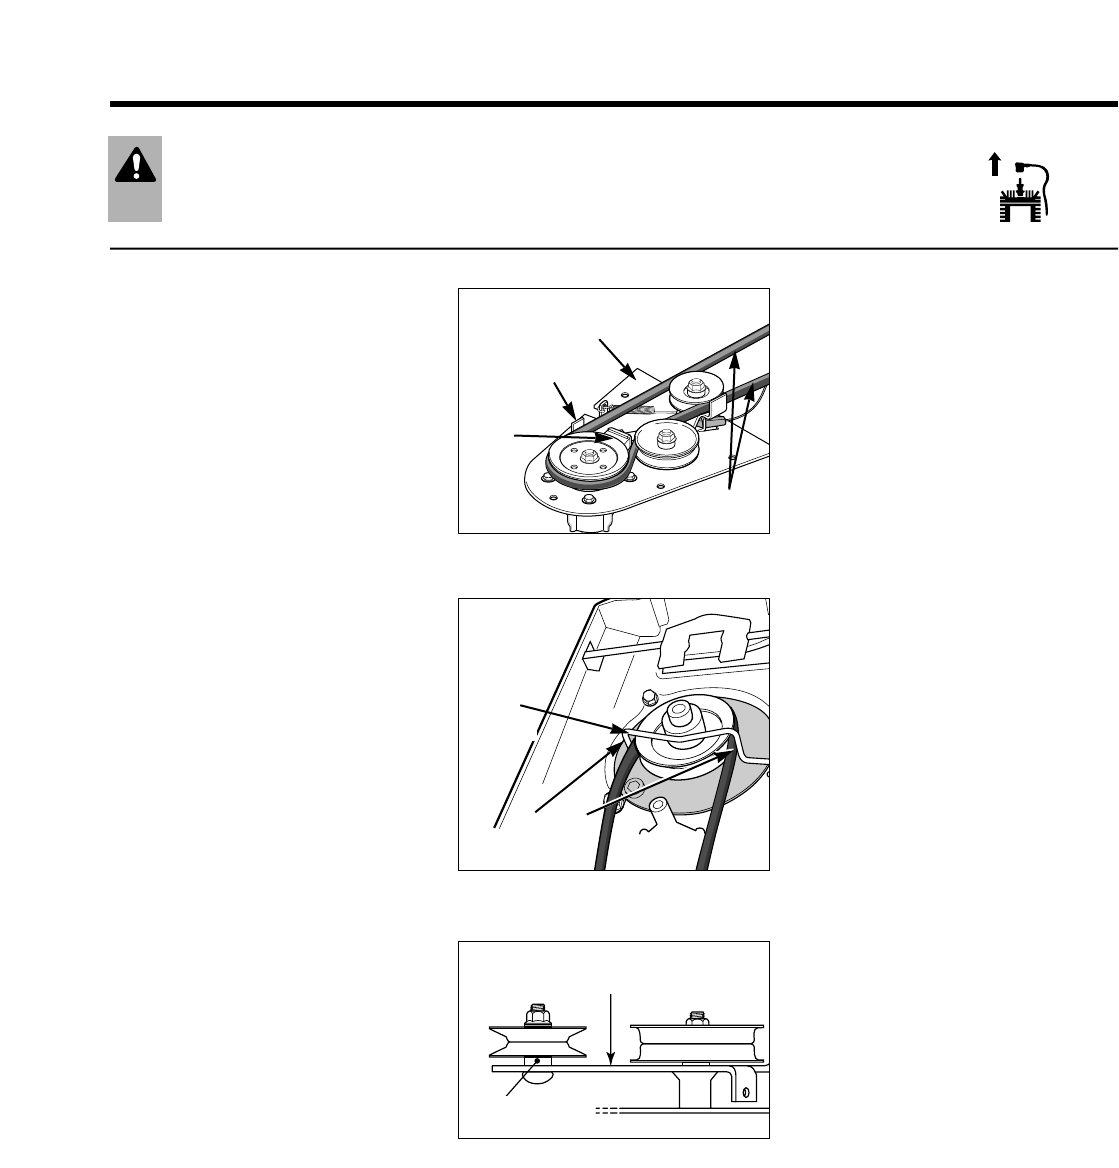
1– Belt must be routed
between pulleys and guides.
Examine inside surface of belt. If belt
is cracked or peeling, unbolt and lower
spindle mounting plate and proceed with
this step. The pulley system has two
belt guides. The belt must run between
the pulleys and the guides. If routed in-
correctly, re-route belt as shown in
Figures 5-8 and 5-9. Use masking tape
to temporarily hold belt in place while
reattaching the spindle mounting plate.
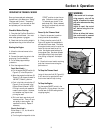
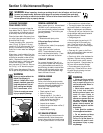
2– Minimum clearance is 1/4" on
each side between rear belt guide
and pulley.
If the rear belt guide (Figure 5-9) is
less than 1/4" from the sides of the pulley
with the bail engaged, loosen the belt
guide hardware, move guide to create
clearance of at least 1/4", then tighten
hardware.
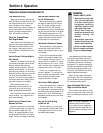
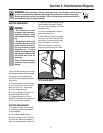
3– Both idler pulleys must
be mounted right-side up.
The two idler pulleys shown in Figure
5-10 are correctly installed– note that the
longer hub on each pulley is against the
idler arm. If the pulleys are upside-
down, turn them over and tighten them
securely.
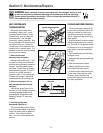
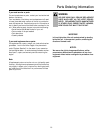
CLEANING AND DEBRIS REMOVAL
Thorough and regular cleaning of de-
bris from around the engine and on the
machine is required for maximum en-
gine efficiency and good overall perfor-
mance. Inspect and clean the following
areas regularly:
• Brush and wipe off all engine surfaces,
especially before checking oil or adding
fuel. Do not let oil or grease accumulate.
For access to the front of the engine, the
debris shield can be lifted up and tilted
forward.
• Wipe the deck clean, particularly near
the engine muffler.
• Keep safety and operating decals clean
and legible.
• Clean the underside of the deck.
• Keep all operating control levers
debris-free so they work properly.
• Loosen the clamp plates securing the
trimmer lines, remove the lines, clean
thoroughly under the plates in the
grooves, then replace the trimmer lines.
Hint: Use a pipe cleaner.
Figure 5-8
Figure 5-10
Figure 5-9
Front Pulley
Belt Guide
Brake
Place
Tape Here
Spindle Mounting Plate
Rear
Pulley
Belt
Guide
Minimum
1/4" Gap
Idler Arm
Longer Hub
Idler Pulley
Idler Pulley
WARNING Before inspecting, cleaning or servicing the unit, shut off engine, wait for all parts
to come to a complete stop, disconnect spark plug wire and move wire away from spark plug.
Remove ignition key on electric start models. Failure to follow these instructions can result in
serious personal injury or property damage.