


6
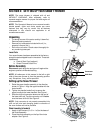
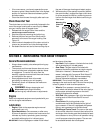
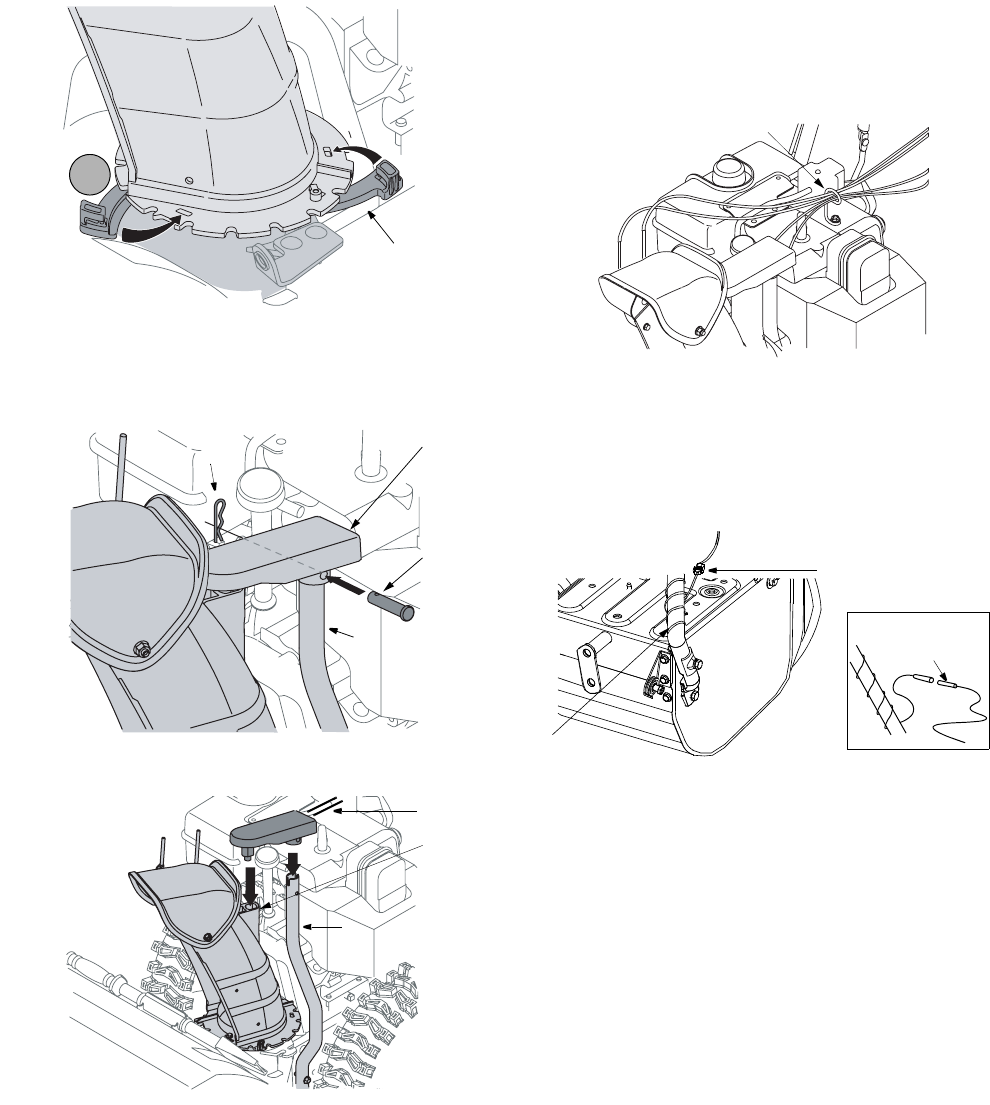
3. One end of each chute keeper is already attached
to the chute flange. Pivot the free end of the chute
keeper to align it with the chute flange and push it
till it snaps into position. See Figure 4. Repeat with
remaining chute keepers.
Figure 4
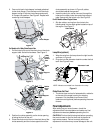
For Models with 4 Way Chute Control Box
1. Pull the hairpin clip out of the clevis pin on the chute
support tube. Save this hardware. See Figure 5.
Figure 5
Figure 6
2. Position the chute assembly so the chute opening
is facing the front of the unit.
3. Place the chute control box on the short tube of the
chute assembly and the chute support tube of the
chute assembly as shown in Figure 6, cables
should be towards the operator.
4. Insert the clevis pin, earlier removed, through the
holes on the chute control box and chute support
tube. Secure with the hairpin clip. See Figure 5.
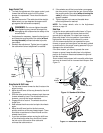
For All Models without Engine Covers
1. Slip the cables, running from the chute to the
handle panel into the cable guide located on top of
the engine. See Figure 7 .
Figure 7
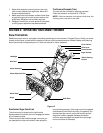
Lamp Wire (optional)
1. Wrap the wire from the lamp down the right handle
as shown in Figure 8 .
2. Plug wire into the alternator lead wire under the fuel
tank. See Figure 8 inset.
Figure 8
Chute Clean-Out Tool
1. The chute clean-out tool is fastened with a cable tie
to the rear of the auger housing for shipping
purposes. Cut the cable tie and remove the
extension cord (optional) before operating the snow
thrower.
Final Adjustments
After setting up your snow thrower, check the
adjustments as instructed below and make any final
adjustments necessary before operating the unit.
CAUTION: Perform the following test before operating
the snow thrower for the first time and at the start of
each winter season. Failure to comply with these
adjustment instructions may cause damage to the unit.
Chute
Assembly
3
Chute Keeper
Chute Support
Tube
Clevis
Pin
4 Way
Chute
Control
Box
Hairpin Clip
Chute Support
Tube
Short
Tube
Cables
Cable Guide
Alternator Lead
Lamp Wire
Alternator
Lead
NOTE: Wheels are omitted from illustration for clarity.