


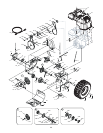
14
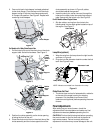
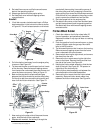
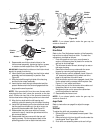
Shave Plate and Skid Shoes
The shave plate and skid shoes on the bottom of the
snow thrower are subject to wear. Check these
periodically and replace as necessary.
Replacing Skid Shoe
1. Remove four carriage bolts and hex nuts which
attach two skid shoes to the snow thrower on two
sides. See Figure 16 .
2. Reassemble new skid shoes with the same
hardware. Make certain the skid shoes are
adjusted to be level.
Replacing Shave Plate
1. After removing both skid shoes, remove four
carriage bolts and hex nuts which attach shave
plate to the snow thrower housing. See Figure 16 .
2. Reassemble new shave plate, making sure heads
of the carriage bolts are to the inside of the housing.
Tighten securely. Re-install skid shoes.
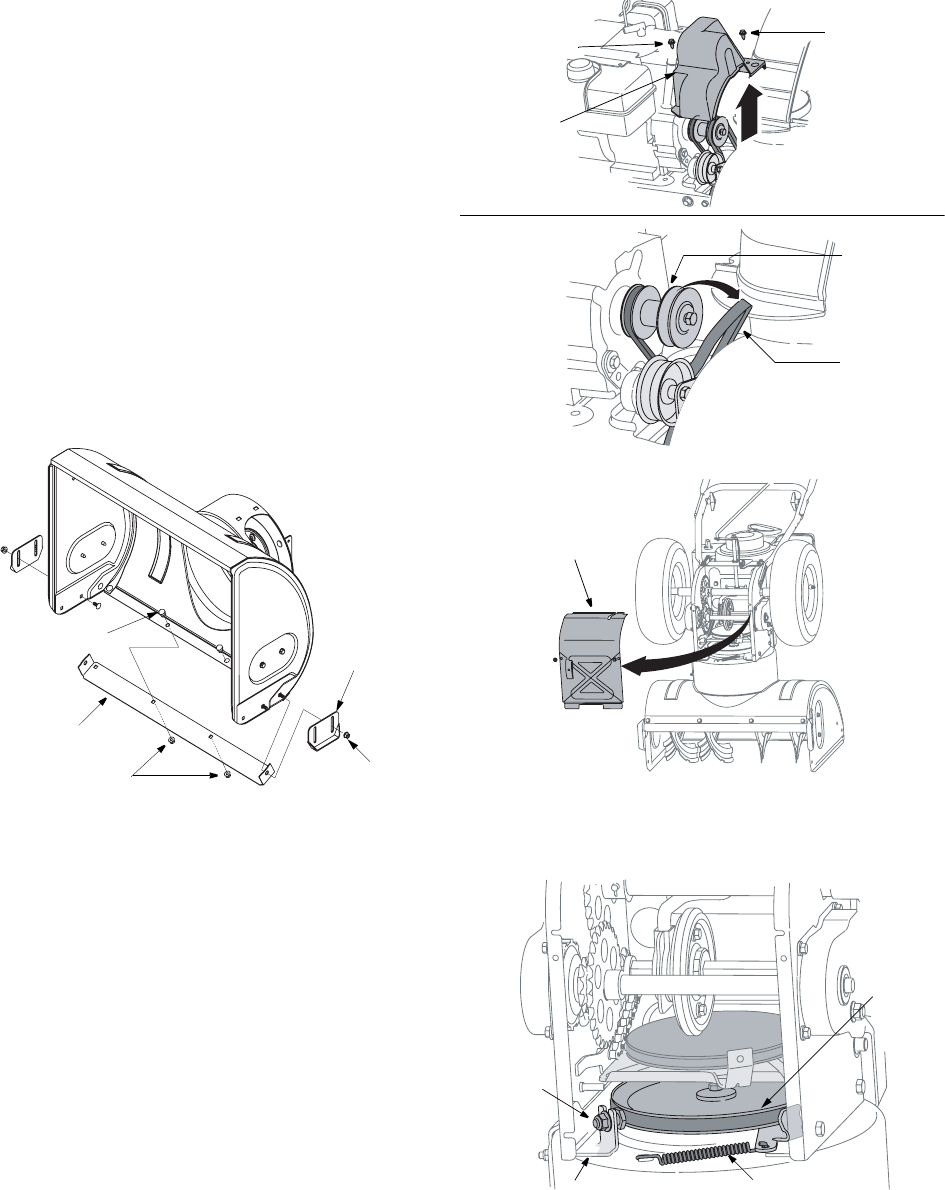
Figure 16
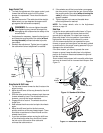
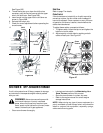
Replacing Belt
Check the condition of both auger belt and drive belt
every 25 hours of snow thrower operation. Replace if
either shows signs of wear and tear.
1. Remove belt cover by removing the two self-
tapping screws that secure it to the snow thrower
frame. See Figure 17A.
2. Take auger belt off the pulley as shown in Figure
17B.
Auger Belt
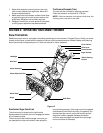
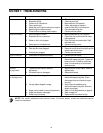
3. Tip the snow thrower up and forward, so that it rests
on the housing. Remove two self-tapping screws
from the frame cover underneath the snow thrower
and move the frame cover away. See Figure 18 .
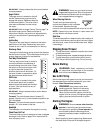
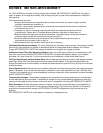
4. Half turn shoulder screw and slide it out of the
mounting bracket. See Figure 19.
5. Unhook spring to release tension on the auger belt.
Remove old belt and replace with new belt
installing it on the groove. See Figure 19.
Figure 17
Figure 18
6. Wrap auger belt around the auger pulley. See
Figure 19.
Figure 19
7. Re-insert shoulder screw into the mounting bracket
and tighten to secure.
8. Wrap auger belt behind the idler. Reattach the
spring to the bolt where it was earlier secured.
Skid Shoe
Nut
Shave Plate
Hex Nut
Carriage Bolt
Belt Cover
Self-Tapping
Screw
Self-Tapping
Screw
A
B
Pulley
Auger Belt
Engine
Frame Cover
Shoulder
Screw
Spring
Auger
Pulley
Mounting Bracket