17
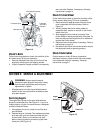
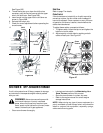
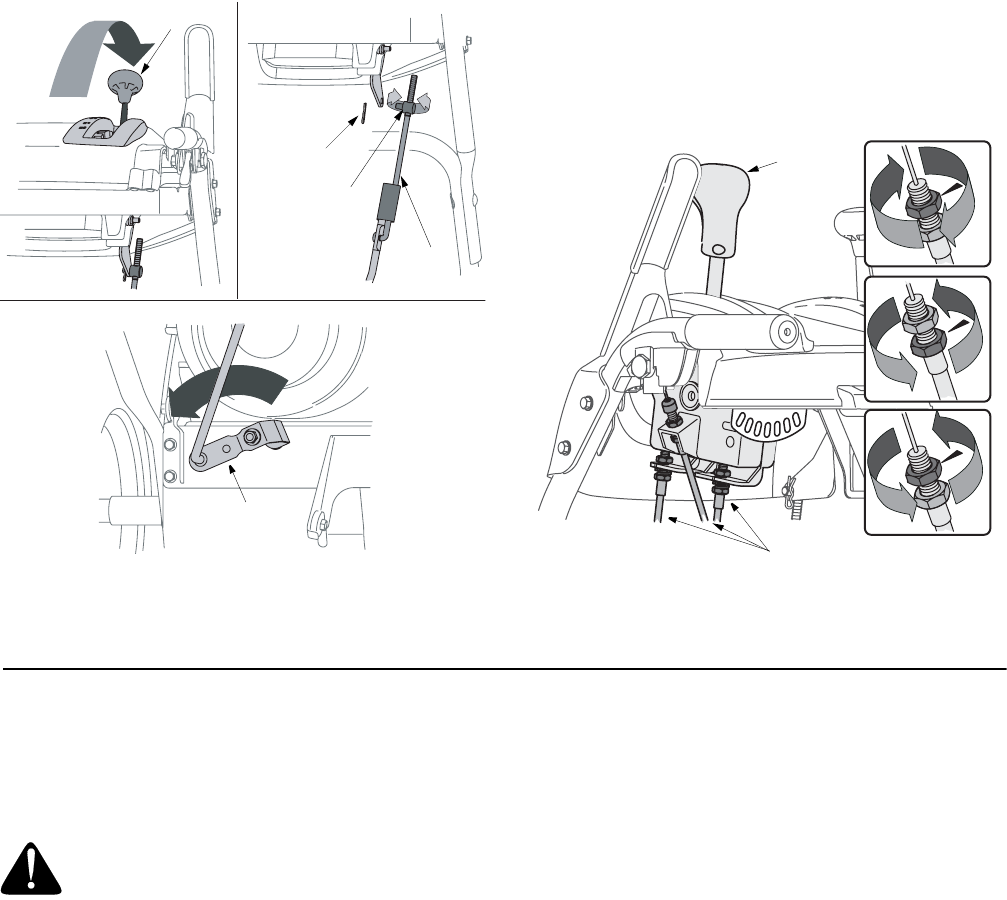
See Figure 26C.
4. Thread the ferrule up or down the shift rod as
necessary until the ferrule lines up with the upper
hole in the shift lever. See Figure 26B.
5. Insert ferrule into the upper hole in shift lever as
shown in Figure 26B.
6. Reinstall the hairpin clip.
7. Check for correct adjustment before operating the
snow thrower.
Figure 26
Skid Shoe
Refer to page 7 for details.
Chute Control
If the chute does not rotate fully or its pitch cannot be
moved up or down, the four chute control cables will
have to be adjusted. Once a season or every 25 hours
of operation, whichever is earlier, check whether the
cables have slackened.
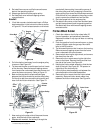
To adjust these cables, proceed as follows:
1. To tighten cable, loosen the top nut and tighten the
bottom nut on the cable.
2. Adjust equally on both sides by working on both
cables of each pair. See Figure 27.
Figure 27
SECTION 6: OFF-SEASON STORAGE
If unit is to be stored over 30 days, prepare for storage
as instructed in the separate engine manual packed
with your unit.
• Clean snow thrower thoroughly.
• Lubricate as instructed in the Maintaining Your
Snow Thrower section of this manual.
• Store the snow thrower in a clean, dry area.
• Refer to the engine manual for correct engine
storage instructions.
NOTE: When storing any type of power equipment in a
poorly ventilated or metal storage shed, care should be
taken to rustproof the equipment, especially springs,
cables and all moving parts.
A
B
Shift
Lever
Shift Arm
Shift
Rod
Ferrule
Hairpin Clip
C
Chute
Control
Chute Control Cable
WARNING: Never store snow thrower with
fuel in tank indoors or in poorly ventilated
areas, where fuel fumes may reach an open
flame, spark or pilot light as on a furnace, water
heater, clothes dryer or gas appliance.


