


9
INSTALLING AND USING
THE EDGER ATTACHMENT
To create borders or edges near walks,
driveways, flower beds, etc., you must
remove the four tine sections and install
the Edger Attachment (this attachment
was supplied with the unit – see
Section 3).
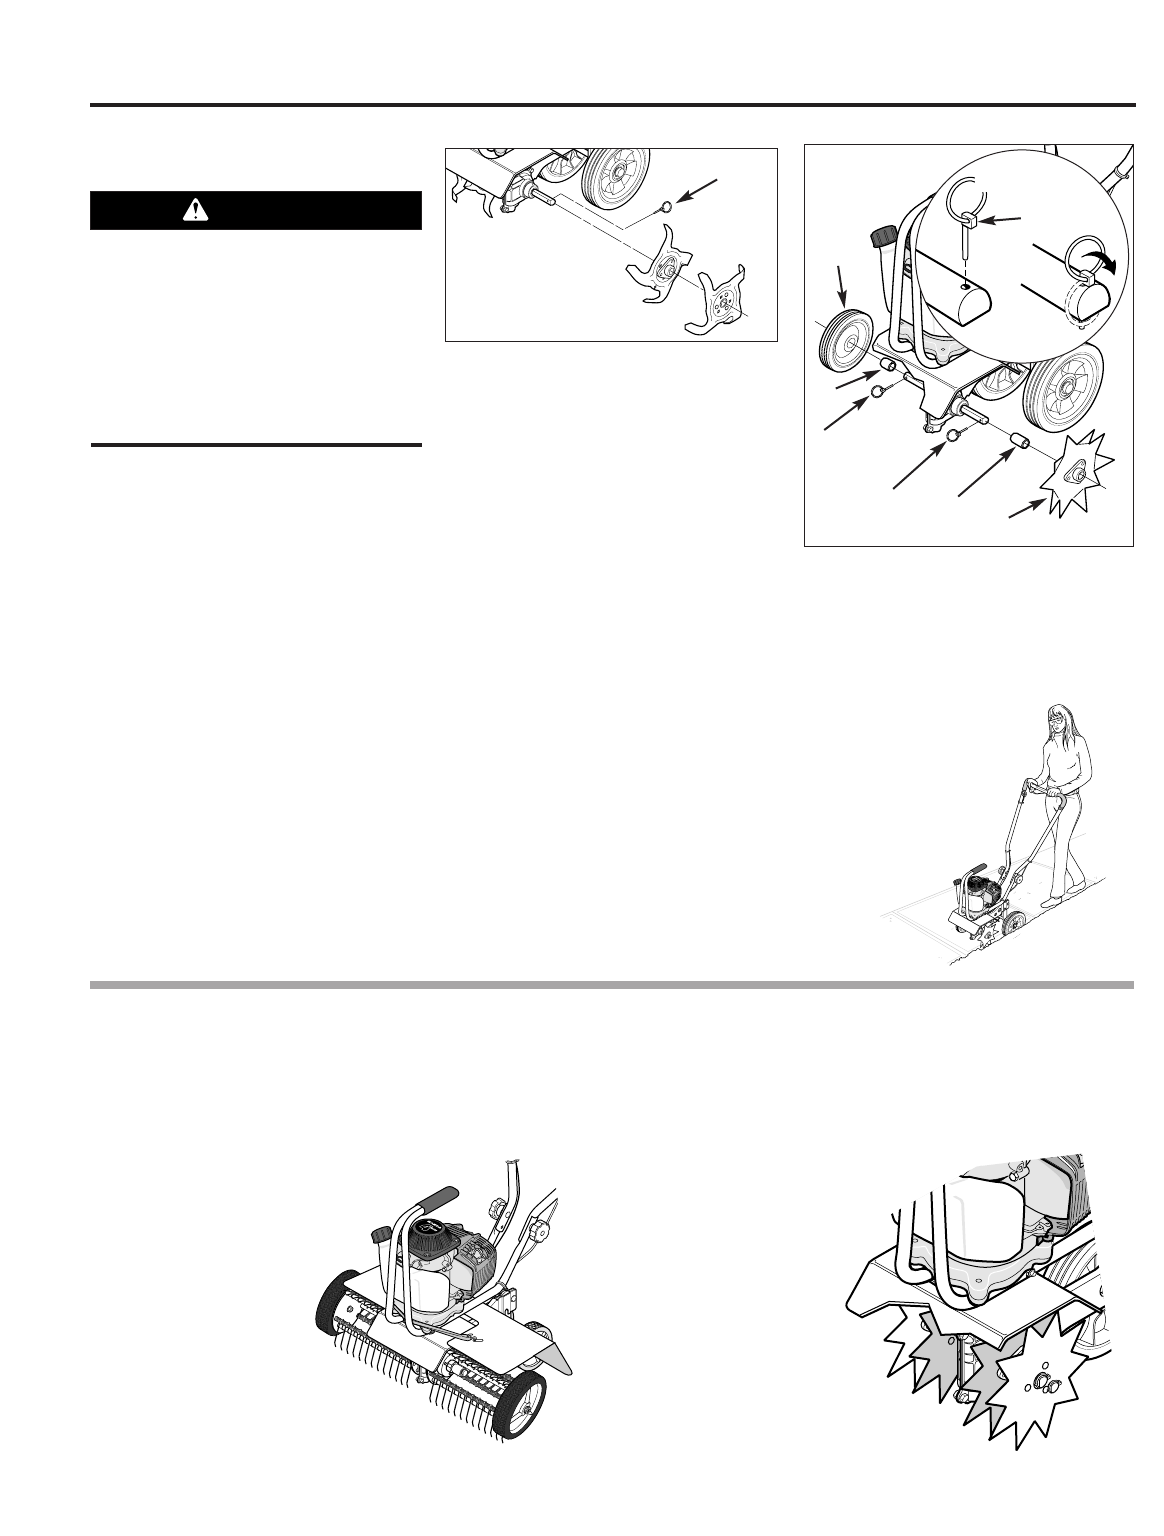
Installing the Edger Attachment
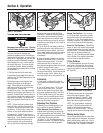
1. Gather together the following parts:
Border/Edger Tine (A, Figure 10); Long
Bushing (B); Border/Edger Wheel (C); and
Short Bushing (D).
2. Prop the machine carefully onto the
front of the tubular carrying handle. The
work surface should be firm and flat.
NOTE: Typically, the Border/Edger Tine is
mounted on the right side of the unit for
right-handed people, and on the left-side
of the unit for left-handed people.
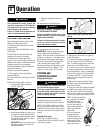
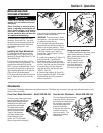
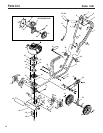
3. Flip open and remove the two ring lock
pins (E, Figures 9 and 10) on each tine
shaft.
Keep left and right-side tines separate and
marked for easier reinstallation.
IMPORTANT: The ring lock pin is under
spring tension – use care when removing
or replacing the ring lock pin.
4. It is important for proper tilling perfor-
mance that the tine sections be later rein-
stalled in their original positions. There-
fore, mark the position of each tine section
(Left-Outer, Left-Inner, etc.) before re-
moving them. Refer to Figure 7 for tine
position information.
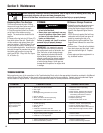
5. Install the short bushing (D, Figure 10)
onto the tine shaft. Then place the
Border/Edger wheel (C) onto the same
shaft – the wheel hub should face toward
the tiller. Insert the ring lock pin through
the rounded side of the tine shaft and
snap the ring down over the shaft (see
“DETAIL”, Figure 10).
6. Slide the long bushing (B, Figure 10)
onto the opposite side shaft. Then install
the Border/Edger tine (A) and secure it
with the ring lock pin.
Using the Edger Attachment
The Edger Attachment makes clean, sharp
edges next to walkways, driveways,
paths, planted areas, patios, etc.
Take your time when
edging. Decide how far
away to edge the walk or
drive, then slowly pro-
ceed using the walk or
drive as your sight line.
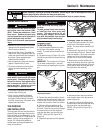
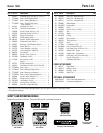
Power Lawn Rake Attachment – Model OEM-290-263
The Power Lawn Rake helps to keep
your lawn healthy and vigorous.
Matted grass and debris looks
unattractive and stifles lawn
growth and overall health.
This attachment mounts
without tools and features
dozens of tempered steel
“fingers” that penetrate
and loosen matted grass
without disturbing root
growth. An 18"-wide swath
covers a large lawn area quickly.
Lawn Aerator Attachment – Model OEM-290-264
The Lawn Aerator Attachment helps
to promote healthy, dense lawns
by loosening and aerating the
soil for better root growth.
Four tempered steel tines
puncture the surface
of the lawn thus allowing
nutrients to reach the
roots more easily. This
attachment assembles
without tools.
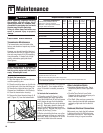
Attachments
The following Tiller/Edger attachments are available where the Tiller/Edger was purchased. See your local authorized dealer or con-
tact the Factory for details.
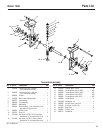
Figure 10: Border/Edger tine assembly.
A
B
E
E
C
D
Ring Lock Pin
DETAIL
This side out
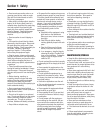
Contact with rotating tines or other
moving parts can cause serious per-
sonal injury.
Before installing or removing attach-
ments, or adjusting or servicing the ma-
chine, stop the engine, let all moving
parts come to a complete stop, discon-
nect the spark plug wire and move the
wire away from the spark plug.
WARNING
Section 4: Operation
Figure 9: Ring lock pin and tines.
E