


9
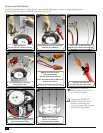
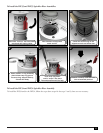
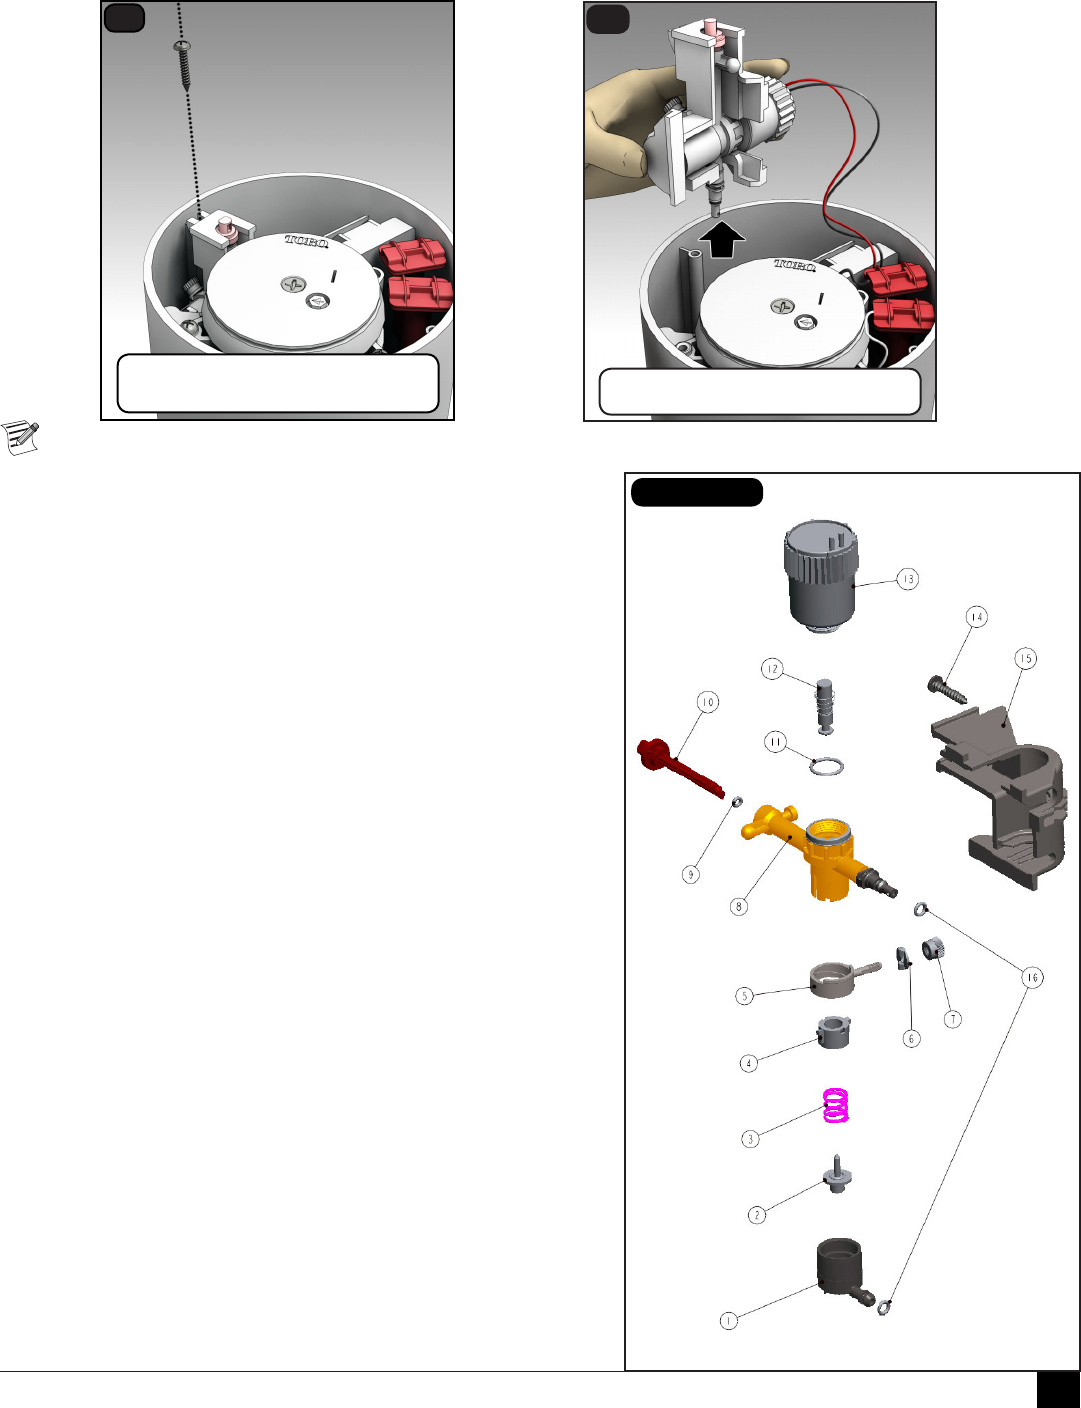
To Service the Pilot Valve
e pilot valve can be replaced while the system is under pressure. Remove the pilot valve for service.
Refer to Figure 1 for pilot valve service issues.
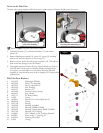
1. Unthread solenoid (17), unthread thumbnut (7), and remove
locator (6).
2. Remove diaphragm assembly (1), piston (2), spring (3), traveling
adjuster (4), pressure adjuster (5) and o-ring (11).
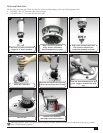
3. Remove selector shaft (10) and plunger assembly (12). (e selector
shaft retains the plunger in the valve body.)
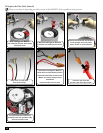
4. oroughly clean and inspect all parts. Ensure threads are clean on
solenoid and PV body prior to assembly. Replace damaged parts
as necessary and reassemble in reverse order. Improper solenoid
assembly or cross-threading may result in damage to PV body and/or
malfunctions.
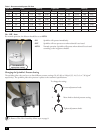
Pilot Valve Parts Breakout
1. 118-1825 Diaphragm, Welded
2. 102-2469 Piston, PV, adjustable
3. 102-2235 Spring, adjustable PV
4. 102-2236 Nut, traveling
5. 102-2237 Adjuster, PV
6. 102-2606 Locator, Pressure Setting
7. 343-4441 Nut, umb
8. 118-3711 PV, Body, Innity
9. 1-2035 O-ring
10. 102-4831 Selector, PV, red (included item 9)
11. 360-0220 O-ring
12. 118-1740 Plunger
13. 118-0248 Solenoid, Standard
13. 102-3443 Solenoid, SPIKE GUARD
13. 102-3444 Solenoid, Nickel plated, SPIKE GUARD
13. 102-2709 Solenoid, DC Latching
13. 118-0841 GDC Module w/ DC Latching Solenoid
14. 4102001 Screw, #10 x 1”, Tapping, SS
15. 118-1816 Housing, Pilot Valve
16. 2-9654 O-ring
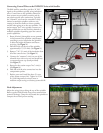
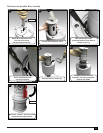
1
Remove screw securing
pilot valve assembly.
2
Carefully slide assembly out.
Figure 1