


Important: Do not overtighten the adjusting
bolt. This could damage the blade-drive belt.
4. Install the blade-drive system cover that you
previously removed.
Servicing the Cutting Blades
Service Interval: Yearly
Important:
Youwillneedatorquewrenchtoinstall
thebladesproperly
. If you do not have a torque
wrench or are uncomfortable performing this
procedure, contact an Authorized Service Dealer.
Examine the blades for sharpness and any wear or
damage whenever you run out of gasoline; refer
to Inspecting the Blades (page 21). If the blade edge
is dull or nicked, have it sharpened or replace it. If the
blade is worn, bent, damaged or cracked, replace it
immediately with a genuine Toro replacement blade.
DANGER
A worn or damaged blade can break, and a piece
of the blade could be thrown toward the operator
or a bystander, resulting in serious personal injury
or death.
• Inspect the blades periodically for wear or
damage.
• Replace a worn or damaged blade.
Note: Maintain sharp blades throughout the cutting
season, because sharp blades cut cleanly without tearing
or shredding the grass blades. Tearing and shredding
turns grass brown at the edges, which slows growth and
increases the chance of disease.
Preparing to Service the Cutting Blades
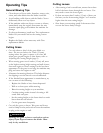
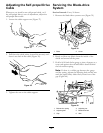
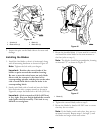
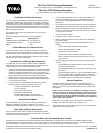
1. Lock the handle in the vertical position (Figure 41);
refer to Adjusting the Handle Height (page 10).
1
G016519
Figure 41
1. Handle locked in the vertical position
2. Tip the machine onto its side, with the air lter up in
the air, until the upper handle rests on the ground.
WARNING
The blades are sharp; contacting a blade could
result in serious personal injury.
• Disconnect the wire from the spark plug.
• Wear gloves when servicing the blade.
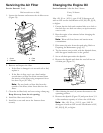
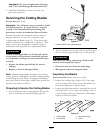
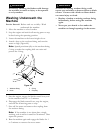
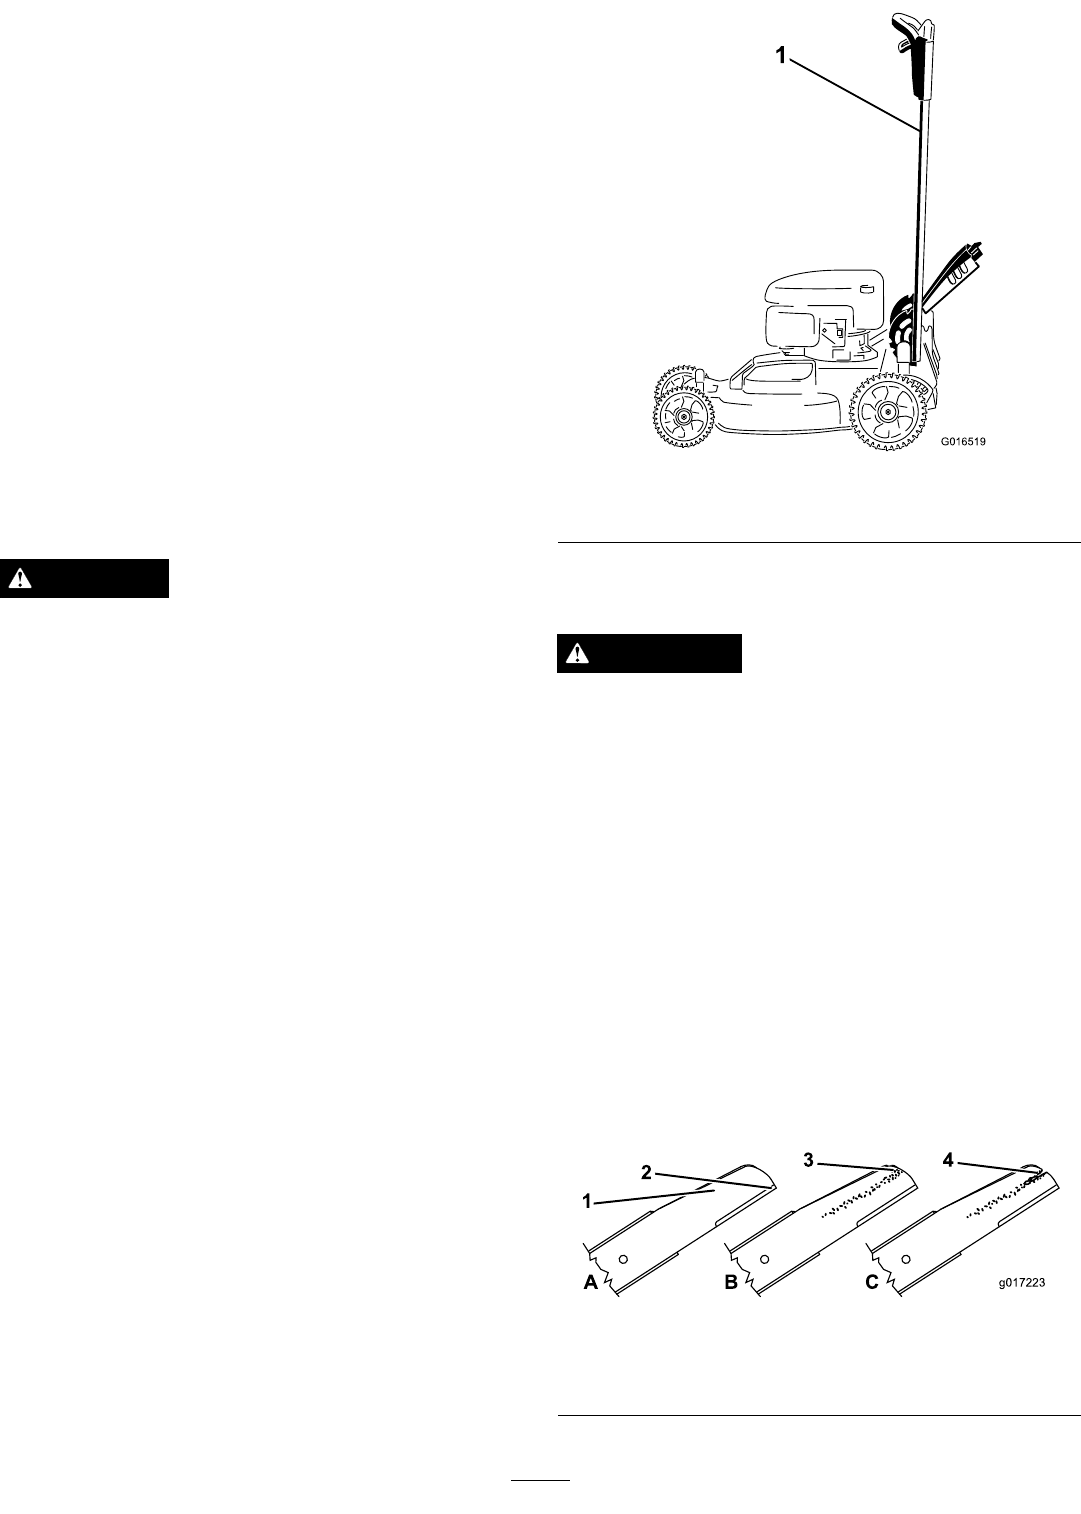
Inspecting the Blades
Service Interval: Before each use or daily
1. Inspect the cutting edges (Figure 42). If the edges
are not sharp or have nicks, remove the blades and
have them sharpened or replace them.
2. Inspect the blades themselves, especially the curved
area (
Figure 42). If you notice any damage, wear, or
a slot forming in this area (Figure 42), immediately
replace it with a new blade.
g017223
Figure 42
1. Cutting edge 3. Wear/slot forming
2. Curved area 4. Crack
21