29
RQT6866
Recording operations
28
RQT6866
Recording operations
1
2
3
B
EH790
EH590
EH790
EH590
A
B
∫
1
2
DISC1–5
EDIT
3
∫
3
∫
∫
¥
REC
PAUSE
EDIT
EDIT
EDIT
NR
Î
2
REC
2
EDIT
REC
Recording CDs
Preparation:
≥Do the preparatory steps (➡ page 28).
≥Insert the CD(s) you want to record (➡ page 8).
≥[EH790]
Press [DISC, 1–5] on the CD changer to select the disc where you want to
start recording, then press [∫] to stop the disc.
ª
A
Normal recording
1 Press ["] (reverse side) or [!] (forward side) then [∫] to
set the tape direction.
2 Press [¥ REC PAUSE].
The deck goes into the recording standby mode and the indicator “"”
or “!” starts flashing.
3 Press [!] on the CD changer or CD player.
Recording starts automatically.
4 seconds after the CD(s) finishes, the deck goes into the recording
standby mode.
To stop recording
EITHER
Press [∫] on the CD changer or CD player.
The deck goes into the recording standby mode 4 seconds later.
OR
Press [∫] on the deck.
Recording stops immediately but the CD continues to play.
To record programmed tracks
Program tracks before step 1 (➡ page 15).
ª
B
One touch CD editing
This function makes it easier for you to record from discs.
≥When recording, if a track is cut off in the middle at the end of the front
side, it is recorded from the beginning on the reverse side.
(Ensure the reverse mode “d” is selected. )
≥At the end of the reverse side recording stops and the current track will be
interrupted.
After pressing ["] or [!] then [∫] on the cassette deck to set the tape
direction,
Press [EDIT].
Recording starts. In the meantime, “CD EDIT” will scroll across the display.
After edit-recording has finished, the cassette deck automatically stops.
To stop editing
Press [∫] on the CD changer or CD player.
The cassette deck also stops. “EDIT OUT” scrolls across the display.
To edit programmed tracks
Program the tracks (➡ page 15) and press [EDIT].
D
1
2
3
C
A
A
B
COUNTER
RESET
1
COUNTER
DISPLAY
COUNTER
RESET
DISPLAY
DECK 1/2
6
3
4
2
5
132
<
OPEN
DOLBY NR
REV MODE
A
A
2
NR
Î
2
NR
Î
ªA
To display the tape counter while recording
Press [COUNTER DISPLAY].
The counter is displayed for about 5 seconds.
≥Press [COUNTER RESET] to reset the counter.
≥To display or reset the tape counter for deck 1, first press [DECK 1/2].
ªB
Erasing recordings
1 Press [INPUT SELECTOR] to select “TAPE”.
2 Insert the recorded tape into deck 2.
3 Press [DOLBY NR] so the “Î NR” indicator goes out.
4 Select the reverse mode.
5 Press [¥ REC PAUSE].
6 Press ["] or [!].
ªC
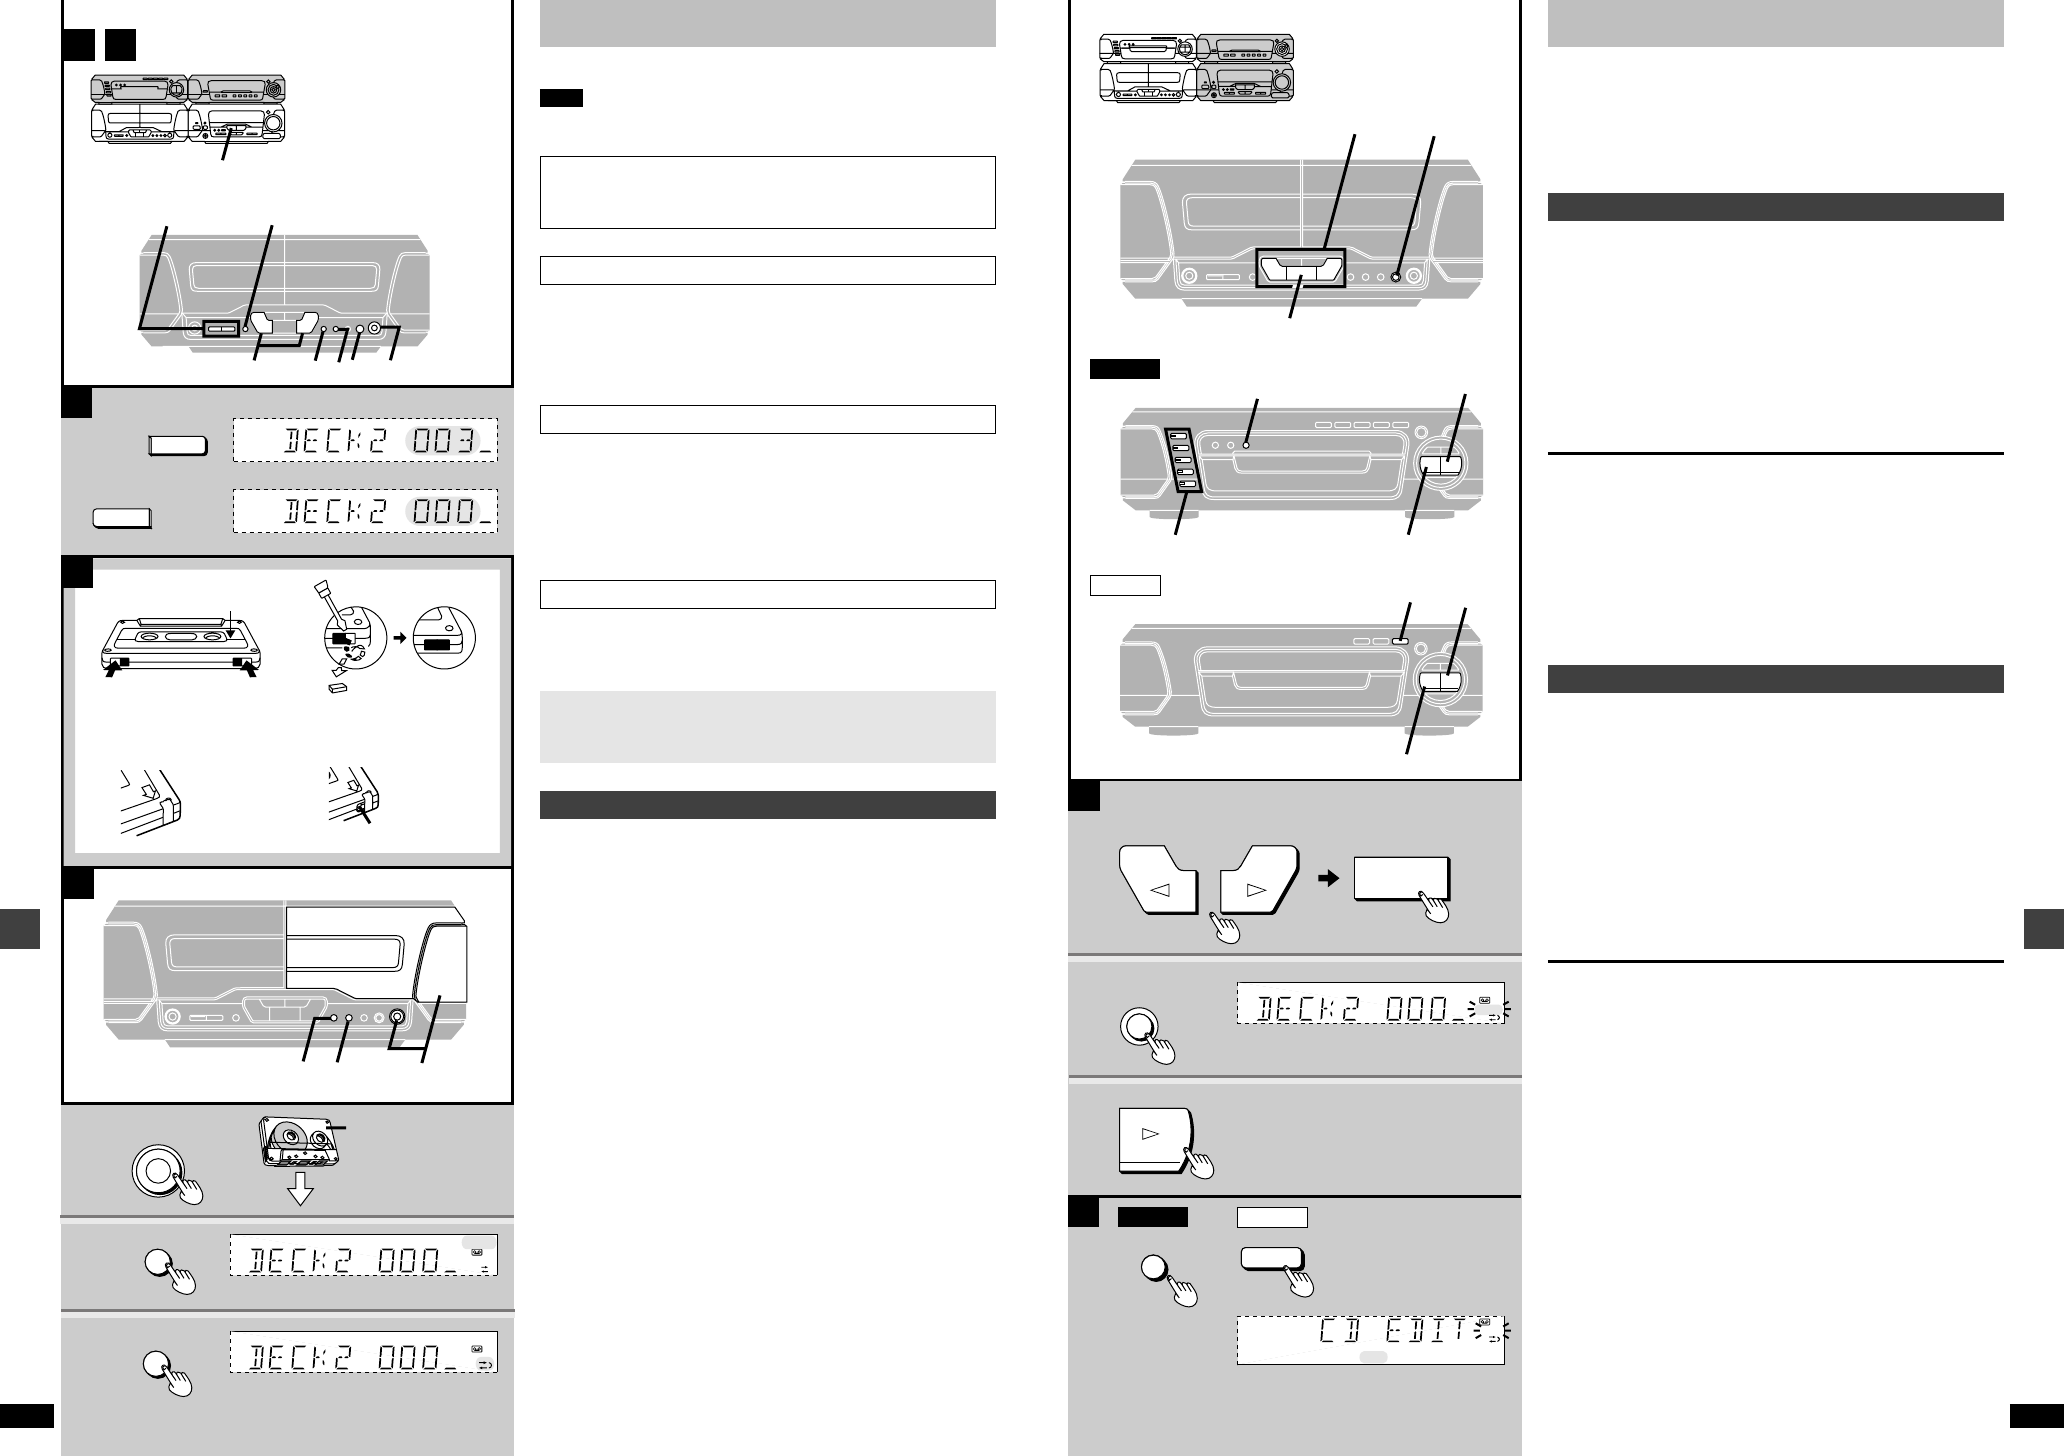
Erasure prevention
The illustration shows how to remove the tabs to prevent recording. To
record on the tape again, cover as shown, being careful not to cover the
high position discrimination hole.
Your attention is drawn to the fact that recording pre-recorded tapes
or discs or other published or broadcast material may infringe copy-
right laws.
ª
D
Preparatory steps
Do these steps before each recording.
Wind up the leader tape so recording can begin immediately.
1 Press [< OPEN] on deck 2 and insert the
cassette.
Close the holder by hand.
2 Press [DOLBY NR] to select Dolby NR on
(“ÎNR” appears) or off.
(➡ “Dolby noise reduction”, page 19)
3 Press [REV MODE] to select the reverse mode.
Each time you press the button:
b: One side only records.
d and f: Both sides record (forward >reverse).
“f” automatically changes to “d” when [¥ REC PAUSE], [EDIT]
or [TAPE EDIT] is pressed.
Before recording (Deck 2 only)
See page 39 for tape selection.
Note
[EH790]
You cannot record when [6CH DISCRETE INPUT] is selected.
Volume, sound quality and surround effects have no effect on
recording. Sound quality and surround effects are automatically set
to flat when recording.
Side A
Tab for side B Tab for side A
To re-record
Normal tape High-position tape
Discrimination hole
Forward side
Tape facing down


