


7
SECTION 1 – ASSEMBLY INSTRUCTIONS
D. Repeat procedure for left Handle Link.
E. Close catcher by pushing down on Handle.
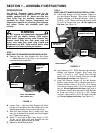
F. Actuate Catcher Handle. Catcher should open and
close smoothly with no binding. If the action is not
smooth, adjustment to the hinge or handle links
may be required.
FIGURE 1.10
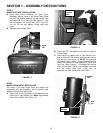
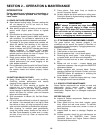
G. If hinge adjustment is required, loosen hinge plate
hardware. For a tighter seal, push top of rear cover
frame firmly against the Front Cover Assembly.
Tighten hinge plate hardware securely. See Figure
1.10.
WARNING
The LT Bumper Kit, 6-3123, must be installed before
operating machine with Grass Catcher.
STEP 6
LT FRONT BUMPER KIT, #6-3123, INSTALLATION
The weight of the Clamshell Grass Catcher and
contents affects the stability and handling of the
machine. The Front Bumper Kit must be installed prior
to operating the machine with the catcher installed.
Failure to install the Bumper Kit could cause damage,
serious injury or death. The Bumper Kit, included with
this Grass Catcher Kit, comes with instructions and all
of the hardware required to complete installation.
Follow and complete each step carefully.
STEP 7
AIR LIFT KIT, #6-0480, INSTALLATION
Some Lawn Tractor models will not require the
installation of the Air Lift Kit included with the Grass
Catcher. Inspect the blade on your mower. If the blade
does not have mounting holes for the Air Lift Kit, the
blade is a High Lift version and does not require the kit.
If the blade does have the holes in the lift area of the
blade, install the Lift Kit. Installation instructions and the
necessary hardware are included with the Air Lifts.
WARNING
Blades are extremely sharp and can cause severe
injuries. Wear heavy gloves when working on or
handling blades. DO NOT use blades that show
signs of wear or damage.
WARNING
DO NOT operate machine without entire Grass
Catcher or guards in place.
STEP 8
DECK ADAPTER INSTALLATION
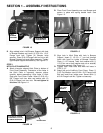
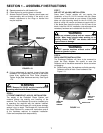
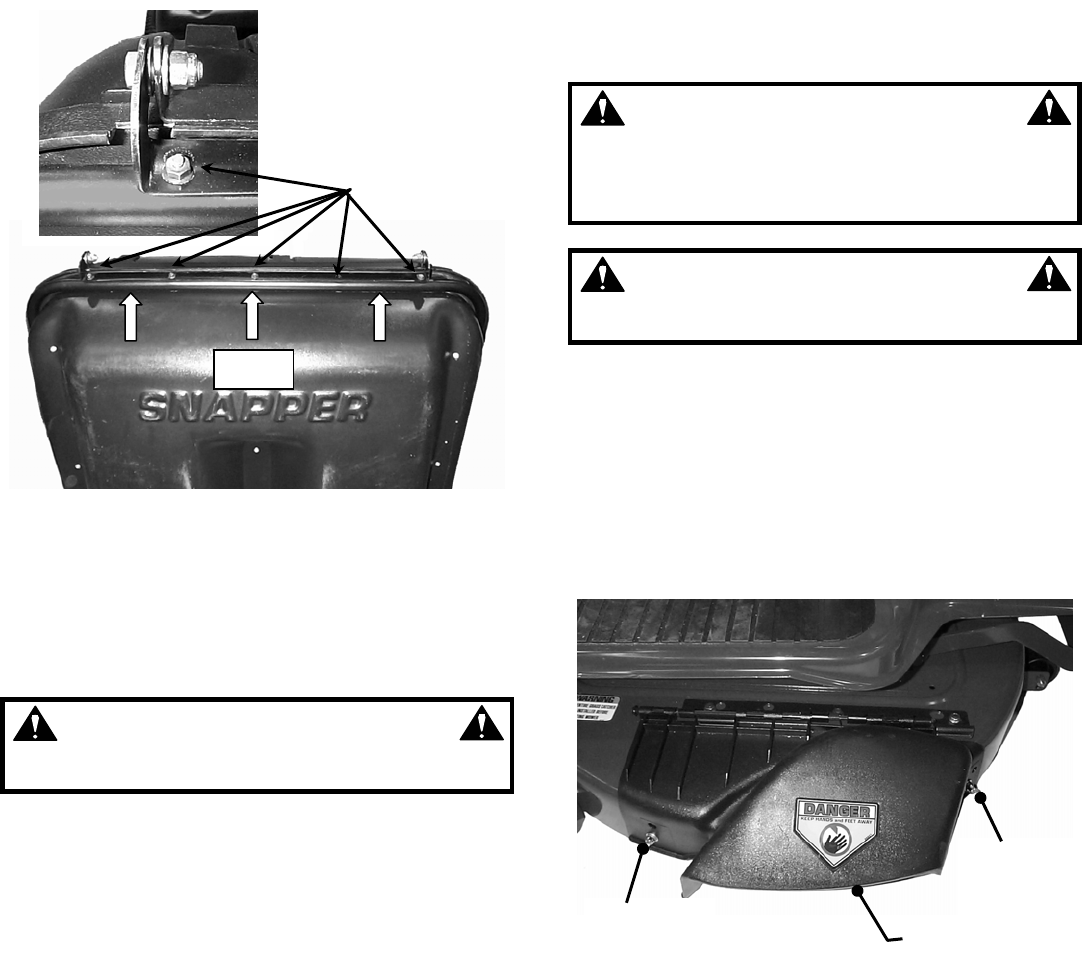
The Discharge Deflector will have to be removed to
install the Deck Adapter. Be careful to save the
Deflector and all hardware removed for future use when
not bagging.
A. Remove wing nuts, flat washers and bolts securing
Deflector to side of deck. Save hardware. See
Figure 1.11.
FIGURE 1.11
HINGE PLATE
HARDWARE
PUSH
WING NUT
& FLAT
WASHER
DEFLECTOR
WING NUT
& FLAT
WASHER