


13
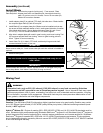
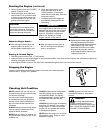
Open
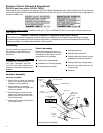
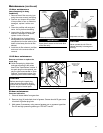
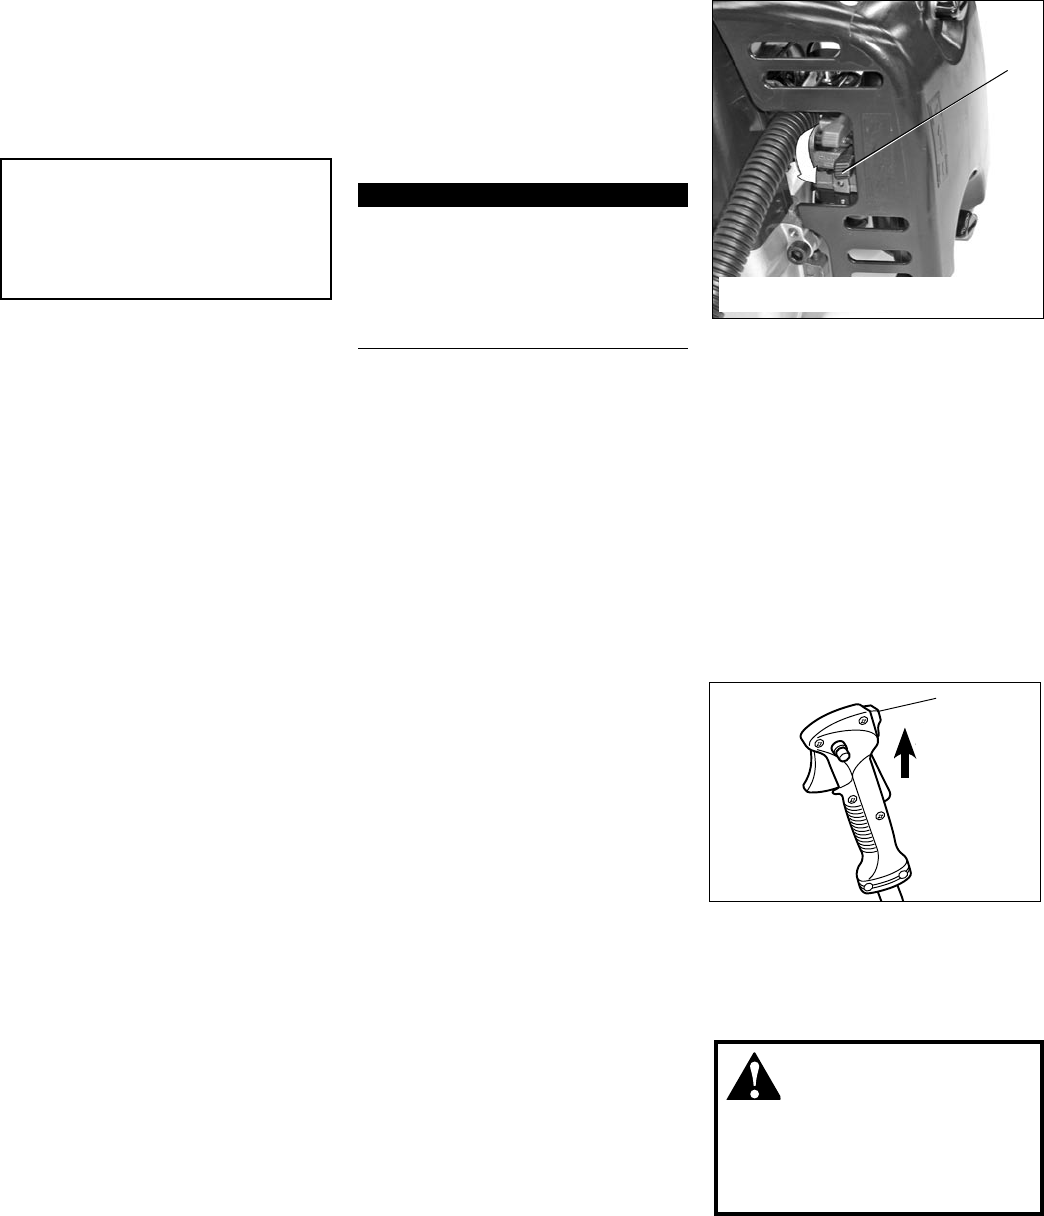
After engine starts, move choke to OPEN
position
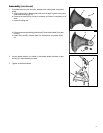
Set the choke lever to the CLOSED 4.
position if engine is cold.
While holding the outer tube rmly 5.
with left hand. Use your other hand
to slowly pull the recoil starter han-
dle until resistance is felt, then pull
quickly to start the engine.
CAUTION!
Do not pull the recoil starter to the
end of the rope travel. Pulling the
recoil starter to the end of the rope
travel can damage the starter.
IMPORTANT!
If the engine fails to start after several
attempts with the choke in the closed
position, the engine may be ooded
with fuel. If ooding is suspected,
refer to the ”Starting a Flooded
Engine” section of this manual.
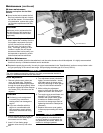
When the engine starts, slowly 6.
move the choke lever to the
“OPEN” position. (If the engine
stops after the initial start, close the
choke and restart.)
Operating the throttle trigger will 7.
automatically disengage the fast
idle setting.
Starting the Engine (continued)
After the engine starts, allow the ■
engine to warm up at idle 2 or 3
minutes before operating the unit.
When the Engine Starts...
After the engine is warm, pick up ■
the unit and clip on the shoulder
strap, if so equipped.
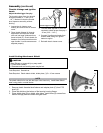
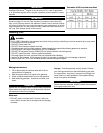
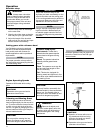
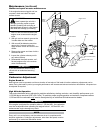
Idle the engine briey before stopping (about 2 minutes), then slide the ignition
switch to the “O” (Engine OFF) position.
Stopping the Engine
Starting A Flooded Engine
Slide the ignition switch to the “I” (ON) position1. .
Open the choke, put the throttle trigger in the full throttle position, then clear excess fuel from the combustion chamber by 2.
cranking the engine several times.
If the engine still fails to start or re, refer to the troubleshooting ow chart at the end of this manual.3.
OFF
Ignition
switch
NEVER operate the unit with the cut-
ting attachment shield or other protec-
tive devices removed!
Use only authorized Shindaiwa parts and
accessories with your Shindaiwa trimmer.
Do not make modifications to this unit with-
out written approval from Shindaiwa, Inc.
ALWAYS make sure the cutting attach-
ment is properly installed and firmly
tightened before operation.
NEVER use a cracked or warped
cutting attachment: replace it with a
serviceable one.
Checking Unit Condition
ALWAYS make sure the cutting attach-
ment fits properly into the appropriate
attachment holder. If a properly installed
attachment vibrates, replace the attach-
ment with new one and re-check.
ALWAYS stop the engine immediately
and check for damage if you strike a
foreign object or if the unit becomes
tangled. Do not operate with broken or
damaged equipment.
NEVER allow the engine to run at high
RPM without a load. Doing so could dam-
age the engine.
NEVER operate a unit with worn or dam-
aged fasteners or attachment holders.
WARNING!
A cutting attachment shield or
other protective device is no guarantee
of protection against ricochet. YOU
MUST ALWAYS GUARD AGAINST
FLYING DEBRIS!
12
Idle the engine briefly before stopping
(about 2 minutes), then slide the ignition
switch to the “O” (Engine OFF) position.
Stopping the Engine
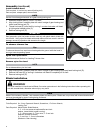
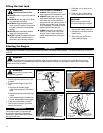
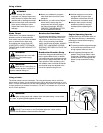
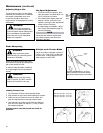
Adjusting Engine Idle
Idle Adjusting
Screw
The engine must return to idle speed
whenever the throttle lever is released.
Idle speed is adjustable, and must be set
low enough to permit the engine clutch to
disengage the cutting attachment.
WARNING!
The cutting attachment must
NEVER rotate at engine idle! If the
idle speed cannot be adjusted by
the procedure described here, return
the unit to your Shindaiwa dealer for
inspection.
Idle Speed Adjustment
Place the unit on the ground, then start 1.
the engine, and then allow it to idle 2-3
minutes until warm.
If the attachment rotates when the 2.
engine is at idle, reduce the idle speed
by turning the idle adjustment screw
counter-clockwise.
If a tachometer is available, adjust idle. 3.
Check Specifications page for correct
idle speed
Starting the Engine (continued)
NOTE
Carburetor fuel mixture adjustments are
preset at factory and cannot be serviced
LQWKH¿HOG
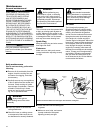
Disconnect the spark plug lead and use 1.
the spark plug wrench to remove the
spark plug (turn counter clockwise to
remove).
Slide the ignition switch to the “O” 2.
(STOP) position.
If the spark plug is fouled or
Ŷ
soaked with fuel, clean the plug as
necessary.
Open the choke and fully depress the 3.
throttle lever with your left hand, then
pull the starter handle rapidly with your
right hand to clear excess fuel from the
combustion chamber.
Replace the spark plug and tighten it 4.
firmly with the spark plug wrench. If a
torque wrench is available, torque the
spark plug to the values recommended
in the “Specifications” section.
Repeat the starting procedure for a 5.
warm engine.
If the engine still fails to start, refer to 6.
the troubleshooting section near the
end of this manual.
Starting A Flooded Engine
OFF
Ignition
switch
NEVER operate the unit with the cut-
ting attachment shield or other protec-
tive devices removed!
Use only authorized Shindaiwa parts and
accessories with your Shindaiwa trimmer.
Do not make modifications to this unit with-
out written approval from Shindaiwa, Inc.
ALWAYS make sure the cutting attach-
ment is properly installed and firmly
tightened before operation.
NEVER use a cracked or warped
cutting attachment: replace it with a
serviceable one.
Checking Unit Condition
ALWAYS make sure the cutting attach-
ment fits properly into the appropriate
attachment holder. If a properly installed
attachment vibrates, replace the attach-
ment with new one and re-check.
ALWAYS stop the engine immediately
and check for damage if you strike a
foreign object or if the unit becomes
tangled. Do not operate with broken or
damaged equipment.
NEVER allow the engine to run at high
RPM without a load. Doing so could dam-
age the engine.
NEVER operate a unit with worn or dam-
aged fasteners or attachment holders.
WARNING!
A cutting attachment shield or
other protective device is no guarantee
of protection against ricochet. YOU
MUST ALWAYS GUARD AGAINST
FLYING DEBRIS!
12
Idle the engine briefly before stopping
(about 2 minutes), then slide the ignition
switch to the “O” (Engine OFF) position.
Stopping the Engine
Adjusting Engine Idle
Idle Adjusting
Screw
The engine must return to idle speed
whenever the throttle lever is released.
Idle speed is adjustable, and must be set
low enough to permit the engine clutch to
disengage the cutting attachment.
WARNING!
The cutting attachment must
NEVER rotate at engine idle! If the
idle speed cannot be adjusted by
the procedure described here, return
the unit to your Shindaiwa dealer for
inspection.
Idle Speed Adjustment
Place the unit on the ground, then start 1.
the engine, and then allow it to idle 2-3
minutes until warm.
If the attachment rotates when the 2.
engine is at idle, reduce the idle speed
by turning the idle adjustment screw
counter-clockwise.
If a tachometer is available, adjust idle. 3.
Check Specifications page for correct
idle speed
Starting the Engine (continued)
NOTE
Carburetor fuel mixture adjustments are
preset at factory and cannot be serviced
LQWKH¿HOG
Disconnect the spark plug lead and use 1.
the spark plug wrench to remove the
spark plug (turn counter clockwise to
remove).
Slide the ignition switch to the “O” 2.
(STOP) position.
If the spark plug is fouled or
Ŷ
soaked with fuel, clean the plug as
necessary.
Open the choke and fully depress the 3.
throttle lever with your left hand, then
pull the starter handle rapidly with your
right hand to clear excess fuel from the
combustion chamber.
Replace the spark plug and tighten it 4.
firmly with the spark plug wrench. If a
torque wrench is available, torque the
spark plug to the values recommended
in the “Specifications” section.
Repeat the starting procedure for a 5.
warm engine.
If the engine still fails to start, refer to 6.
the troubleshooting section near the
end of this manual.
Starting A Flooded Engine
Squeezing the throttle trigger makes ■
the cutting attachment move faster;
releasing the throttle permits the attach-
ment to stop moving. If the cutting
attachment continues to move when
the engine returns to idle, carbure-
tor idle speed should be adjusted (see
“Adjusting Engine Idle.”)
NEVER operate the unit with the cut-
ting attachment shield or other protec-
tive devices removed!
Use only authorized Shindaiwa parts
and accessories with your Shindaiwa
trimmer. Do not make modications to
this unit without written approval from
Shindaiwa.
ALWAYS make sure the cutting attach-
ment is properly installed and rmly
tightened before operation.
NEVER use a cracked or warped cut-
ting attachment: replace it with a ser-
viceable one.
Checking Unit Condition
ALWAYS make sure the cutting attach-
ment ts properly into the appropri-
ate attachment holder. If a properly
installed attachment vibrates, replace
the attachment with new one and
re-check.
ALWAYS stop the engine immediately
and check for damage if you strike a
foreign object or if the unit becomes
tangled. Do not operate with broken
or damaged equipment.
NEVER allow the engine to run at high
RPM without a load. Doing so could
damage the engine.
NEVER operate a unit with worn or
damaged fasteners or attachment
holders.
WARNING!
A cutting attachment shield
or other protective device is no
guarantee of protection against rico-
chet. YOU MUST ALWAYS GUARD
AGAINST FLYING DEBRIS!