54
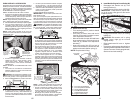
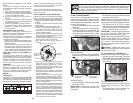
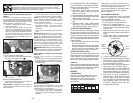
PURGAR LA TRANSMISIÓN
PRECAUCIÓN: Nunca enganche o desen-
ganche la palanca del control de rue da libre
cuando el motor esta fun cio nan do.
Para asegurar la operación y ejecución adec-
uada, es re co men da do que la transmisión sea
purgada antes de operar el tractor para la prim-
era vez. Este proceso removerá cualquier aire
adentro de la transmisión que se halla formado
durante el trans por te de su tractor.
IMPORTANTE: Si por acaso su transmisión debe
ser removida para servicio o reemplazo, debe
ser purgada después de la reinstalación y antes
de operar el tractor.
1. Para mayor seguridad, ubique el tractor en
una superficie nivelada, despejada de cual-
quier objeto y abierta, con el motor apagado
y el freno de mano puesto.
2. Desenganche la transmisión poniendo el
con trol de rueda libre en la posición de desen-
ganchado (Vea “PARA EL TRANS POR TE” en
esta sección de este manual).
3. Sentado en el asiento del tractor, empiece
el motor. Des pués que este corriendo el mo-
tor, mueva el control de es tran gu la ción a la
posición de lento. Quitar el freno de mano.
PRECAUCIÓN: En el transcurso del paso 4,
puede que de pronto se pongan en movimiento
las ruedas.
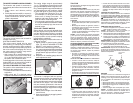
4. Apretar el pedal de marcha adelante hasta
el fondo, mantener por cinco (5) segundos y
soltar el pedal. Apretar el pedal de marcha
atrás hasta el fondo, mantener por cinco (5)
segundos y soltar el pedal. Repetir el proced-
imiento tres (3) veces.
5. Apague el motor y embrague el freno de
estacionamiento.
6. Enganche la transmisión poniendo el control
de rueda libre en la posición de conducir (Vea
“PARA TRANSPORTAR” en esta sección del
manual).
7. Sentado en el asiento del tractor, empiece el
motor. Des pués que este corriendo el motor,
mueva el control de es tran gu la ción media
(1/2) velocidad. Quitar el freno de mano
8. Conduzca su tractor hacia adelante durante
aproximadamente cinco pies y entonces ha-
cia marcha atrás cinco pies (150 cm). Repita
este proceso tres (3) veces.
Su transmisión esta ahora purgado y dispuesto
para la operación nor mal.
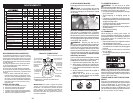
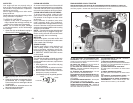
6. Inserte la llave en la ignición y gire la llave en
el sentido que giran las manillas del reloj a la
posición de arranque start, y suelte la llave tan
pronto como arranque el motor. No haga fun-
cionar el arrancador continuamente por más
de quince segundos por minuto. Si el motor no
arranca después de varios intentarlos, mueva
el control de la ace le ra ción a la posición de
rápido, espere unos cuantos minutos y trate de
nuevo. Si el mo tor sigue sin funcionar, mueva
el control de la aceleración a la posición de
es tran gu la ción y intente de nuevo.
ARRANQUE CON TIEMPO TEMPLADO
(50° F/10°C y más)
7. Cuando arranque el motor, mueva el control
de la ace le ra ción a la posición de rápido.
• Los accesorios y el embrague ahora pueden
ser utilizados. Si el motor no acepta esta
carga, vuelva a arrancar el motor para per-
mitirle que se caliente por un minuto utilizan-
do el estrangulador como describido arriba.
ARRANQUE CON TIEMPO FRÍO
(50° F/10°C y menos)
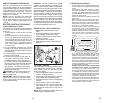
7. Al hacer arrancar el motor, mantenga el
control de la aceleración a la posición de es-
trangulación hasta que el motor se caliente y
empieze funcionar mal. Una vez que empieze
a funcionar mal, mueva inmediatamente el
control de la aceleración a la posición rápida.
El calentamiento del motor puede tomar a
partir de varios segundos a varios minutos
(cuanto más fría es la temperatura, más largo
es el calentamiento).
CALENTAMIENTO PARA LA TRANSMISION
AUTOMATICA
Antes de conducir la unidad en un tiempo frío, la
transmisión debe ser calentada como las instruc-
ciones siguientes:
1. Asegúrese que el tractor este situado en una
superficie nivelada.
2. Alivie el freno de estacionamiento y deje que
el freno vuelva a la posición de operación.
3. Permita que la transmisión se caliente du rante
un minuto. Esto puede ser echo du rante el
tiempo de calentamiento del motor.
• Los accesorios pueden ser utilizados du-
rante el periodo del recalentamiento del
mo tor después que la transmisión halla
sido calentada.
AVISO: Si se encuentra a mucha altura (sobre
3000 pies) o en clima frío (por debajo de 32°F
[0°C]), la mezcla del combustible del carburador
debe ser ajustada para el mejor rendimiento del
motor. (Vea “PARA AJUSTAR EL CARBURA-
DOR” en la sección de Servicio y Ajustes de este
manual).
19
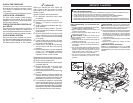
PURGE TRANSMISSION
CAUTION: Never engage or dis en gage
freewheel lever while the engine is run ning.
To ensure proper operation and per for mance,
it is rec om mend ed that the trans mis sion be
purged before operating trac tor for the first
time. This procedure will remove any trapped
air inside the trans mis sion which may have
de vel oped dur ing shipping of your tractor.
IMPORTANT: Should your transmission
require removal for service or re place ment,
it should be purged after re in stal la tion before
operating the tractor.
1. Place tractor safely on a level surface
-
that is clear of objects and open - with
engine off and parking brake set.
2. Disengage transmission by placing
freewheel control in disengaged position
(See “TO TRANS PORT” in this section
of manual).
3. Sitting in the tractor seat, start en gine.
After the engine is running, move throttle
control to slow position. Disengage park-
ing brake.
CAUTION: At any time, during step 4,
there may be movement of the drive wheels.
4. Depress forward drive pedal to full for ward
position and hold for five (5) seconds and
release pedal. Depress reverse drive
pedal to full reverse position and hold
for five (5) seconds and release pedal.
Repeat this pro ce dure three (3) times.
5. Shutoff engine and set parking brake.
6. Engage transmission by placing free-
wheel control in engaged position (See
“TO TRANSPORT” in this sec tion of
manual).
7. Sitting in the tractor seat, start en gine.
After the engine is running, move throttle
control to half (1/2) speed. Disengage
parking brake.
8. Drive tractor forward for approximately
five feet then backwards for five feet.
Repeat this driving procedure three
times.
Your transmission is now purged and now
ready for normal operation.
AUTOMATIC TRANSMISSION WARM UP
Before driving the unit in cold weath er, the
trans mis sion should be warmed up as fol-
lows:
1. Be sure the tractor is on level ground.
2. Release the parking brake and let the
brake slowly return to operating position.
3. Allow one minute for trans mis sion to
warm up. This can be done during the
en gine warm up period.
• The attachments can be used during
the engine warm-up period after the
trans mis sion has been warmed up
and may require the choke con trol be
pulled out slight ly.
NOTE: If at a high altitude (above 3000 feet)
or in cold temperatures (below 32°F (0°C))
the car bu re tor fuel mixture may need to be
adjusted for best engine performance (see
“TO ADJUST CARBURETOR” in the Service
and Ad just ments section of this manual).
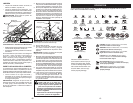
6. Insert key into ignition and turn key
clock wise to start position and release
key as soon as engine starts. Do not run
starter con tin u ous ly for more than fifteen
sec onds per minute. If the engine does
not start after several attempts, push
choke control in, wait a few minutes and
try again. If engine still does not start,
pull the choke control out and retry.
WARM WEATHER STARTING
(50°F (10°C) and above)
7. When engine starts, slowly push choke
control in until the engine begins to run
smoothly. If the en gine starts to run
roughly, pull the choke control out slightly
for a few seconds and then continue to
push the control in slowly.
• The attachments and ground drive
can now be used. If the engine does
not accept the load, restart the en gine
and allow it to warm up for one minute
using the choke as de scribed above.
COLD WEATHER STARTING
(50°F (10°C) and below)
7. When engine starts, slowly push choke
control in until the engine begins to run
smoothly. Continue to push the choke
control in small steps allowing the engine
to accept small changes in speed and
load, until the choke control is fully in.
If the engine starts to run roughly, pull
the choke control out slightly for a few
seconds and then continue to push the
control in slowly. This may require an
engine warm-up period from several
sec onds to several minutes, depending
on the tem per a ture.


