


50
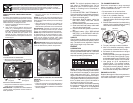
La operación de cualquier tractor puede hacer que salten objetos extraños dentro
de sus ojos, lo que puede producir daños graves en éstos. Siempre use anteojos
de seguridad o pro tec cio nes para los ojos mientras opere su tractor o cuando
haga ajustes o reparaciones. Recomendamos gafas de seguridad o una máscara
de visión amplia de seguridad usada sobre las gafas.
B
C
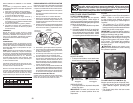
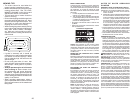
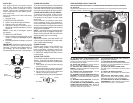
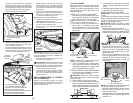
PARA USAR EL CONTROL DE LA ACELER-
ACIÓN (D)
Siempre opere el motor a una aceleración
completa.
• Si el motor funciona a una velocidad inferior a
la máxima (rápida), su rendimiento disminuye.
• El rendimiento óptimo se obtiene a la velocidad
máxima (rápida).
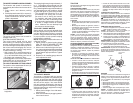
COMO USAR SU TRACTOR
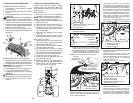
PARA AJUSTAR EL FRENO DE ES TA CIO NA-
MIEN TO
Su tractor viene equipado con un interruptor sen-
sor que exige la presencia del operador. Cuando
el motor está funcionando, si el operador trata de
bajarse del asiento sin primero aplicar el freno de
estacionamiento, se apagará el motor.
1. Presione el pedal (B) del freno completa-
mente y sostengalo.
2. Jale hacia arriba la palanca del freno de
mano (C) y manténgala en esa posición;
suelte gradualmente el pedal del embrague/
freno (B), y luego suelte la palanca del freno
de mano. El pedal tiene que quedar en la
posición de freno. Asegúrese que el freno
de estacionamiento va a sujetar el tractor en
forma segura.
D
F
J
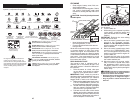
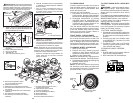
PARADA
CUCHILLAS DE LA SEGADORA -
• Mueva la control del embrague del accesorio
a la posición desenganchado ( ).
IMPULSIÓN DE RECORRIDO -
• Para parar el mecanismo impulsor, presione el
pedal del freno completamente.
IMPORTANTE: Los pedales de marcha adelante
y atrás vuelven a la posición neutra cuando no
están apretados.
( ) “Desenganchado”
(Disengaged)
( ) “Enganchado”
(Engaged)
MOTOR -
• Mueva el control (D) de aceleración a la
posición lenta.
AVISO: No mover el control de aceleración a la
posición lenta y permitir que el motor esté inactivo
antes de parar puede causar que el motor tenga
un "pistoneo".
• Gire la llave de ignición (F) a la posición de
apagado “STOP” y remueva la llave al aban-
donar el tractor para evitar el uso no autorizado.
IMPORTANTE: Dejando el interruptor de la
ignición en cualquier posición otra que “STOP”
causar i que la batería se descargue (muerta).
AVISO: Bajo ciertas condiciones, cuando el trac-
tor está parado con el motor andando en vacío,
los gases de escape del motor caliente pueden
hacer que el césped se ponga “café.” Para
eliminar esta posibilidad, siempre pare el motor
cuando pare el tractor en áreas con césped.
PRECAUCIÓN: Siempre pare el tractor com-
pletamente, según se ha descrito anteriormente,
antes de abandonar la posición del operador.
23
V-BELTS
Check V-belts for deterioration and wear after
100 hours of operation and replace if neces-
sary. The belts are not ad just able. Re place
belts if they begin to slip from wear.
NOTE: The original equipment battery on
your tractor is maintenance free. Do not
attempt to open or remove caps or covers.
Adding or checking level of elec tro lyte is
not necessary.
TO CLEAN BATTERY AND TER MI NALS
Corrosion and dirt on the battery and termi-
nals can cause the battery to “leak” power.
1. Remove terminal guard.
2. Disconnect BLACK battery cable first
then RED bat tery cable and remove
battery from tractor.
3. Rinse the battery with plain water and dry.
4. Clean terminals and battery cable ends
with wire brush until bright.
5. Coat terminals with grease or pe tro leum
jelly.
6. Reinstall battery (See “REPLACING
BATTERY" in the SERVICE AND AD-
JUST MENTS section of this manual).
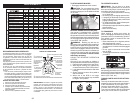
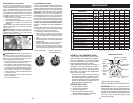
TEMPERATURE RANGE ANTICIPATED BEFORE NEXT OIL CHANGE
SAE VISCOSITY GRADES
-20 0 30 40
80
100
-30
-20 0
20 30 40
F
C
32
-10
10
60
5W-30
SAE 30
oil_visc_chart1_e
ENGINE
LUBRICATION
Only use high quality detergent oil rated with
API service classification SG-SL. Select the
oil’s SAE viscosity grade according to your
expected operating temperature.
NOTE: Although multi-viscosity oils (5W30,
10W30 etc.) improve starting in cold weather,
they will result in increased oil consumption
when used above 32°F/0°C. Check your
engine oil level more frequently to avoid pos-
sible engine damage from running low on oil.
Change the oil after every 50 hours of opera-
tion or at least once a year if the tractor is
not used for 50 hours in one year.
Check the crankcase oil level before starting
the engine and after each eight (8) hours
of operation. Tighten oil fill cap/dipstick
securely each time you check the oil level.
ENGINE OIL FILTER
Replace the engine oil filter every sea son or
every other oil change if the tractor is used
more than 100 hours in one year.
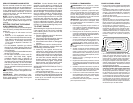
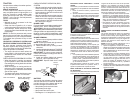
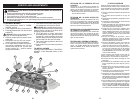
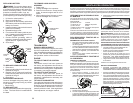
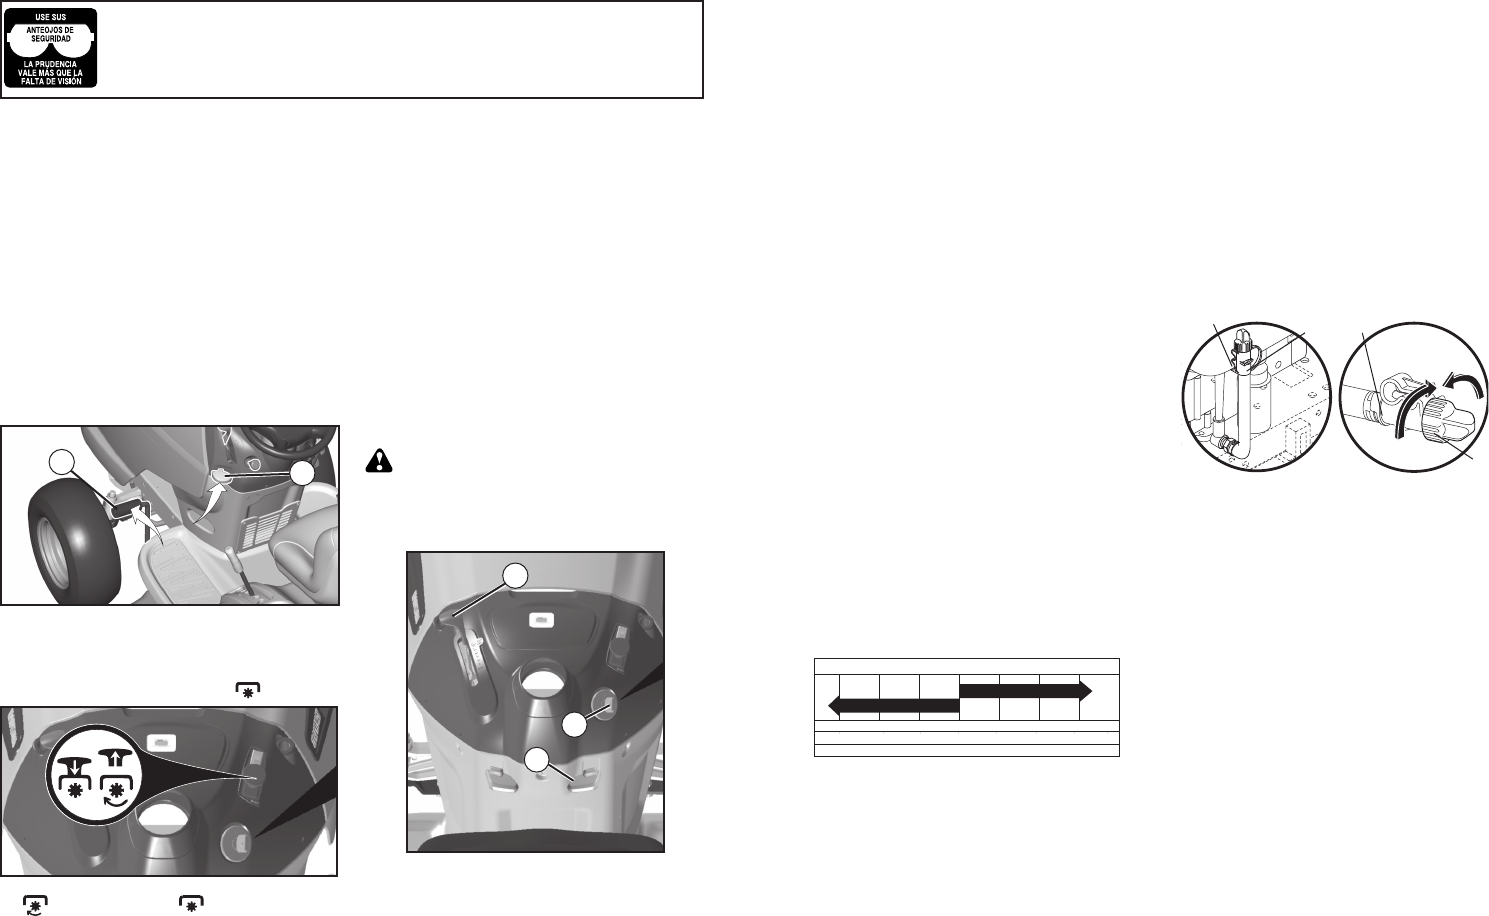
02463
Cap
Docking
Position
Oil Drain
Extension
TO CHANGE ENGINE OIL
Determine temperature range expected
before oil change. All oil must meet API
service classification SG-SL.
• Be sure tractor is on level surface.
• Oil will drain more freely when warm.
• Catch oil in a suitable container.
1. Remove oil fill cap/dipstick. Be careful
not to allow dirt to enter the engine when
changing oil.
2. Slide oil drain extension from the docking
position on the engine blower housing
and extend outward from engine.
3. To open, twist cap counter-clockwise
4. After oil is drained completely, replace
cap and twist clockwise until it stops.
5. Re-attach oil drain extension to engine
blower housing.
6. Refill engine with oil through oil fill dipstick
tube. Pour slowly. Do not overfill. For ap-
proximate capacity see “PRODUCT SP-
EC I FI CA TIONS” section of this man u al.
7. Use gauge on oil fill cap/dipstick for
checking level. For accurate reading,
tighten dipstick cap securely onto the
tube before removing dipstick. Keep oil
at “FULL” line on dipstick. Tighten cap
onto the tube securely when finished.