


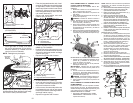

18
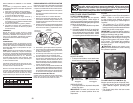
SERVICE REMINDER/HOUR METER
Service reminder shows the total number
of hours the engine has run and flashes to
indicate that the engine or mower needs ser-
vicing. When service is required, the service
reminder will flash for two hours. To service
engine and mower, see the Maintenance
section of this manual.
NOTE: Service reminder runs when the
ignition key is in any position but "STOP".
For acurate reading, be sure key remains
in the "STOP" position when engine is not
running.
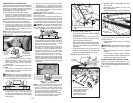
BEFORE STARTING THE ENGINE
CHECK ENGINE OIL LEVEL
The engine in your tractor has been shipped,
from the factory, already filled with sum mer
weight oil.
1. Check engine oil with tractor on level
ground.
2. Remove oil fill cap/dipstick and wipe
clean, reinsert the dipstick and screw cap
tight, wait for a few seconds, remove and
read oil level. If nec es sary, add oil until
“FULL” mark on dipstick is reached. Do
not overfill.
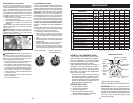
• For cold weather operation you should
change oil for easier starting (See the oil
viscosity chart in the Main te nance sec tion
of this man u al).
• To change engine oil, see the Main te nance
section in this manual.
• Fill fuel tank to bottom of filler neck. Do
not overfill. Use fresh, clean, regular
un lead ed gasoline with a minimum of
87 octane. (Use of leaded gasoline will
increase carbon and lead oxide deposits
and reduce valve life). Do not mix oil with
gasoline. Purchase fuel in quan ti ties that
can be used within 30 days to assure fuel
freshness.
CAUTION: Wipe off any spilled oil or
fuel. Do not store, spill or use gasoline near
an open flame.
IMPORTANT: When operating in tem-
peratures below 32°F(0°C), use fresh, clean
winter grade gas o line to help insure good
cold weather start ing.
CAUTION: Alcohol blended fuels (called
gasohol or using ethanol or methanol) can
attract moisture which leads to separation
and for ma tion of acids during storage. Acidic
gas can damage the fuel system of an engine
while in storage. To avoid engine problems,
the fuel system should be emptied before
stor age of 30 days or longer. Drain the gas
tank, start the engine and let it run until the
fuel lines and carburetor are empty. Use
fresh fuel next season. See Storage In struc-
tions for additional information. Never use
engine or carburetor cleaner products in the
fuel tank or permanent damage may occur.
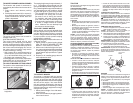
TO START ENGINE
When starting the engine for the first time or
if the engine has run out of fuel, it will take
extra cranking time to move fuel from the
tank to the engine.
1. Be sure freewheel control is in the trans-
mis sion en gaged position.
2. Sit on seat in operating position, depress
brake pedal and set parking brake.
3. Move attachment clutch to dis en gaged
position.
4. Move throttle control to choke po si tion.
NOTE: Before starting, read the warm and
cold starting procedures below.
5. Insert key into ignition and turn key
clock wise to start position and release
key as soon as engine starts. Do not run
starter continuously for more than fifteen
sec onds per minute. If the engine does
not start after several attempts, move
throt tle control to fast position, wait a
few minutes and try again. If engine still
does not start, move the throttle control
back to the choke position and retry.
WARM WEATHER STARTING (50°F/10°C)
and above)
6. When engine starts, move the throt tle
control to the fast position.
• The attachments and ground drive can
now be used. If the engine does not accept
the load, restart the en gine and allow it to
warm up for one minute using the choke
as de scribed above.
55
• Si el césped está demasiado alto, se debe
segar dos veces para reducir la carga y los
posibles peligros de incendio debido a los
recortes secos. Haga el primer corte re la ti va-
men te alto; el segundo a la altura deseada.
• No siegue el césped cuando está mojado. El
césped mojado taponará la segadora y dejará
montones indeseables. Per mi ta que se seque
el césped antes de segarlo.
• Siempre opere el motor con una aceleración
completa cuan do siegue para asegurarse
de conseguir un mejor ren di mien to y una
descarga apropiada de los materiales. Regule
la velocidad de recorrido seleccionando un
cambio lo su fi cien te men te bajo para obtener
un rendimiento de corte de parte de su sega-
dora y también la calidad del corte deseada.
• Cuando opere con accesorios, seleccione una
velocidad de recorrido que se acomode al ter-
reno y le permita obtener el mejor rendimiento
del accesorio que se está usando.
CONSEJOS PARA SEGAR
• No se pueden usar las cadenas para las llantas
cuando la caja de la segadora está adjunta al
tractor.
• La segadora debe estar nivelada en forma
adecuada para obtener el mejor rendimiento
al segar. Vea “PARA NIVELAR LA CAJA DE
LA SEGADORA” en la sección de Servicio y
Ajustes de este manual.
• El lado izquierdo de la segadora se debe usar
para recorte.
• Maneje de modo que los recortes se descar-
guen en el área que ya ha sido cortada. Man-
tenga el área de corte a la derecha del tractor.
Esto producirá una distribución más pareja de
los recortes y un corte más uniforme.
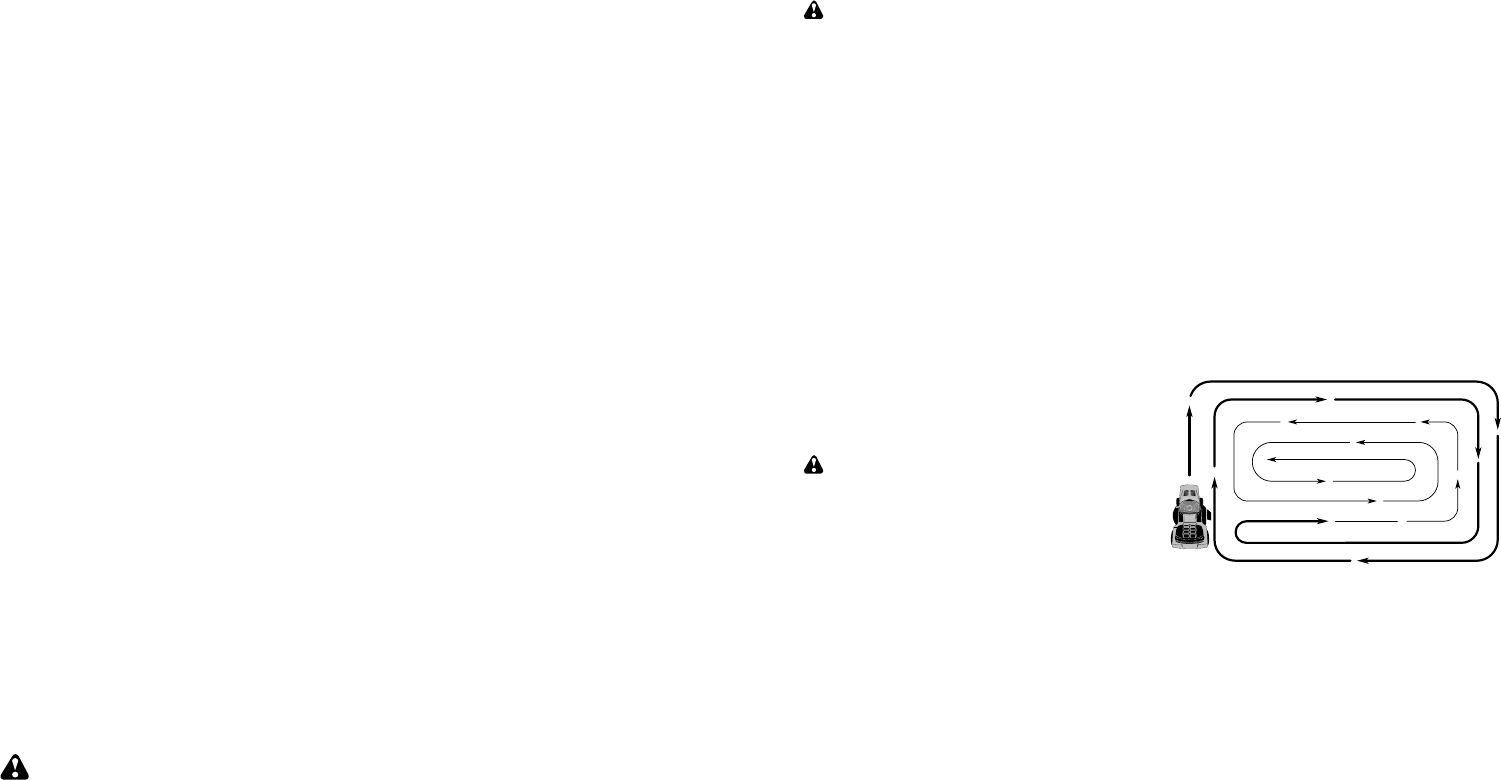
• Al segar las área grandes, empiece girando a
la derecha de modo que los recortes se des-
carguen, alejándose de los arbustos, cercos,
entradas de automóviles, etc. Después de una
o dos vueltas, siegue en la dirección opuesta,
haciendo virajes a la izquierda, hasta que
termine.
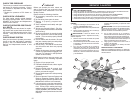
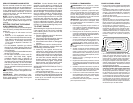
PURGAR LA TRANSMISIÓN
PRECAUCIÓN: Nunca enganche o desen-
ganche la palanca del control de rue da libre
cuando el motor esta fun cio nan do.
Para asegurar la operación y ejecución adec-
uada, es re co men da do que la transmisión sea
purgada antes de operar el tractor para la prim-
era vez. Este proceso removerá cualquier aire
adentro de la transmisión que se halla formado
durante el trans por te de su tractor.
IMPORTANTE: Si por acaso su transmisión debe
ser removida para servicio o reemplazo, debe
ser purgada después de la reinstalación y antes
de operar el tractor.
1. Para mayor seguridad, ubique el tractor en
una superficie nivelada, despejada de cual-
quier objeto y abierta, con el motor apagado
y el freno de mano puesto.
2. Desenganche la transmisión poniendo el
con trol de rueda libre en la posición de desen-
ganchado (Vea “PARA EL TRANS POR TE” en
esta sección de este manual).
3. Sentado en el asiento del tractor, empiece
el motor. Des pués que este corriendo el mo-
tor, mueva el control de es tran gu la ción a la
posición de lento. Quitar el freno de mano.
PRECAUCIÓN: En el transcurso del paso 4,
puede que de pronto se pongan en movimiento
las ruedas.
4. Apretar el pedal de marcha adelante hasta
el fondo, mantener por cinco (5) segundos y
soltar el pedal. Apretar el pedal de marcha
atrás hasta el fondo, mantener por cinco (5)
segundos y soltar el pedal. Repetir el proced-
imiento tres (3) veces.
5. Apague el motor y embrague el freno de
estacionamiento.
6. Enganche la transmisión poniendo el control
de rueda libre en la posición de conducir (Vea
“PARA TRANSPORTAR” en esta sección del
manual).
7. Sentado en el asiento del tractor, empiece el
motor. Des pués que este corriendo el motor,
mueva el control de es tran gu la ción media
(1/2) velocidad. Quitar el freno de mano
8. Conduzca su tractor hacia adelante durante
aproximadamente cinco pies y entonces ha-
cia marcha atrás cinco pies (150 cm). Repita
este proceso tres (3) veces.
Su transmisión esta ahora purgado y dispuesto
para la operación nor mal.