


SERVICE AND ADJUSTMENTS
TO REPLACE AUGER SHEAR BOLT
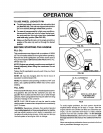
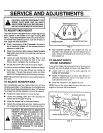
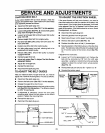
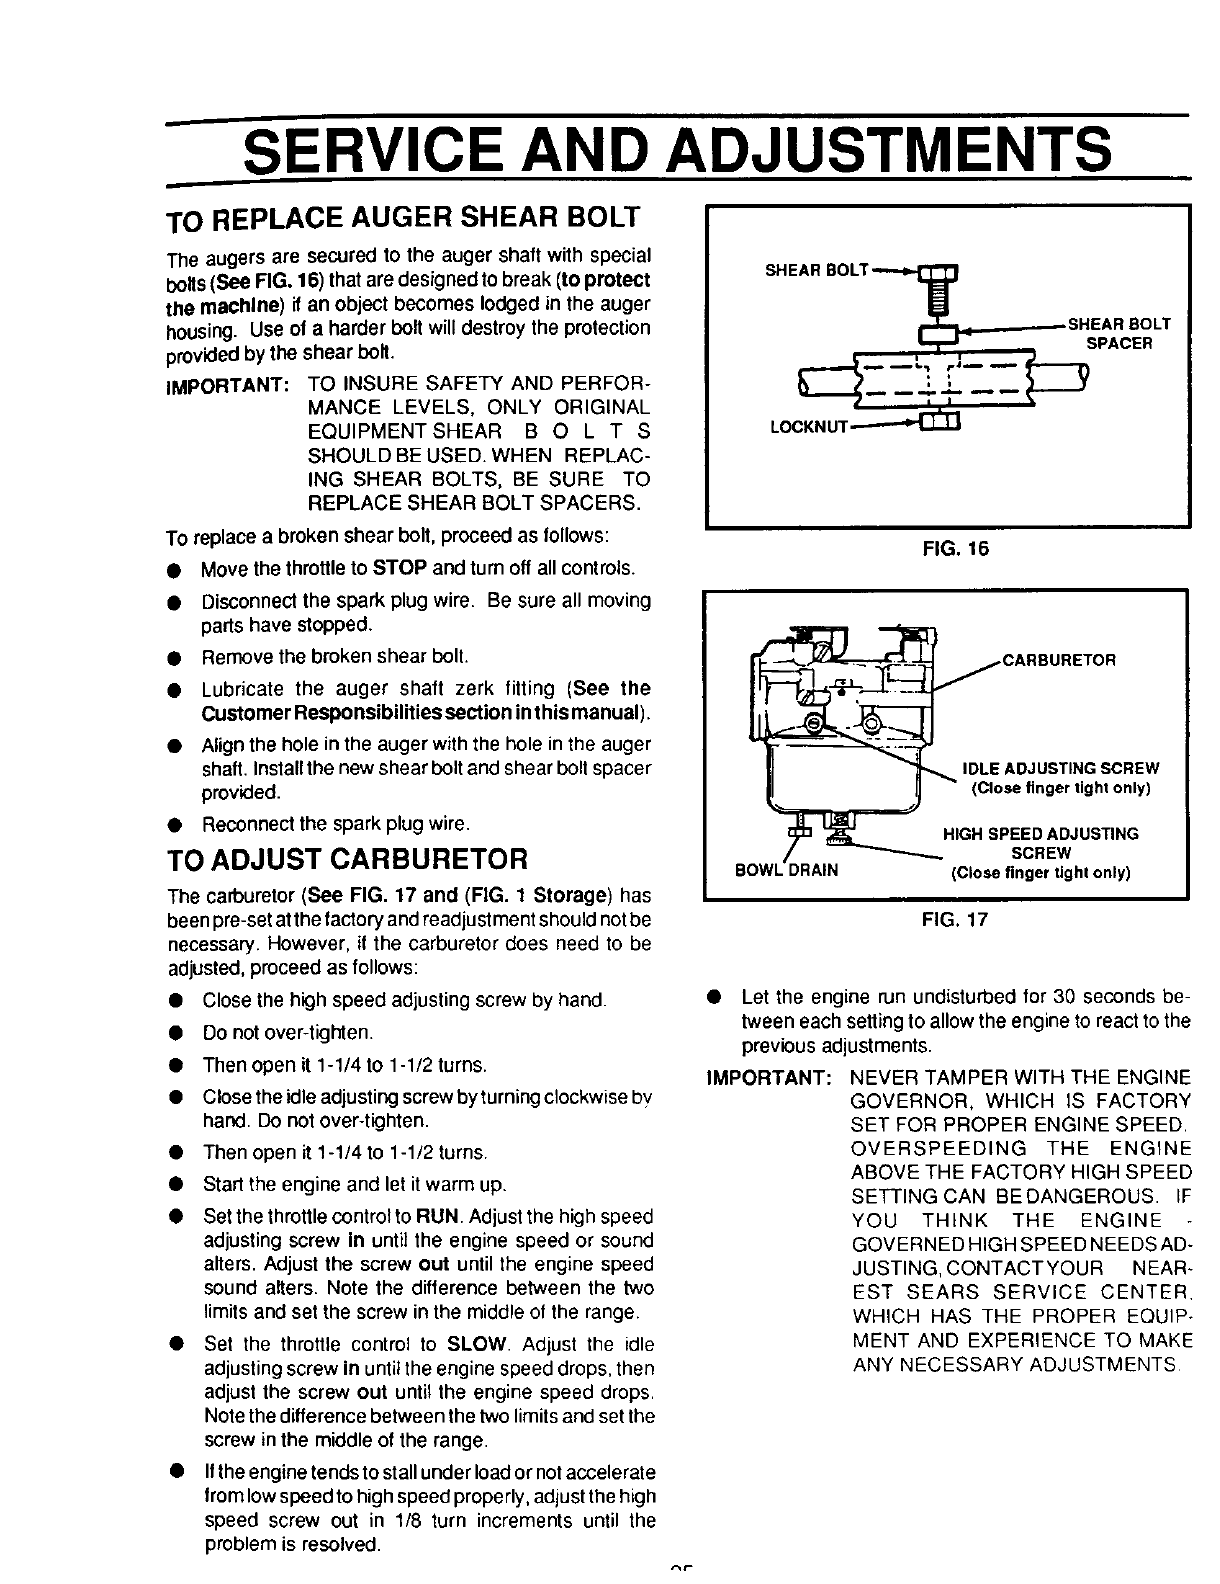
The augers are secured to the auger shaft with special
bolts (See FIG. 16) that are designed to break (to protect
the mechlne) if an object becomes lodged in the auger
housing. Use of a harder bolt willdestroy the protection
provided by the shear bolt.
IMPORTANT: TO INSURE SAFETY AND PERFOR-
MANCE LEVELS, ONLY ORIGINAL
EQUIPMENT SHEAR B O L T S
SHOULD BE USED. WHEN REPLAC-
ING SHEAR BOLTS, BE SURE TO
REPLACE SHEAR BOLT SPACERS.
SHEAR
°°'T s,,,.o,,o.T
LOCKNUT"-_'_
TO replace a broken shear bolt, proceed as follows:
• Move the throttle to STOP and tum off all controls.
• Disconnectthe spark plug wire. Be sure all moving
parts have stopped.
• Remove the broken shear bolt.
• Lubricate the auger shaft zerk fitting (See the
Customer Responsibilities section in this manual).
• Alignthe hole in the auger with the hole in the auger
shaft.Installthe new shear bolt and shear bolt spacer
provided.
• Reconnect the spark plug wire.
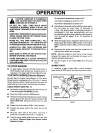
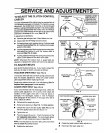
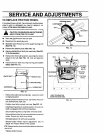
TO ADJUST CARBURETOR
The carburetor (See FIG. 17 and (FIG. 1 Storage) has
been pre-set atthe factoryand readjustment should not be
necessary. However, if the carburetor does need to be
adjusted, proceed as follows:
• Close the high speed adjusting screw by hand.
• Do not over-tighten.
• Then open it 1-1/4 to 1-1/2 turns.
• Close the idle adjusting screw byturning clockwise by
hand. Do not over-tighten.
• Then open it 1-1/4 to 1-1/2 turns.
• Start the engine and let it warm up.
• Set the throttle controlto RUN. Adjust the high speed
adjusting screw in until the engine speed or sound
alters. Adjust the screw out until the engine speed
sound alters. Note the difference between the two
limits and set the screw in the middle of the range.
• Set the throttle control to SLOW. Adjust the idle
adjusting screw in until the engine speed drops, then
adjust the screw out until the engine speed drops.
Note the difference between the two limits and set the
screw in the middle of the range.
• If the engine tends to stall under load or notaccelerate
from low speed to high speed prope fly, adjust the high
speed screw out in 1/8 turn increments until the
problem is resolved.
FIG. 16
IDLE ADJUSTING SCREW
(Close finger light only)
)RAIN
HIGH SPEED ADJUSTING
SCREW
(Close finger tight only)
FIG. 17
• Let the engine run undisturbed for 30 seconds be-
tween each setting to allow the engine to react to the
previous adjustments.
IMPORTANT: NEVER TAMPER WITH THE ENGINE
GOVERNOR, WHICH IS FACTORY
SET FOR PROPER ENGINE SPEED.
OVERSPEEDING THE ENGINE
ABOVE THE FACTORY HIGH SPEED
SETTING CAN BEDANGEROUS. IF
YOU THINK THE ENGINE
GOVERNED HIGH SPEED NEEDS AD-
JUSTING, CONTACTYOUR NEAR-
EST SEARS SERVICE CENTER.
WHICH HAS THE PROPER EQUIP-
MENT AND EXPERIENCE TO MAKE
ANY NECESSARY ADJUSTMENTS