


f.
= .,.,.,,= .., = = ==.,.==
SERVICE AND ADJUSTMENTS
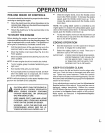
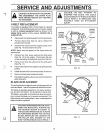
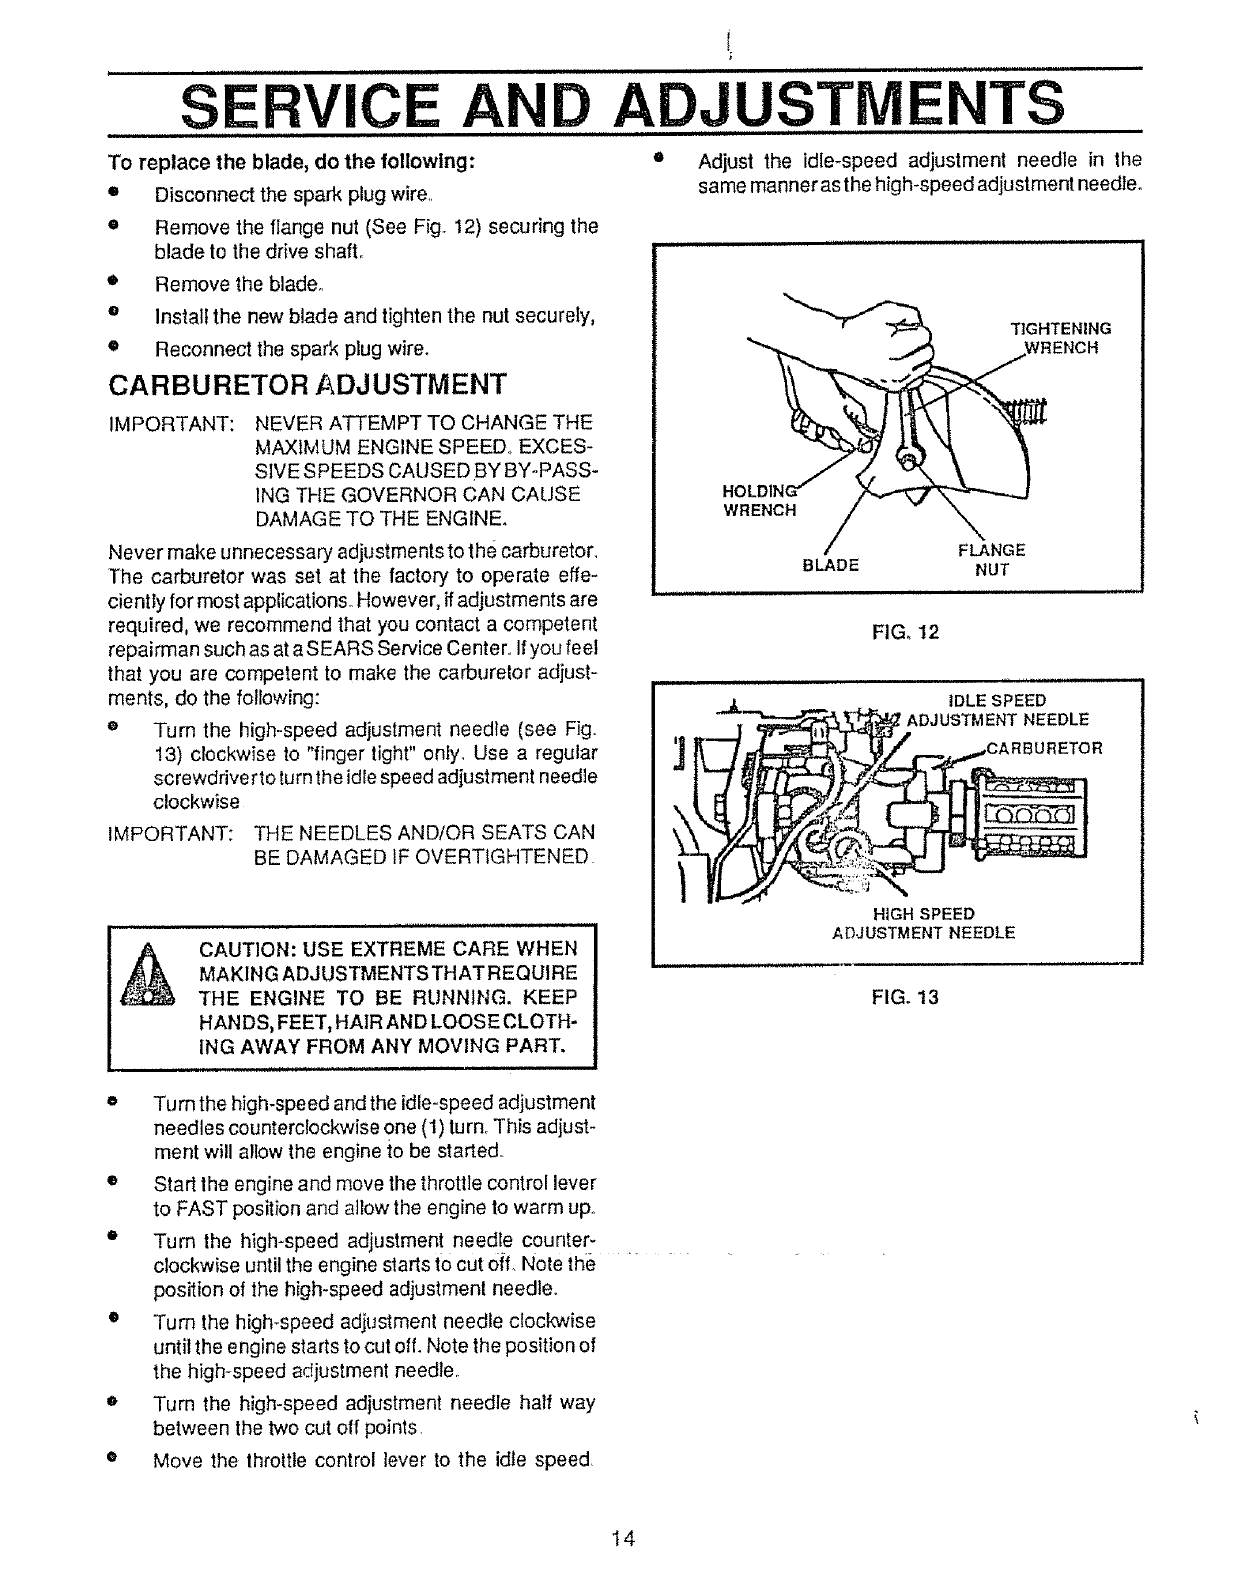
To replace the blade, do the following:
• Disconnect the spark plug wire,.
= Remove the flange nut (See Fig. 12) securing the
blade to the drive shall
e Remove the blade,.
o Install the new blade and tighten the nut securely,
• Reconnect the spark plug wire.
CARBURETOR ADJUSTMENT
IMPORTANT: NEVER ATTEMPT TO CHANGE THE
MAXIMUM ENGINE SPEED., EXCES-
SIVE SPEEDS CAUSEDBY BY-PASS-
ING THE GOVERNOR CAN CAUSE
DAMAGE TO THE ENGINE.
Never make unnecessary adjustments to the carburetor_
The carburetor was set at the factory to operate effe-
ciently for most applications° However, if adjustments are
required, we recommend that you contact a competent
repairman such as at aSEARS Service Center. Ifyou feel
that you are competent to make the carburetor adjust-
ments, do the following:
e Turn the high-speed adjustment needle (see Fig.
13) clockwise to "finger tight" only. Use a regular
screwdriver to turn the idle speed adjustment needle
clockwise
IMPORTANT: THE NEEDLES AND/OR SEATS CAN
BE DAMAGED IF OVERTtGHTENED
o
o
==, ,,,,,, ,,,,, ,,,,,,,,,
CAUTION: USE EXTREME CARE WHEN
MAKING ADJUSTMENTSTHAT REQUIRE
THE ENGINE TO BE RUNNING, KEEP
HANDS, FEET, HAiR AND LOOSE CLOTH-
ING AWAY FROM ANY MOVING PART.
1,,1,_J=,.l=,
Turn the high-speed and the idle-speed adjustment
needles counterclockwise one (1) turn, This adjust-
ment will allow the engine to be started..
Start lhe engine and move the throttle control lever
to FAST position and allow the engine to warm upo
Turn the high-speed adjustment needle counter-
clockwise until the engine starts to cut off, Note the "
position of the high-speed adjustment needle.
• Turn the high-speed adjustment needle c!ockwise
until the engine starts to cut off. Note the position of
the high-speed adjustment needle..
• Turn the high-speed adjustment needle half way
between the two cut off points
• Move the throttle control lever to the idle speed.
=, .,.,,,,,,,,,,,,,,, =, =,1,,
• Adjust the idle-speed adjustment needle in the
same manner as the high-speed adjustment needle°
TIGHTENING
WRENCH
BLADE
FLANGE
NUT
FIG_ 12
HiGH SPEED
ADJUSTMENT NEEDLE
FIG. 13
14