i i i ll,i i,,,i,,i i,i iu,J.i.
TENANCE
ii ii ,i ,, IIMI I , I,l,,I
AIR CLEANER MAINTENANCE
Replace the filter once a year; more often under dusty or
dirty conditions. DO NOT attempt to clean or oil the air
filter.
To install a new air filter, do the following:
o Disconnect the spark plug wire from the spark plugo
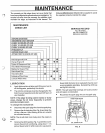
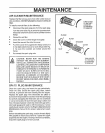
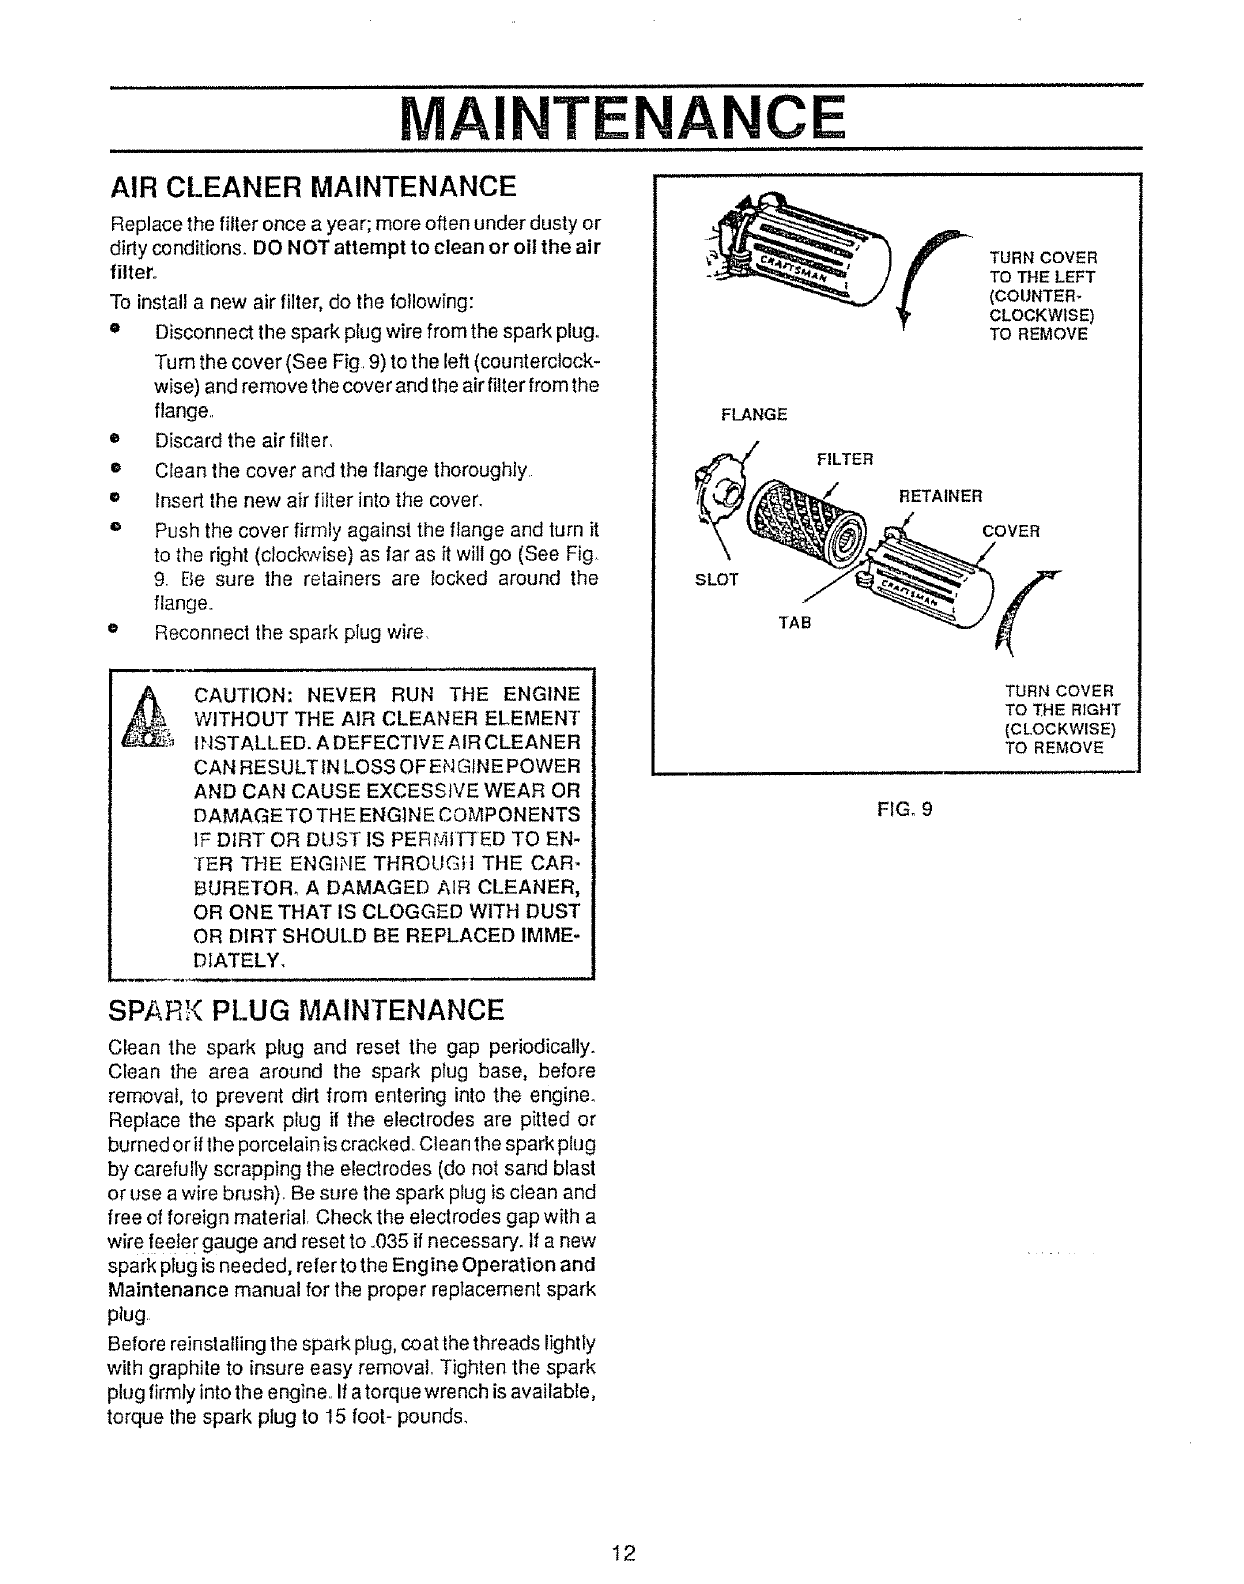
Turn the cover (See Fig, 9) to the left (counterclock-
wise) and remove the cover and the air filter from the
flange..
e Discard the air filter.
• Clean the cover and the flange thoroughly
o Insert the new air filter into the cover.
® Push the cover firmly against the flange and turn it
to the right (clocte,vise) as far as it will go (See Fig
9. Be sure the retainers are locked around the
flange.
o Reconnect the spark plug wire.
CAUTION: NEVER RUN THE ENGINE
WITHOUT THE AIR CLEANER ELEMENT
_ IHSTALLED. A DEFECTIVEAIR CLEANER
CAN RESULTtN LOSS OFEHGINEPOWER
AND CAN CAUSE EXCESSIVE WEAR OR
DAMAGETO THE ENGINE COMPONENTS
tF DIRT OR DUST IS PERiv]ITTED TO EN-
TER THE ENGfHE THROUGI] THE CAR-
BURETOR, A DAMAGED AIR CLEANER_
OR ONE THAT IS CLOGGED WiTH DUST
OR DIRT SHOULD BE REPLACED IMME-
DIATELY,
SPAR < PLUG MAINTENANCE
Clean the spark plug and reset the gap periodically.
Clean the area around the spark plug base, before
removal, to prevent dirt from entering into the engine.
Replace the spark plug if the electrodes are pitted or
burned or if lhe porcelain is cracked.. Clean the spark plug
by carefully scrapping the electrodes (do not sand blast
or use a wire brush). Be sure the spark plug is clean and
free of foreign material. Check the electrodes gap with a
wir e feeler gauge and reset to ,,035if necessary. If a new
spark pIug is needed, refer to the Engine Operation and
Maintenance manual for the proper replacement spark
plug
Before reinstalling the spark plug, coat the threads lightly
with graphite to insure easy removal,, Tighten the spark
plug firmly into the engine° If a torque wrench is available,
torque the spark plug to 15 foot- pounds.
TURN COVER
TO THE LEFT
(COUNTER-
CLOCKWISE)
TO REMOVE
FLANGE
SLOT
TAB
FILTER
RETAINER
COVER
TURN COVER
TO THE RIGHT
(CLOCKWISE)
TO REMOVE
FIG. 9
12


