


ASSEMBLY & ADJUSTMENTS cont.
18
WARNING:
To avoid injury, adjust the auxiliary handle for maximum
control and balance. DO NOT overreach when operating the trimmer.
ALWAYS KEEP proper balance for better control of the tool in unexpected
situations.
!
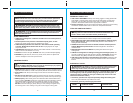
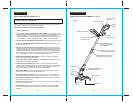
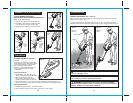
ADJUSTING THE AUXILIARY HANDLE (Fig. 7a)
1. The auxiliary handle’s bracket can be moved up or down on the shaft and the
auxiliary handle itself can be moved forward or backward into 4 different locked
positions (see Fig. 7a).
2. When the handle is in desired position, turn knob and tighten securely.
Fig. 7a
Fig. 7
ATTACHING THE AUXILIARY HANDLE (Fig. 7 and 7a)
1. Remove the battery pack from the trimmer.
2. Unscrew the auxiliary handle’s tightening knob
(counterclockwise) and remove from handle.
3.
Position auxiliary handle onto handle bracket
assembly located on trimmer shaft (see Fig. 7).
4.
Position the knob and screw through the auxiliary
handle
and bracket, and tighten knob
(turn clockwise). Do not
tighten completely until you
have adjusted the handle to
your desired working
position.
WARNING:
To avoid injury, ALWAYS remove the battery from the
trimmer BEFORE installing parts or cleaning the trimmer or making any
adjustments.
!
NOTE: THE AUXILIARY HANDLE MUST BE ATTACHED to the trimmer shaft
before use.
ASSEMBLY & ADJUSTMENTS cont.
19
WARNING:
To avoid injury, ALWAYS remove the battery from the
trimmer BEFORE installing parts or cleaning the trimmer or making any
adjustments.
!
WARNING:
BEFORE
connecting the battery pack to your
trimmer, BE SURE you are not
pressing in on the trigger switch.
Failure to do so could result in
accidental start-up, which may
cause serious personal injury.
!
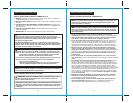
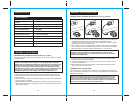
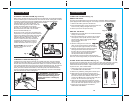
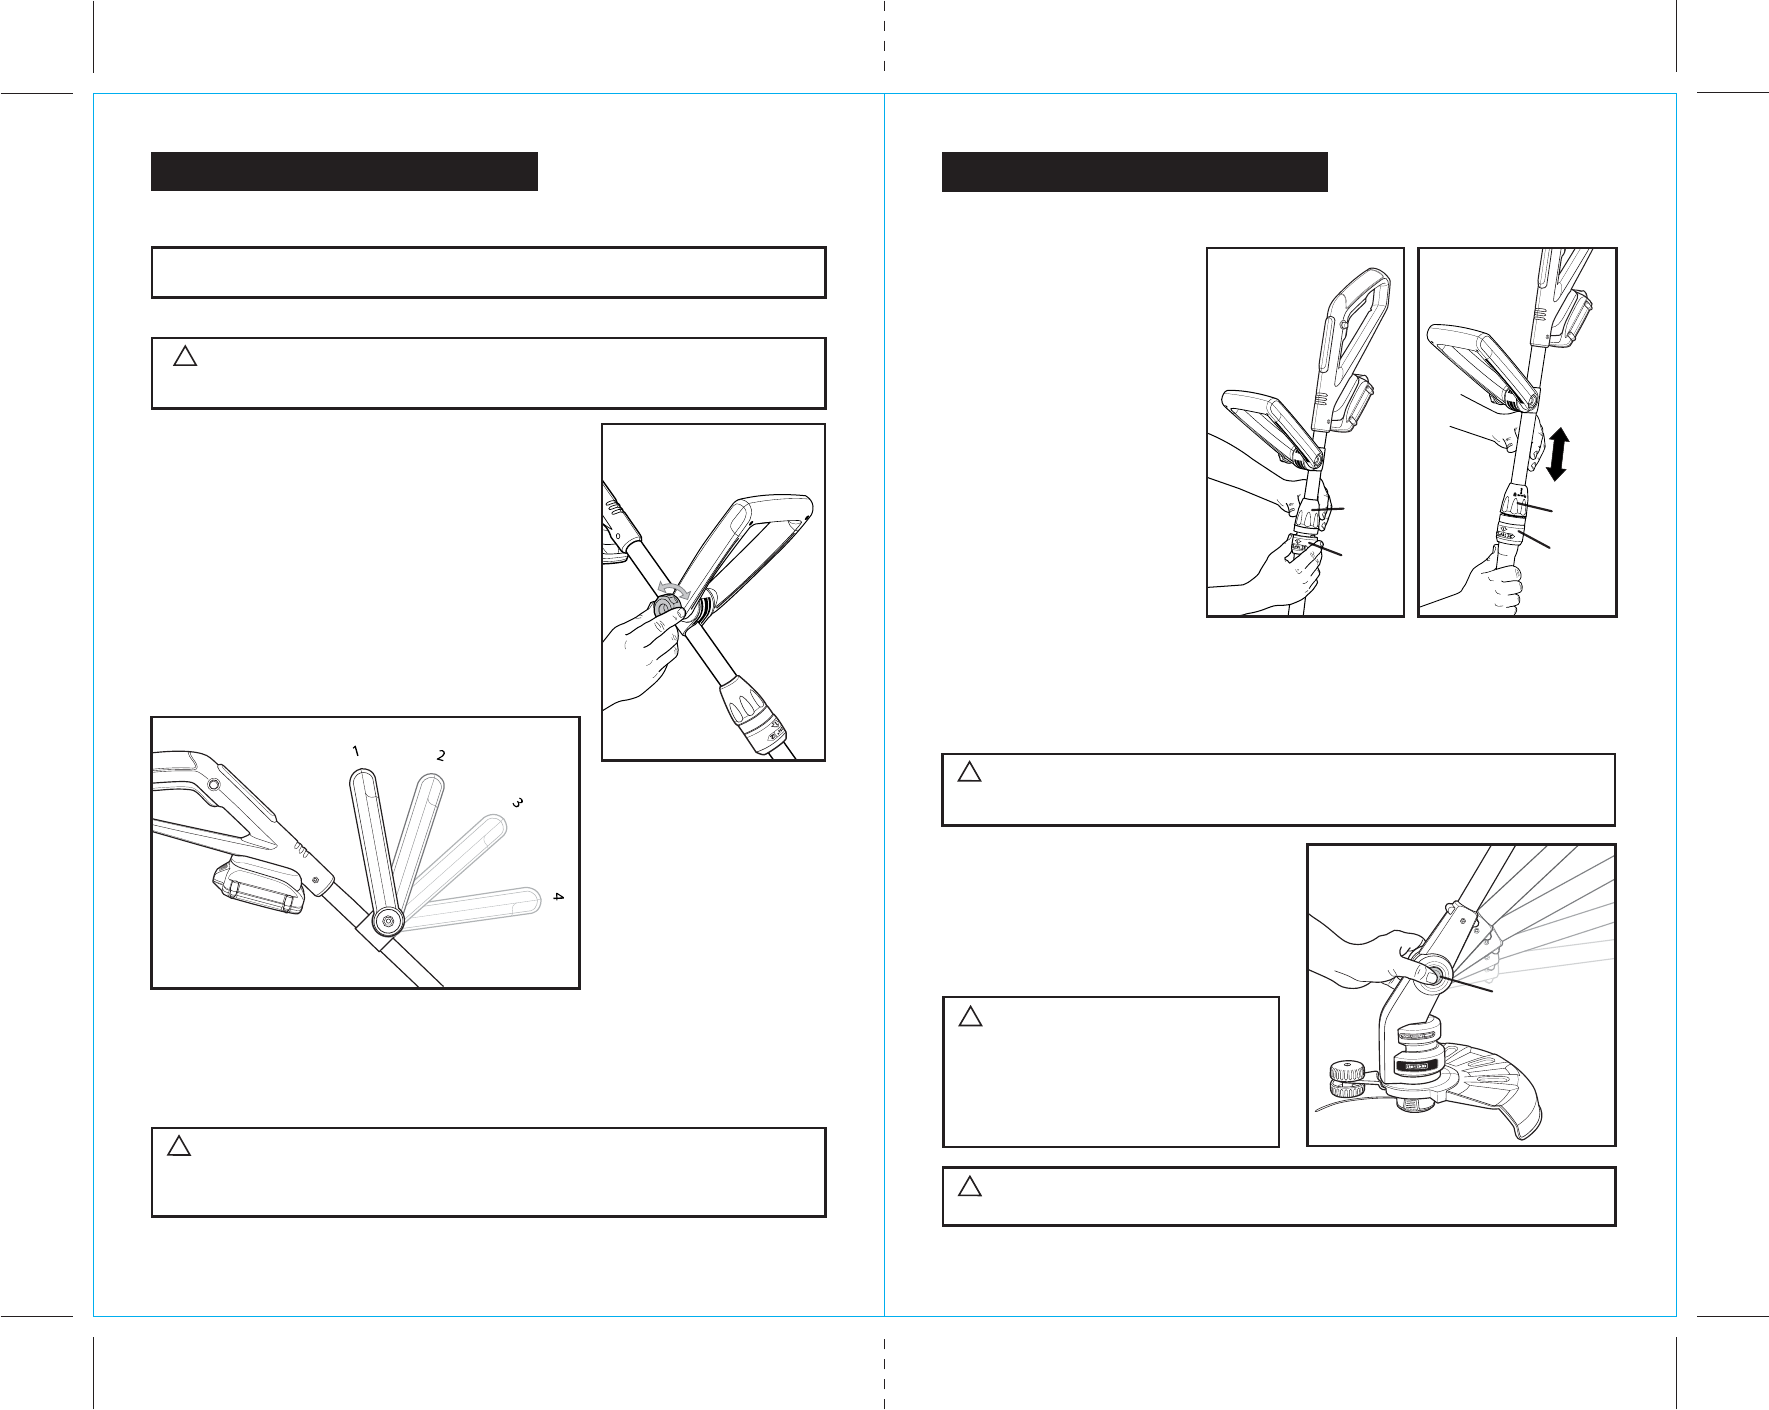
ADJUSTING THE CUTTING ANGLE (Fig. 9)
Your trimmer has a 5-position tilting head that easily adjusts to the desired working
angle for optimum operator control and comfort. To adjust the trimmer head angle.
1. Remove the battery pack from the trimmer.
2. Press the red trimmer head adjustment
button on the motor housing (see Fig. 9).
3. Move the trimmer head to one of the five
different angles and release the button.
Head will click into position. Easily
readjust the angle to a more efficient
position as needed.
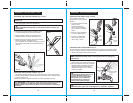
ADJUSTING THE HEIGHT (Figs. 8 and 8a)
The Trimmer’s Telescopic
Shaft Comes in the Collapsed
Position
1. To raise the telescopic shaft,
twist top collar
(counterclockwise) to
unlock, and pull (extend)
top of shaft up, to desired
height.
2. Twist top collar (clockwise)
to lock top shaft in place.
3. To lower or collapse the
shaft simply reverse the
above steps, 1 and 2.
Fig. 8
Fig. 8a
Fig. 9
Top
Collar
Bottom
Collar
Top
Collar
Bottom
Collar
WARNING:
If any part of the trimmer is missing or damaged, do not
install the battery pack until the damaged part is repaired or replaced.
!
Trimmer Head
Adjustment
Button
1
2
3
4
5