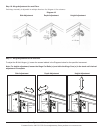
Step 12: Add Hinge Plates and Small Doors
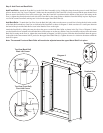
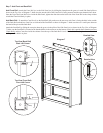
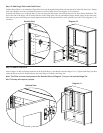
Add the Hinge Plates (x) by inserting a Hinge Plate Screw (k) through the Hinge Plate, and into the holes in the Side Panel (ee). Tighten
each with a phillips screw driver. Repeat the process for all four Hinge Plates. See Diagram 12 for assistance.
To attach each Hinge (w) to its Hinge Plate (x), the bolt along the back center of the Hinge Plate must be loose during installation. The
slot on the end of the Hinge will t around the bolt on the Hinge Plate. The top and bottom Hinges should engage at the same time.
Once the two parts of the Hinge are mated, tighten the bolt on the Hinge Plate rmly with a phillips screw driver. See Diagram 12 for
assistance.
Detailed View Diagram 12
ee
w x
k
Step 13: Add Bi-fold Doors
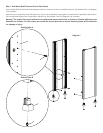
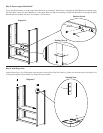
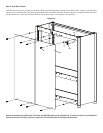
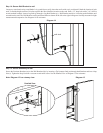
Insert a Hinge Car Bolt (o) through each hole in the Bi-fold Hinge (y) and thread it into the Hinge Car (z). Tighten each Hinge Car Bolt
with a phillips screw driver. Repeat Process until each Hinge is secured to the Hinge Car.
Note: The Pillar is shown transparent in the Detailed View of Diagram 13 so you can see the Hinge Car.
Hint: This step will require 2 people.
Diagram 13
Detailed View
z
o
y


