7 — English
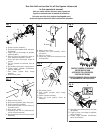
Tighten the knob securely.
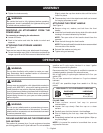
WARNING:
Be certain the knob is fully tightened before operating
equipment; check it periodically for tightness during use
to avoid serious personal injury.
REMOVING AN ATTACHMENT FROM THE
POWER HEAD
For removing or changing the attachment:
Loosen the knob.
Push in the button and twist the shafts to unlock and
separate.
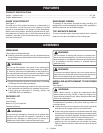
ATTACHING THE STORAGE HANGER
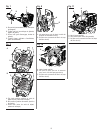
See Figure 3.
There are two ways to hang your attachment for storage.
To use the hanger cap, push in the button and place the
hanger cap over end of the lower end attachment shaft.
ASSEMBLY
Slightly rotate the cap from side to side until the button
locks into place.
The secondary hole in the attachment shaft can be used
for hanging purposes as well.
ATTACHING THE FRONT HANDLE
See Figure 4.
Remove wing nut, washer, and bolt from the front
handle.
Install the front handle onto the top side of the drive shaft
housing in the area indicated by the label.
NOTE: The open side of the handle should face the
operator.
Place the bolt through the front handle.
NOTE: The hex bolt head fits inside the hex recess molded
into one side of the handle.
Reinstall the washer and wing nut.
Tighten wing nut securely.
OPERATION
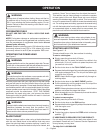
WARNING:
Do not allow familiarity with product to make you care-
less. Remember that a careless fraction of a second is
sufficient to inflict serious injury.
WARNING:
Always wear eye protection with side shields marked to
comply with ANSI Z87.1, along with hearing protection.
Head protection may also be required depending on the
type of attachment used and as prescribed in the attach-
ment’s Operator’s Manual. Failure to do so could result in
objects being thrown into your eyes and other possible
serious injuries.
WARNING:
Do not use any attachments or accessories not recom-
mended by the manufacturer of this product. The use of
attachments or accessories not recommended can result
in serious personal injury.
FUELING AND REFUELING THE POWER HEAD
FUEL MIXTURE
This product is powered by a 2-cycle engine and requires
pre-mixing gasoline and 2-cycle lubricant. Pre-mix unleaded
gasoline and 2-cycle engine lubricant in a clean 1 gallon
container approved for gasoline.
Recommended fuel: This engine is certified to operate on
unleaded gasoline intended for automotive use.
Mix a high quality 2-cycle engine lubricant at 2.6 oz. per
gallon (US).
Do not use automotive lubricant or 2-cycle outboard
lubricant.
DO NOT mix quantities larger than usable in a 30 day
period.
HIGH QUALITY 2-CYCLE ENGINE LUBRICANT
GASOLINE LUBRICANT
1 gallon (US) 2.6 oz.
1 liter 20 cc (20 ml)
FILLING TANK
Clean surface around fuel cap to prevent
contamination.
Loosen fuel cap slowly. Rest the cap on a clean
surface.
Carefully pour fuel into the tank. Avoid spillage.
Prior to replacing the fuel cap, clean and inspect the
gasket.
Immediately replace fuel cap and hand tighten. Wipe up
any fuel spillage.
NOTE: It is normal for smoke to be emitted from a new
engine after first use.


