


STARTING
AND
STOPPING
See
Figures
21 -
23.
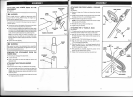
TO
START
A COLD
ENGINE:
DO
NOT
squeeze
the throttle
trigger
until
the
engine starts
ano
runs.
r
Lay the
trimmer on a
flat, bare surface.
r
PRIME
- Press
the
primer
bulb 7 times.
r
SET
the start
lever
to the
START
posiiion.
I
PULL
the rope
until the engine starts.
r
Wait 6-1
0 seconds,
then squeeze the
trigger
to run.
NOTE:
Squeezing
the
throttle trigger releases
the
start lever
to
the RUN
position.
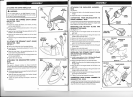
TO START
A WARM
ENGINE:
PULL
the rope until
the engine starts.
TO STOP
THE
ENGINE:
Press
and hold
the switch in the stop
" @
" position
until
the
engine stops.
PRIMERBULI
Fi1.22
START
P()SITI()N
START
LEVER
RUN
P0srTt0N
START
LEVER
Fig.
ZJ
I
wnnrurruc'
When servicing, use only identical replacement
parts.
Use of any other
pads
may create a hazard or cause
^r
dil^+ drm.^a
A
wnnuHc'
Always wear safety
goggles
or safety
glasses
with side
shields during tool operation. lf operation is dusty, also
wear a dust mask.
A
wmrurruc'
Before
inspecting,
cleaning, or servicing
the machine,
shut
off engine, wait for all moving
parts
to stop, and
disconnect spark
plug
wire and move it away from spark
plug.
Failure to follow these instructions can result in
serious
personal
injury or
property
damage.
GENERAL
MAINTENANCE
Avoid using solvents when cleaning
plastic
parts.
Most
plastics
are susceptible to damage from
various types of
commercial solvents and
may
be damaged
by thelr use. Use
clean
cloths to remove dirt, dust,
oil,
grease,
etc.
A wnnrurruc,
Do not
at
any time let brake fluids,
gasoline, petroleum-
based
products, penetrating
oils, etc., come in contact
with
plastic parts.
Chemicals can damage,
weaken
or
destroy
plastic
which may result in serious
personal
rnlury.
You
can
often make adjustments and repairs described here.
For
other repairs, have the trimmer serviced by an authorized
service
dealer.
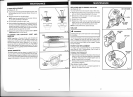
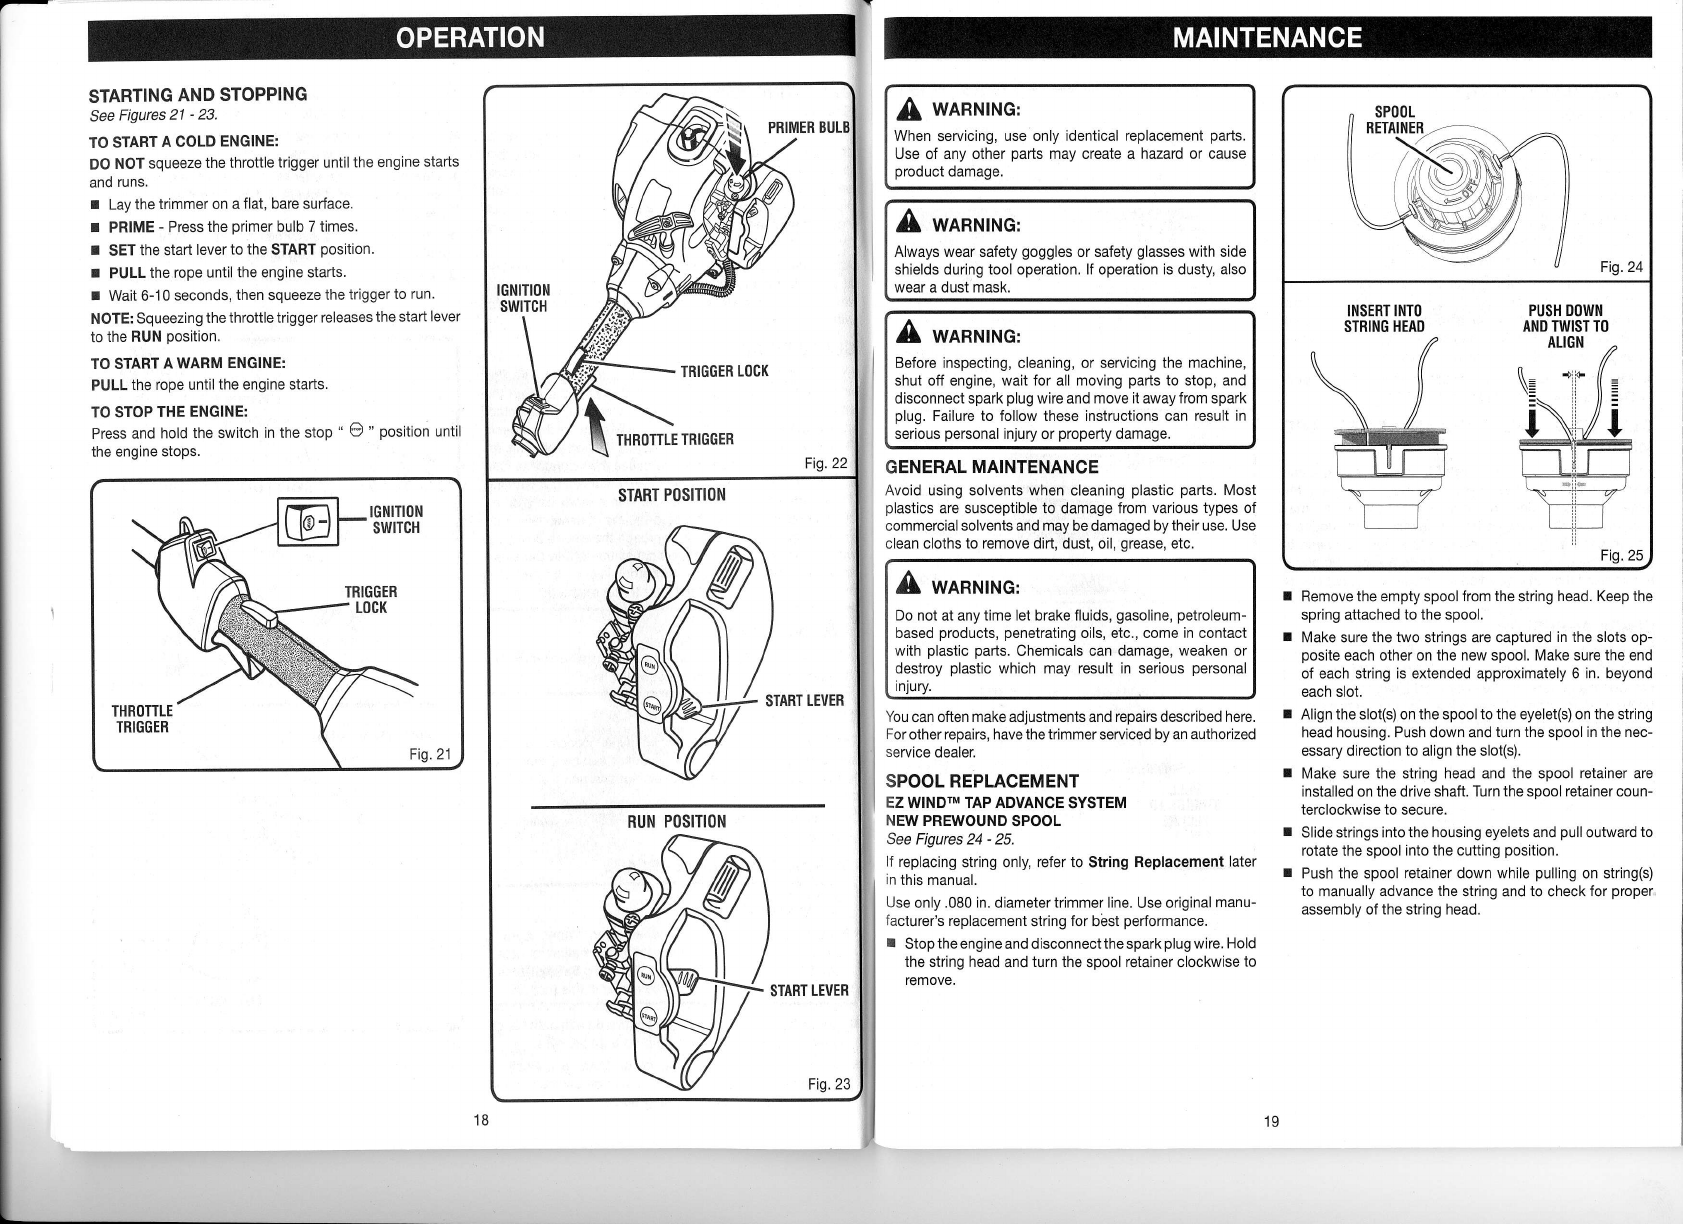
SPOOL REPLACEMENT
EZ WINDTM TAP ADVANCE
SYSTEM
NEW
PREWOUND
SPOOL
See Figures 24
-
25.
lf
replacing
string only,
refer to
String
Replacement
later
tn
this manual.
Use
only
.080 in.
diameter
trimmer line.
Use original
manu-
facturer's
replacement
string
for
bbst
performance.
I
Stop
the engine
and disconnect
the
spark
plug
wire. Hold
the string head
and
turn the
spool
retainer clockwise to
remove.
Fig.24
INSERT INTO
STRING HEAD
Fig. 25
I
Remove the empty spool
from the
string
head. Keep the
spring attached
to the spool.
I
Make sure
the two
strings are captured
in the slots op-
posite
each other on the new spool. Make sure the end
of each string is extended approximately 6 in. beyond
each slot.
I
Align the slot(s) on the spool to the eyelet(s) on the string
head housing.
Push
down and
turn the
spool
in the nec-
essary direction
to
align the slot(s).
r
Make sure the string head and the spool
retainer
are
installed on the drive shaft. Turn
the soool retainer
coun-
terclockwise to
secure.
I
Slide strings into the housing
eyelets
and
pull
outward
to
rotate the spool
into the cutting
position.
r
Push the spool retainer down while
pulling
on string(s)
to manually advance the
string and
to
check
for
proper
assembly of the string head.
19