


English---16
545218616 Rev. 1 12/15/08
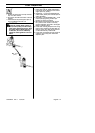
USING THE BLOWER
Start the blower as described in the Starting
and Stopping section. Work according to the
following instructions:
1. Never blow air toward fixed objects such
as walls, large rocks, automobiles and
fences.
2. When working inside corners, blow from
the corner and inward toward the center of
the work area. Otherwise, debris can fly
up in your face and cause eye injury.
3. Never point the blower nozzle at delicate
plants.
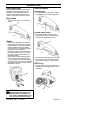
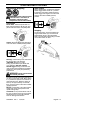
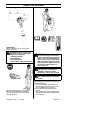
Standard nozzle
The standard nozzle (V) is included with
the HB280. When greater accuracy and
high air stream concentration is desired,
use the standard nozzle.
High-- velocity nozzle
The high--velocity nozzle (W) is also
included with the HB280 blower .
When a wider air stream and greater air
velocity is desired, use the high--velocity
nozzle.
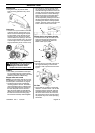
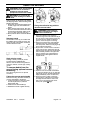
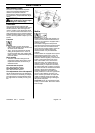
Fitting the collection bag with the
various vacuum tubes
1. Open the collection bag. Insert the
collection bag tube from inside the bag to
fit in the vacuum inlet opening of the bag
as shown. Ensure elastic is seated in
groove. Close the zipper on the bag.
2. Remove the blower tube and install the
collection bag tube. Install and tighten
tube clamp bolt. Attach the carrying strap
to the collection bag loops.
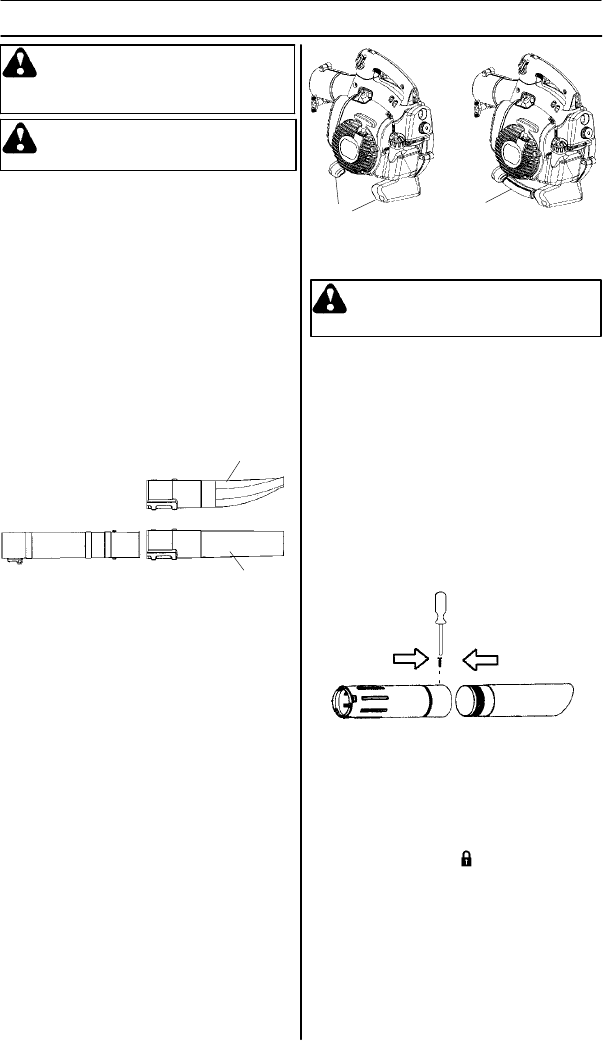
3. Align arrows on lower vacuum tube and
upper vacuum tube. Push lo wer vacuum
tube into upper vacuum tube until the lower
tube is securely seated in the upper tube
(about 3 inches/7 cm). Permanently as-
semble the two tubes together with the
supplied screw .
4. Open the cover on the side of the blower
by using a screwdriver to pry up under the
edge of the cover on the side opposite the
hinge (indicated by arrow on inlet cover).
5. Press the vacuum tubes in the large
opening at the underside of the blower
and align the tabs with the slots in the
tube. Turn it until the bayonet mount
locks (lock symbols align).
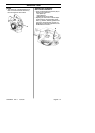
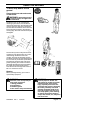
To vacuum debris from the
ground (using optional vacuum
accessory)
The vacuuming device is an optional
accessory.
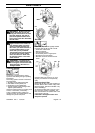
Fitting the vacuum assist handle
Before vacuuming, the assist handle (X)
must be assembled to the blower.
1. Loosen and remove screws from front
and rear impact feet (Y) of blower.
Remove both feet.
2. Install vacuum assist handle (X).
3. Reinstall two screws. Tighten securely.
W
WARNING: When fitting the
tubes to the blower, the engine
must be switched off.
W ARNING: Never start the blower
if the inlet cover is not closed, is
damaged or cannot be closed
(except if the vacuum tube is fitted).
W ARNING: Do not operate the
blower while standing on a ladder or
a stand.
V
Y
X