English – 19
ADJUSTMENTS
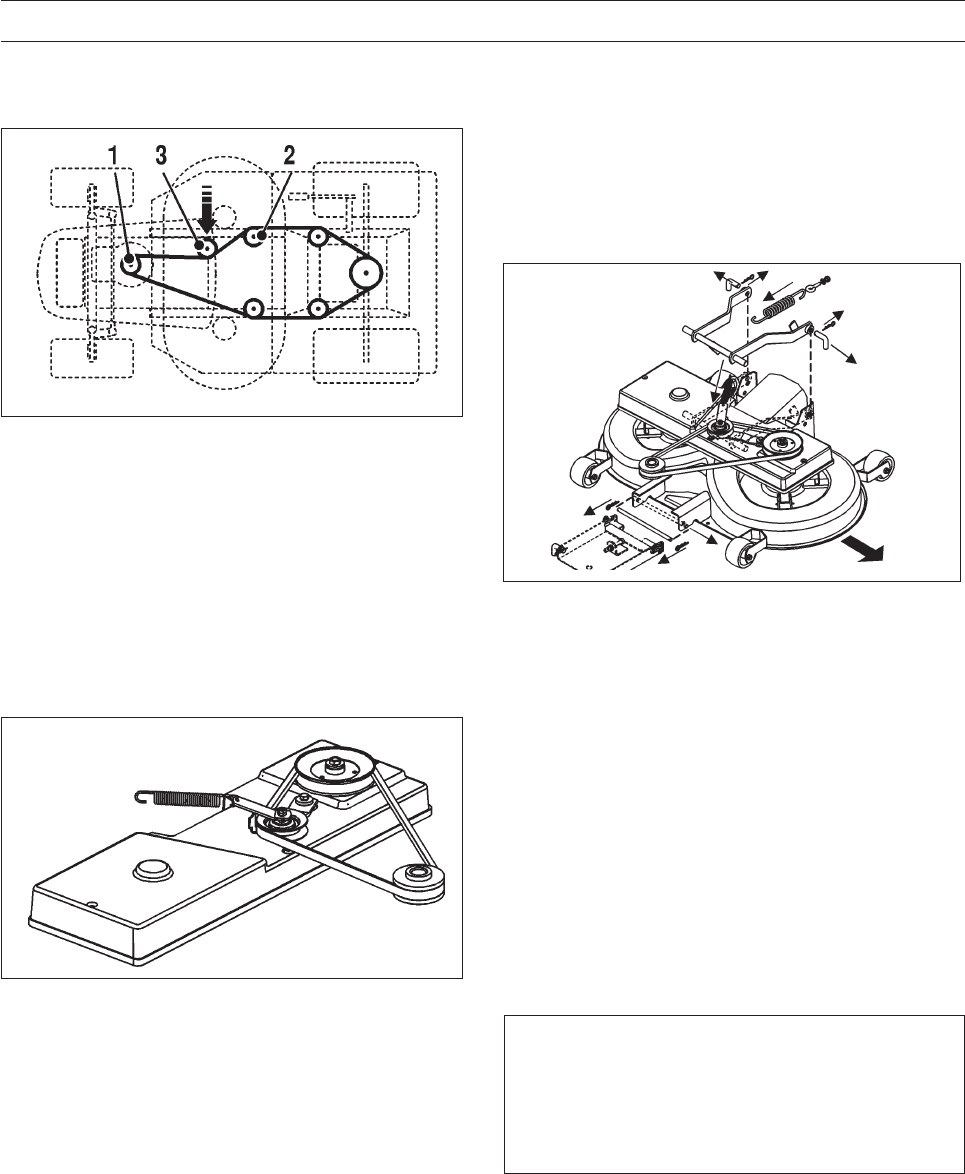
TRANSMISSION DRIVE BELT (FIG. 31)
Fig. 31
TRANSMISSION DRIVE BELT (FIG 31)
1. engine pulley
2. pulley
3. idler pulley
Adjust the tension of the belt with the pulley 3.
MOWER CLUTCH BELT (FIG 32)
The tension of the belt is automatically adjusted with the
spring loaded idler pulley.
MOWER DECK BELT (FIG. 33)
ADJUST THE MOWER COG BELT
NOTE: It is recommended that the mower cog belt be
adjusted after 20 hours of operation as the new belts will
stretch slightly during the initial break in period.
1. engine pulley
2. pulley
3. idler pulley
Adjust the tension of the belt with the pulley 3.
MOWER CLUTCH BELT (FIG. 32)
The tension of the belt is automatically adjusted with the
spring loaded idler pulley.
A. CUTTING OAN REMOVAL (FIG 41)
1. Lower the cutting pan to the lowest position.
2. Pull idler arm assembly in and remove V belt
17x1400 from pulley.
3. Disconnect the spring from the engagement lever.
Fig. 41
4. Disconnect the plug connector from the air valve
switch in tunnel.
5. Lift tunnel to release the lower part from the two
welded pins that connect it to the mower deck
assembly.
6. Pull out tunnel rearwards approximately 10 cm.
Secure the tunnel to prevent it from falling back
down.
7. Remove the hair pin clips from front pin and from the
two rear pins.
NOTE: Altjough it is not necessary, it is recom-
mended to loosen the large spring for safety and to
facilitate reinstalation of cutting pan.
8. Pull out rear pin from one side and then use a pair of
pliers to pull second rear pin from other side.
CAUTION
If the large spring has not been loosened, the pivot
arm assembly will not spring up with force. Do not
place hands or fingers above the pivot arm assembly
and use pliers when pulling out second rear pin.
9. pull out fron pin
10. Remove V-belt from electro magnetic clutch
11. Slide cutting pan out from side of tractor
B. ADJUSTMENT PROCEDURES FOR
COG BELT TENSION
1. Remove cutting pan from tractor, follow procedure
described in A.
2. Remove V-belt pulley and idler arm assy.
3. Remove plastic belt cover.
4. Loosen the two hex nuts on the cog idler pulley on
Fig. 32


