


11
Preparation
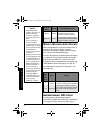
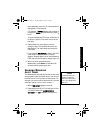
To connect an external antenna to the Weatheradio,
connect one end of the adapter cable to
EXT ANT on
the back of the Weatheradio, then connect the other
end to the antenna.
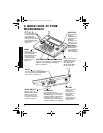
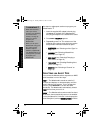
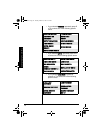
MOUNTING THE WEATHERADIO
You can place your Weatheradio on a flat surface,
such as a desk, shelf, or table, or mount it on a wall.
To mount the Weatheradio on a wall, you need to
attach the supplied mounting bracket to it. You also
need two screws (not supplied) that fit the keyhole
slots on the back of the mounting bracket. For the
best reception, place your Weatheradio where it can
receive alert signals and you hear its alert tone.
Follow these steps to mount the Weatheradio on a
wall.
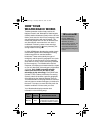
1. Align the slots on the bottom of the
Weatheradio with the hooks on the mounting
bracket, then gently push the Weatheradio
down onto the bracket to secure it.
2. Mark the mounting screw locations 1
1
/2 inches
(38 mm) apart, one above the other.
3. Drill a hole at each marked location, then
thread a screw into each hole until the screw’s
head extends about
1
/8-inch (3.5 mm) from the
wall.
4. Align the keyhole slots on the back of the
mounting bracket with the screw heads in the
wall.
5. To secure the Weatheradio, slide it down until it
stops.
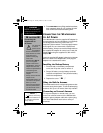
CAUTION
Installing the
Backup Battery
• Use only a fresh battery
of the recommended
type and required size.
• Always remove an old o
r
weak battery. Batteries
can leak chemicals that
can destroy electronic parts
.
Mounting the
Weatheradio
• Electronic noise gene-
rated by your computer
might interfere with your
Weatheradio’s operation.
Place your Weatheradio
as far away from your
computer as possible.
• Keep the Weatheradio
away from heat or cold
sources such as stoves,
heating and air
conditioning vents, and
radiators.
12-258.fm Page 11 Tuesday, March 18, 2003 2:47 PM