


16
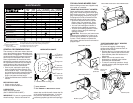
➀ Spray lubricant
➁
See “ENGINE” in Maintenance section.
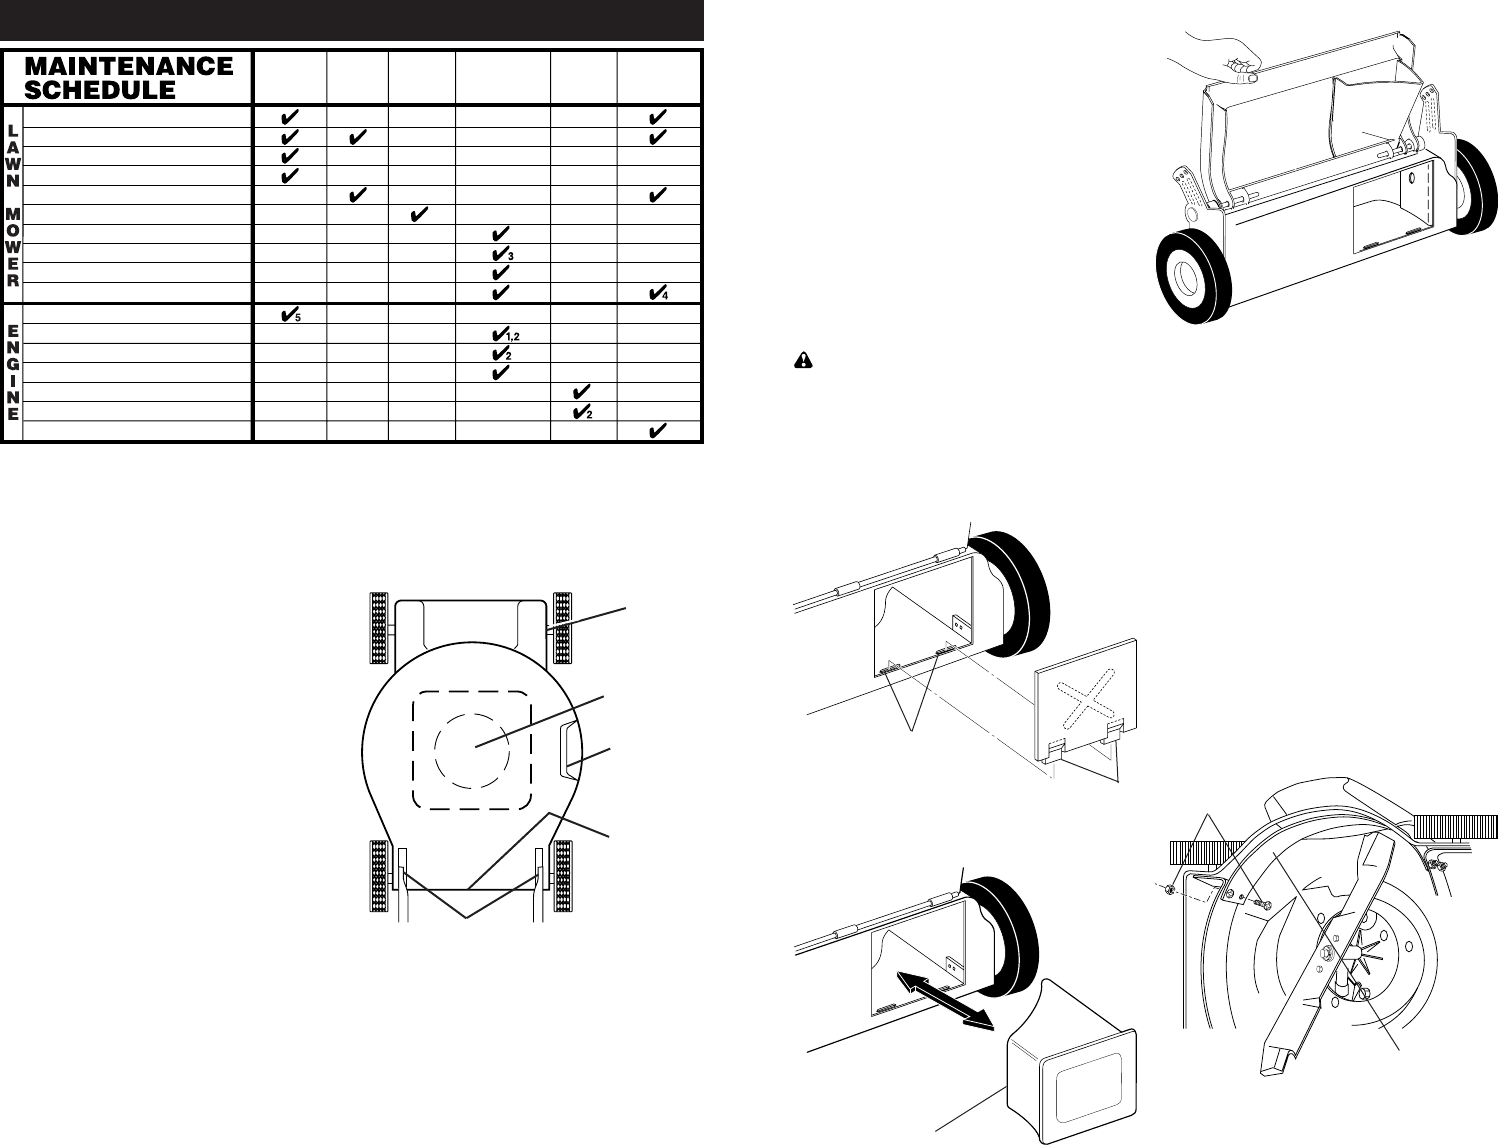
MAINTENANCE
Check for Loose Fasteners
Clean / Inspect Grass Catcher *
CheckTires
Check DriveWheels ***
Clean Lawn Mower ****
Clean under Drive Cover ***
Check Drive Belt / Pulleys ***
Check / Sharpen / Replace Blade
Lubrication
Clean and Recharge Battery **
Check Engine Oil level
Change Engine Oil
Clean Air Filter
Inspect Muffler
Replace Spark Plug
Replace Air Filter Paper Cartridge
Empty fuel system or add Stabilizer
BEFORE
EACH
USE
AFTER
EACH
USE
EVERY
10
HOURS
EVERY
25 HOURS
OR SEASON
EVERY
100
HOURS
BEFORE
STORAGE
1 - Change more often if operating under a heavy load or in high outdoor temperatures.
2 - Service more often if operating in dirty or dusty conditions.
3 - Replace blades more often when mowing in sandy soil.
4 - Charge 48 hours at end of season.
5 - And after each 5 hours of use.
(if so equipped)
Electric-Startmowers
Power-Propelled mowers
Use a scraper
to clean under deck
*
**
***
****
GENERAL RECOMMENDATIONS
The warranty on this lawn mower does not
cover items that have been subjected to op-
erator abuse or negligence. To receive full
value from the war ranty, operator must main-
tain mower as instructed in this manual.
Some adjustments will need to be made
periodically to properly maintain your unit.
All adjustments in the Service and Adjust-
ments section of this manual should be
checked at least once each season.
• Once a year, replace the spark plug,
clean or replace air fi lter element, and
check blade for wear. A new spark plug
and clean/new air fi lter element assures
proper air-fuel mixture and helps your
en gine run better and last longer.
• Follow the Maintenance Sched ule in this
manual.
BEFORE EACH USE
• Check engine oil level.
• Check for loose fasteners.
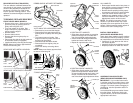
LUBRICATION
Keep unit well lubricated
(See “LUBRICATION CHART”).
IMPORTANT: Do not oil or grease plastic
wheel bearings. Viscous lu bri cants will
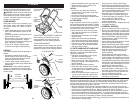
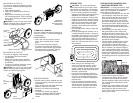
LUBRICATION CHART
attract dust and dirt that will short en the life
of the self-lu bri cat ing bearings. If you feel
they must be lu bri cated, use only a dry,
pow dered graphite type lubricant sparingly.
➀ Wheel
adjuster (on
each wheel)
➁ Engine oil
➀ Rear dis-
charge mower
rear door
hinge rod
➀ Handle bracket mounting pins
➀ Side dis-
charge mower
guard hinge rod
9
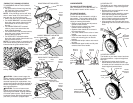
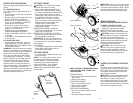
FOR MULCHING MOWERS ONLY
Most mulching mowers are shipped ready
to be used as a mulcher.
“REAR DISCHARGE ONLY” MOWERS
Some models have a seperate mulcher
plug, other models have the mulcher plug
built into the rear door. To convert to bag-
ging or discharging, the plate or plug (if
so equipped) must be removed from the
dis charge open ing of the lawn mower.
• Open rear door and remove mulcher
plate or plug (if so equipped). Store
mulcher plate or plug in a safe place.
• You can now install grass catcher or
optional clipping defl ector accessory.
• To return to mulching operation, install
mulcher plate or plug into discharge
opening of mower.
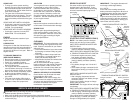
CAUTION: Do not run your lawn mower
without mulcher plate/plug in place or ap-
proved clipping defl ector or grass catch er
in place. Never attempt to op er ate the
lawn mower with the rear door removed or
propped open.
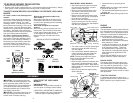
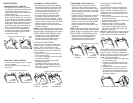
MULCHER "PLUG"
Slots
Mulcher
plate tabs
Mulcher plug
MULCHER "PLATE"
MULCHER PLUG BUILT INTO REAR DOOR
“SIDE DISCHARGE ONLY” MOWERS
MULCHER PLATE TYPE
To convert to bagging or discharging,
mulcher plate must be removed from un-
derside of lawn mower.
• Remove the four (4) screws and lock nuts
securing the mulcher plate to the mower.
• Store mulcher plate and hardware in a
safe place.
• Mower can now be used for side
discharging or op tion al grass catcher
accessory can be attached.
• To return to mulching operation, simply
reinstall mulcher plate and tighten hard-
ware securely.
Mulcher plate
Screw and
lock nut