


6
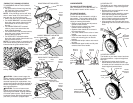
CAUTION: Under normal usage, the
catcher material is subject to de te ri o ra tion
and wear and should, therefore, be
checked frequently for replacement. Any
replacement catcher should be checked to
ensure compliance with original man u fac -
tur er's spec i fi ca tions.
CAUTION: Do not run lawn mower
with out the discharge guard (rear door),
approved grass catcher, clipping de fl ec tor
or mulcher plate in place. Never attempt
to operate mower with the dis charge guard
(rear door) removed or propped open.
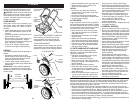
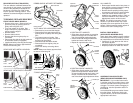
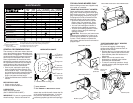
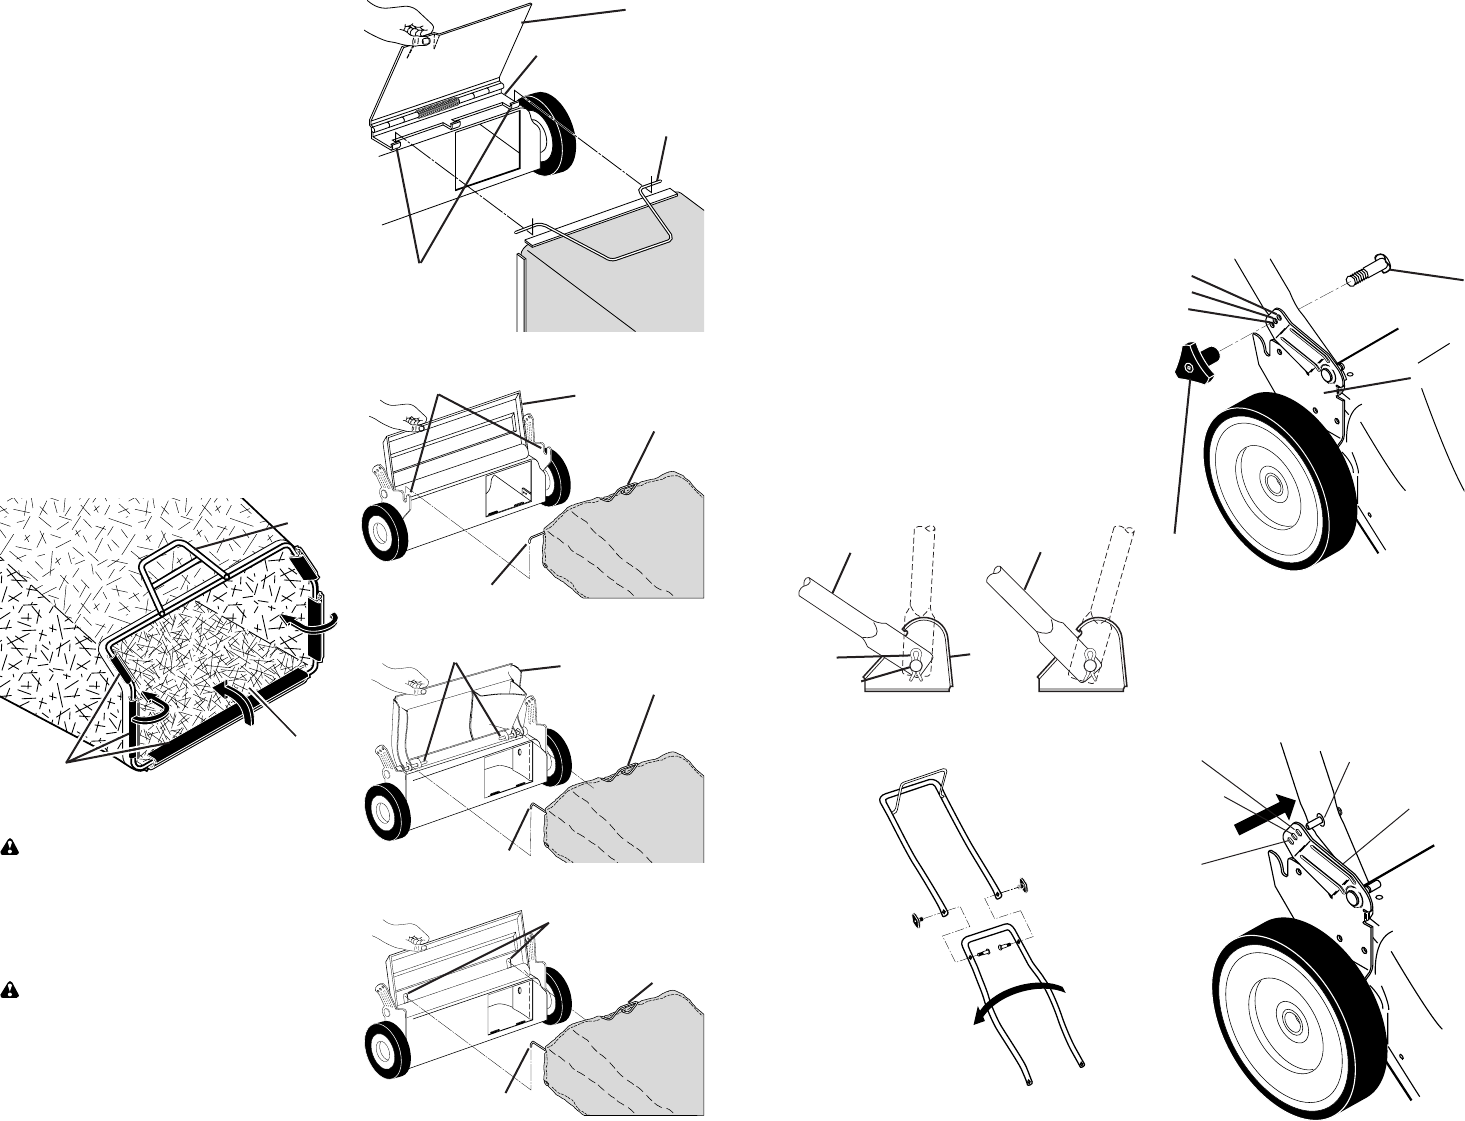
Hinge bracket
Formed tabs
Rear door
Grass
catcher
frame
HINGE BRACKET MOUNTED
DOOR PIVOT PIN MOUNTED
HANDLE BRACKET MOUNTED
DOOR SLOT MOUNTED
Handle bracket hooks Rear
door
Grass
catcher
handle
Catcher frame side hook
Rear door slots
Grass
catcher
han dle
Catcher frame hook
Pivot pins Grass
catcher
handle
Catcher frame hook
Rear
door
Frame
handle
Frame
opening
Vinyl
bindings
“FABRIC TOP” GRASS CATCHERS
TO ASSEMBLE AND ATTACH GRASS
CATCH ER
• Put grass catcher frame into grass bag
with rigid part of bag on the bottom.
• Slip vinyl bindings over frame.
NOTE: If vinyl bindings are too stiff, hold
them in warm water for a few minutes. If
bag gets wet, let it dry before using.
• Lift the rear door on the mower housing.
• For HINGE BRACKET mounted catcher,
place the grass catch er frame onto the
formed tabs on the rear door hinge
bracket.
• For HANDLE BRACKET mounted
catcher, place frame side hooks into
slots in handle brackets.
• For DOOR PIVOT PIN mounted catcher,
place the grass catcher frame hooks
onto the door pivot pins.
• For DOOR SLOT mounted catcher,
place the grass catcher frame hooks into
the slots of the rear door.
NOTE: The grass catcher is secured to the
lawn mower housing when the rear door is
lowered onto the grass catcher frame.
19
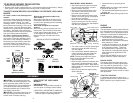
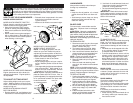
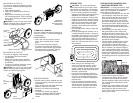
TURN LOWER
HANDLE OVER
TO ADJUST HEIGHT
Mowing
position
Mowing
position
HIGH POSITIONLOW POSITION
Handle
bracket
Hairpin
cotter
Mounting
pin
LAWN MOWER
TO ADJUST CUTTING HEIGHT
See “TO ADJUST CUTTING HEIGHT” in
the Operation sec tion of this manual.
TO ADJUST HANDLE
2 POSITION HANDLES
The handle can be mounted in a high or
low po si tion. The mounting holes in the
bottom of lower handle are off center for
raising or lowering the handle.
• Remove upper handle and all parts at-
tached to lower handle.
• Remove hairpin cotters from lower
handle bracket mount ing pin.
• Squeeze lower handle in to remove it
from mounting pins.
• Turn lower handle over to raise or lower
handle.
• Squeeze lower handle in and position
holes onto mount ing pins on handle
bracket.
• Reassemble hairpin cotters onto mount-
ing pins.
• Reassemble upper handle and all parts
removed from lower handle.
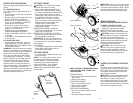
3 POSITION “EZ”
The handle on your lawn mower has three
(3) height positions - adjust to height that
suits you.
• Remove knob and carriage bolt on one
side of the lower handle.
• While holding handle assembly, remove
knob and car riage bolt from opposite
side, align hole in handle with desired
hole in handle bracket and reassemble
bolt and knob and tighten securely.
• Align opposite side of handle with same
positioning hole and secure with bolt and
knob.
Handle
adjustment
bracket
Knob
Bolt
High
Med.
Low
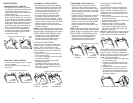
3 POSITION “QUICK”
The handle on your lawn mower has three
(3) height positions - adjust to height that
suits you.
• Squeeze the bottom ends of lower
handle towards each other until the pin
in handle can be inserted into one of the
three height adjustment holes.
High
Handle
adjustment
bracket
Handle pin
Medium
Low
SQUEEZE