


8
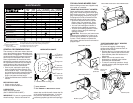
Remote
throttle
control
FAST
SLOW
CHOKE
(START)
OPERATION
The operation of any lawn mower can result in foreign objects thrown into
the eyes, which can result in severe eye damage. Always wear safety
glasses or eye shields while operating your lawn mower or performing any
ad just ments or repairs. We recommend standard safety glasses or a wide
vision safety mask worn over spectacles.
• Reinstall wheel components in the same
order as they were before removal.
Tighten securely.
• Make sure all wheels are at same height.
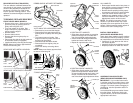
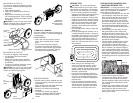
MODELS WITH “QUICK ADJUST”
WHEEL HEIGHT ADJUSTERS
NOTE: For shipping purposes, the rear
wheels on your lawn mower may not be
adjusted to the same position as the front
wheels. Before operating mower adjust all
wheels to the same cutting height.
• Raise wheels for low cut and lower
wheels for high cut.
• Adjust cutting height to suit your require-
ments. Me di um position is best for most
lawns.
• To change cutting height, squeeze adjuster
lever to ward wheel. Move wheel up or
down to suit your re quire ments. Be sure
all wheels are in the same setting.
NOTE: Adjuster is properly positioned when
plate tab inserts into hole in lever. Also, 9-
position adjusters (if so equipped) allow lever
to be positioned between the plate tabs.
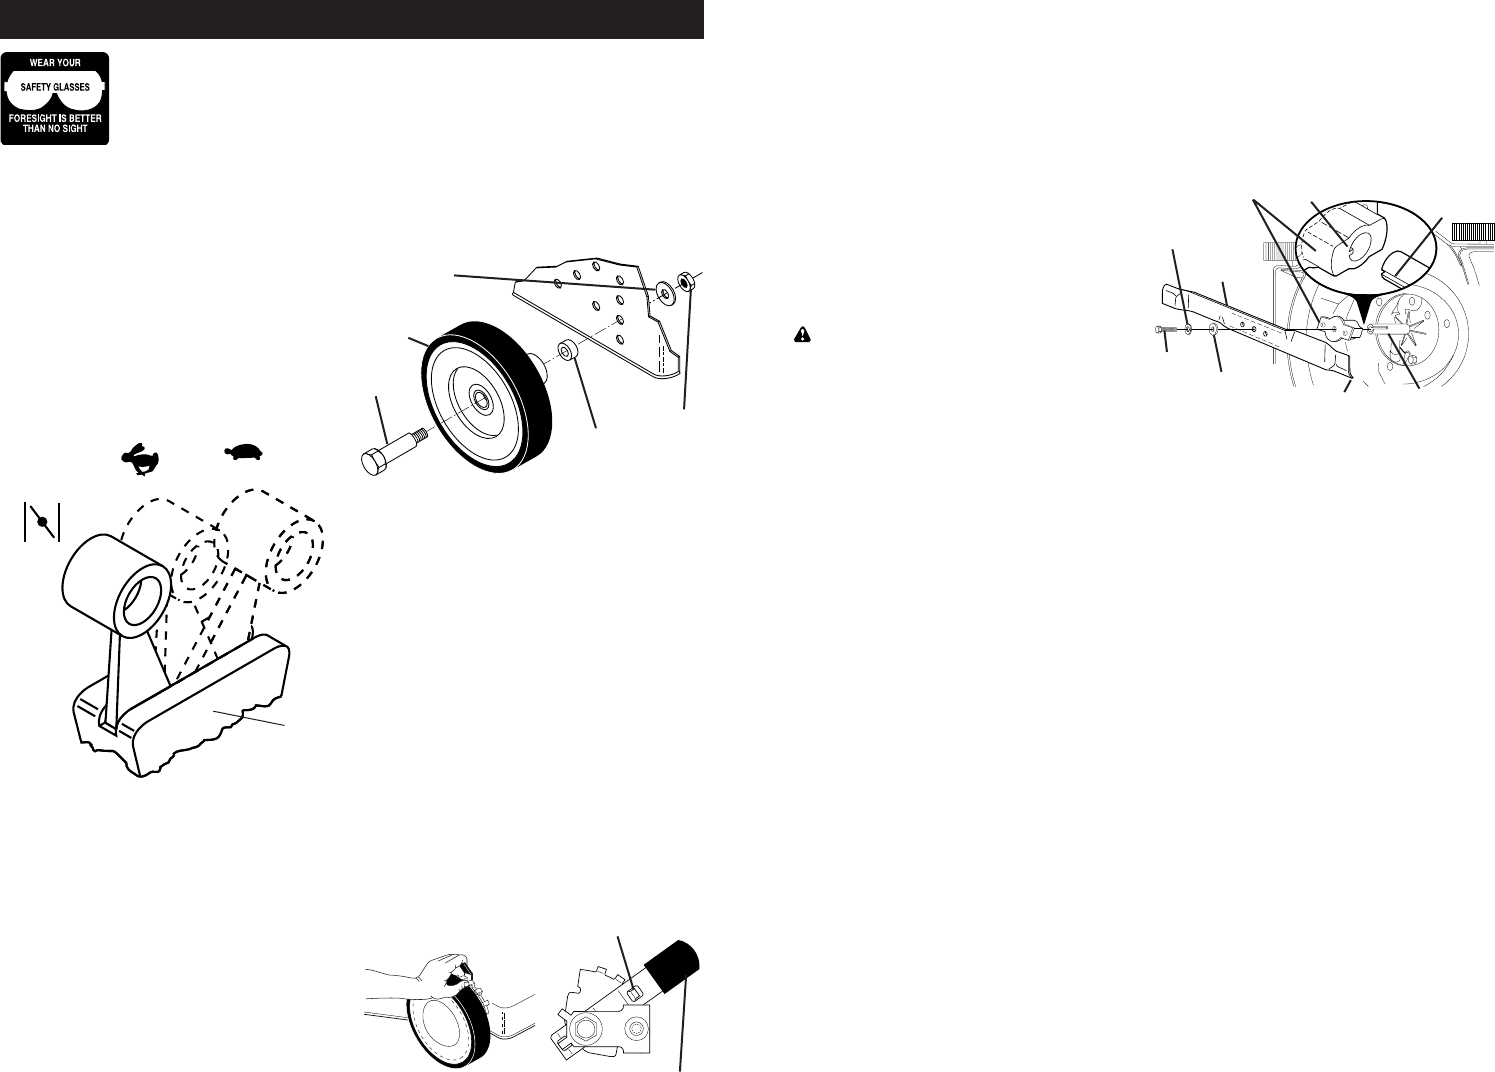
Bolt
Flat washer
Wheel
3/8-16
Locknut
Spacer
LEVER BACKWARD
TO LOWER MOWER
LEVER FORWARD TO RAISE MOWER
Plate tab
Lever
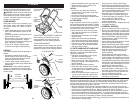
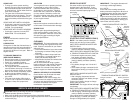
HOW TO USE YOUR LAWN MOWER
ENGINE SPEED CONTROL
MODELS WITH REMOTE THROTTLE
Engine speed is con trolled by the throttle
control located on the upper handle.
• Move lever forward to FAST engine
speed for start ing and better bagging.
• Move lever backward for SLOW engine
speed.
• Some models have engines equipped
with a choke feature. Move the lever all
the way forward to the CHOKE position
when starting a cold engine.
MODELS WITH FIXED SPEED ENGINES
Engine speed was set at the factory for
optimum per form ance. Engine speed is
not adjustable.
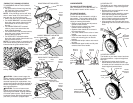
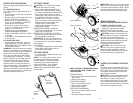
TO ADJUST CUTTING HEIGHT
Adjust cutting height to suit your re quire -
ments. Me di um position is best for most
lawns. Raise wheels for low cut and lower
wheels for high cut.
MODELS WITH MANUAL ADJUST
BOLT-ON WHEELS
• Remove wheel, bolt, and hardware and
reassemble in desired adjustment hole.
17
LAWN MOWER
Always observe safety rules when per-
forming any main te nance.
TIRES
• Keep tires free of gasoline, oil, or insect
control chemi cals which can harm rub-
ber.
• Avoid stumps, stones, deep ruts, sharp
objects and other hazards that may
cause tire damage.
BLADE CARE
For best results, mower blade must be
kept sharp. Re place a bent or dam aged
blade.
CAUTION: Use only a replacement
blade approved by the manufacturer of
your mower. Using a blade not approved
by the manufacturer of your mower is
hazardous, could damage your mower and
void your warranty.
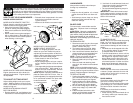
TO REMOVE BLADE
1. Disconnect spark plug wire from spark
plug and place wire where it cannot
come in contact with plug.
2. Turn lawn mower on its side. Make
sure air fi lter and carburetor are up.
3. Use a wood block between blade and
mower hous ing to prevent blade from
turning when re mov ing blade bolt.
NOTE: Protect your hands with gloves
and/or wrap blade with heavy cloth.
4. Remove blade bolt by turning counter-
clockwise.
5. Remove blade and attaching hard-
ware (bolt, lock wash er and hardened
wash er).
NOTE: Remove the blade adapter and
check the key inside hub of blade adapter.
The key must be in good condition to work
properly. Replace adapter if damaged.
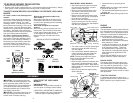
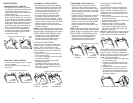
TO REPLACE BLADE
1. Position the blade adapter on the en-
gine crank shaft. Be sure key in adapter
and crankshaft keyway are aligned.
2. Position blade on the blade adapter
aligning the two (2) holes in the blade
with the raised lugs on the adapter.
3. Be sure the trailing edge of blade (op-
posite sharp edge) is up toward the
engine.
4. Install the blade bolt with the lock
washer and hardened washer into
blade adapter and crankshaft.
5. Use block of wood between blade and
lawn mower housing and tighten the
blade bolt, turning clockwise.
• The recommended tightening torque is
35-40 ft. lbs.
IMPORTANT: Blade bolt is heat treated.
If bolt needs replacing, replace only with
approved bolt shown in the Repair Parts
section of this manual.
Blade
bolt
Crankshaft
keyway
Hardened
washer
Lockwasher
Blade adapter Key
Blade
Trailing edge
Crankshaft
TO SHARPEN BLADE
NOTE: We do not recommend sharp en ing
blade - but if you do, be sure the blade
is balanced. An un bal anced blade will
cause eventual damage to lawn mower or
engine.
• The blade can be sharp ened with a fi le
or on a grinding wheel. Do not attempt
to sharpen while on the mower.
• To check blade balance, drive a nail into
a beam or wall. Leave about one inch of
the straight nail ex posed. Place center
hole of blade over the head of the nail.
If blade is balanced, it should remain in
a horizontal position. If either end of the
blade moves downward, sharpen the
heavy end until the blade is balanced.
DRIVE COVER
Clean under the drive cover at least twice
a season. Scrape underside of cover with
a putty knife or similar tool to remove any
buildup of trash or grass.
DRIVE WHEELS
Check drive wheels each time before you
mow to be sure they move freely.
The wheels not turning freely means trash,
grass cuttings, etc. are in the drive wheel
area and must be cleaned to free drive
wheels.
If necessary to clean the drive wheels,
check both drive wheels.
• If after cleaning, the drive wheels do not
turn freely, contact your nearest autho-
rized service center.