


10
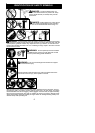
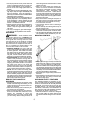
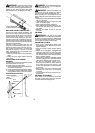
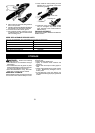
Pruning technique
Second cut
Third cut
Collar
First cut
1. Make the first cut 6 inches from the tree
trunk onthe bottomof thelimb. Use topof
guide bar to make t his cut. Cut 1/3
through the diameter of the limb.
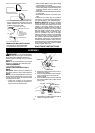
NOTE: When making the second and third
cuts, rest t he foot of the pruner against the
tree limb that is being cut to prevent whipping
of the branch.
Foot
2. Next,move 2-- 4inches fartherout onthe
limb and make a second cut all the way
through the limb.
3. Then,makea finalcut leaving a1 -- 2inch
collar from the trunk of the tree to avoid
damage to the tree.
MAINTENANCE
WARNING: Always stopunitanddis-
connect spark plug wire (or disconnect unit
from power source) before performing main-
tenance.
CHECK FOR D AMAGED OR
WORN PARTS
Contact an authorized service dealer for re-
placement of damaged or worn parts.
S Oil tank -- Discontinue use of pruner attach-
ment if oil tank shows signs of damage or
leaks.
CHECK FOR LOOSE
FA STENERS AND PARTS
S Bar clamp nut
S Fasteners
INSPECT AND CLEAN UNIT AND
DECALS
S After each use, inspect complete unit for
loose or damaged parts. Clean the unit and
decals u sing a damp cloth with a mild deter-
gent.
S Wipe off unit with a clean dry cloth.
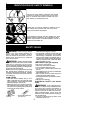
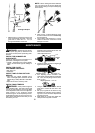
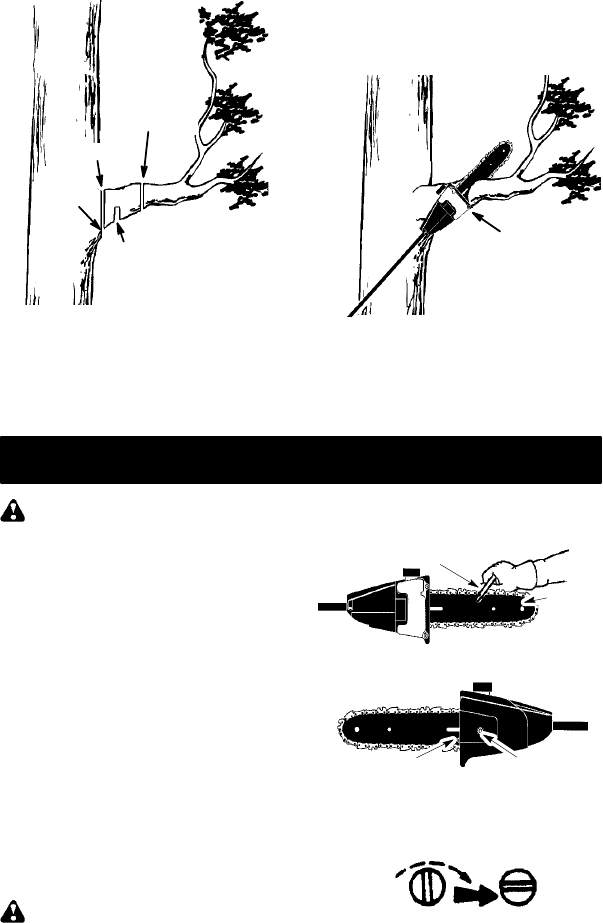
CHECK CHAIN TENSION
WARNING: W ear protective gloves
when handling chain. The chain is sharp and
can cut youevenwhen itis notmoving. Make
chain adjustments with lower end supported.
Chain tension is very important. Chains
stretchduringuse. This isespecially truedur-
ingthefirstfew times youuse yourpruner . Al-
ways check chain tension each time you use
and refuel your unit.
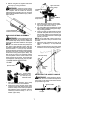
1. Use a screwdriver to move chain around
guidebartoensurekinks d onot exist.The
chain should rotate freely.
Chain Adjustment Tool
Guide
Bar
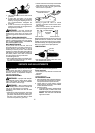
2. Loosen bar clamp nut until it is finger tight
against the bar clamp.
Bar clamp nut
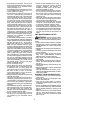
Adjusting Screw
3. Turn adjusting screw clockwise until
chain solidly contacts bottomof guide bar
rail. Then, turn adjusting screw an addi-
tional 1/4 turn.
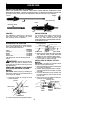
Adjusting Screw -- 1/4 Turn
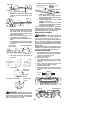
4. Using a screwdriver , roll chain around
guide bar to ensure all links are in bar
groove.
5. Lift up tip of guide bar to check for sag.
Release tip of guide bar, then turn adjust-
ing screw 1/4 turnclockwise. Repeat until
sag does not exist.
6. While lifting tip of guide bar, tighten bar
clamp nut securely with a wrench.