


6 Pelco Installation Manual C2432M-A (12/03)
BARREL
KEY LOCK
TRIM LEASH
BALL STU
D
BALL STUD
RECEIVER
0049500495
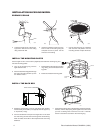
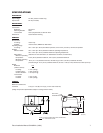
LOWER DOME INSTALLATION
IN-CEILING MODEL
a. Attach the lower dome trim leash to one of the 8-32 x .250-inch
screws that secure the back box to the mounting ring.
b. Insert both keys in the barrel locks. Turn keys clockwise to the un-
locked position. Keys can not be removed from lock in the unlocked
position.
c. Align pegs (located on the mounting ring) with the peg receptacles
(located on the inside of the lower dome).
d. Place lower dome over back box. Hold and turn both keys to the
locked position.
00543
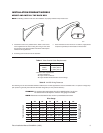
PENDANT MODELS
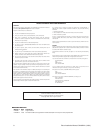
a. Lightly apply O-ring lubricant to the O-ring. Install the O-ring in
the groove on the trim ring of the lower dome.
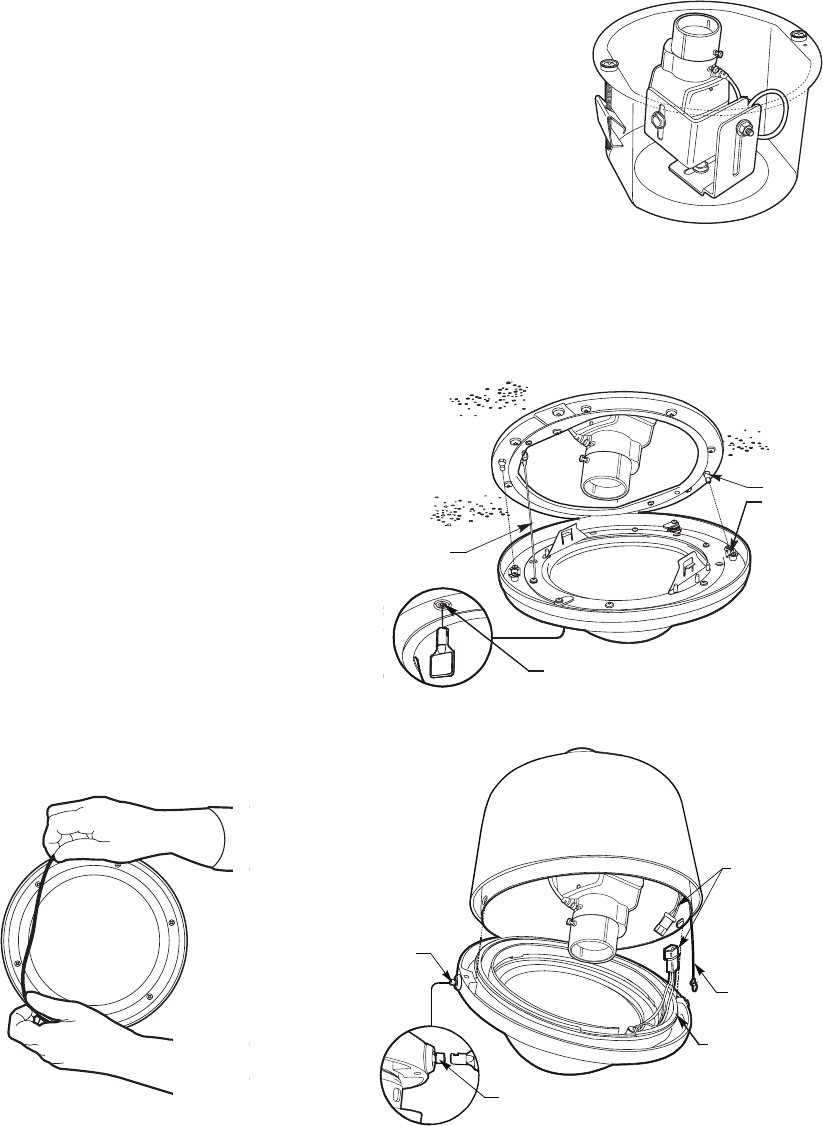
Attach the back box trim leash to a retainer screw inside the
lower dome.
Environmental Model only: Plug the two-pin heater
connection in the lower dome into the mating connector in the
back box.
BARREL
LOCK
CENTER
PIN
00494
HEATER
CONNECTOR
S
O-RING
TRIM
LEASH
b. Align barrel locks in lower dome with the holes located on
each side of the back box. Push lower dome onto back box.
Press the pins of the barrel locks IN to secure the
lower dome.
CAMERA AND LENS INSTALLATION
To install the camera and lens:
1. Extend the lens to the maximum length before installing in the back box.
2. Attach the camera to the tilt table with the 1/4-20 screw and washers (supplied).
3. To ensure that the lens will not hit the lower dome:
• Place the lower dome over the back box with the camera and lens installed (do not attach dome).
• If the lens touches the lower dome, adjust the tilt table assembly.
4. Refer to the manual supplied with the camera and lens for the following information:
• How to connect power and video wiring
• How to make camera and lens adjustments
NOTE:
The torque applied to the camera mounting bracket nut should not exceed 40 pound-inches.