13
English
Assembly
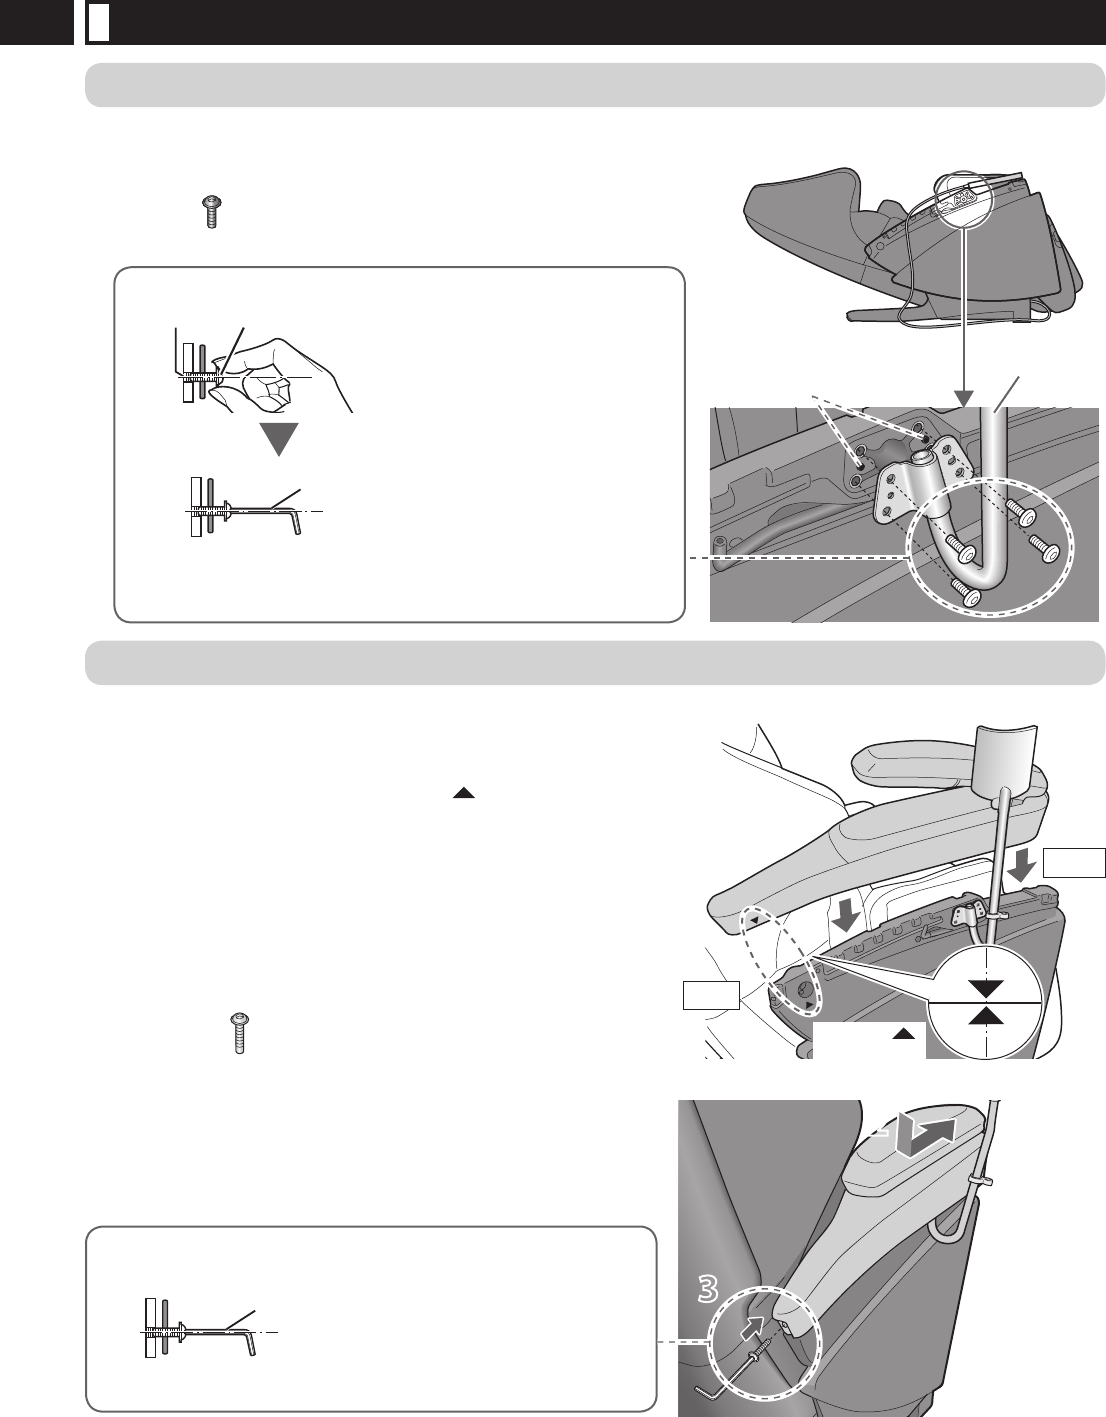
1 Attaching the controller stand to the right or left side panel
Controller
Stand
How to tighten the screws
Attachment screw
Hole
• Tighten the 4 screws lightly
using your ngers.
(Make the screws level with
the holes.)
Allen key • Tighten rmly with the allen
key.
• Screw may be damaged if you
tighten the screw inserted
into the hole crookedly using
an allen key.
<When attaching on the right side panel>
• Align the 2 prongs of the side
panel with the holes of the
controller stand.
Fasten the controller stand with the
attachment screws. (4 positions)
Use this screw: Attachment screws (M6 × 13)
× 4 pcs. (Black)
2 Fasten the armrest with the attachment screws. (On both sides)
1
Insert the armrest into the unit.
• “R” (right side) and “L” (left side) are indicated at the bottom of the
armrest.
• Insert the armrest from the top aligning the
marks on the side of the
armrest.
• Be careful to avoid pinching your ngers or the air plugs.
2
Slide the armrest toward the front while
pushing it downward.
3
Fasten the armrest with the attachment screws.
(One position for each side)
Use this screw: Attachment screws (M6 × 20)
× 2 pcs. (Silver)
<When attaching the right armrest>
1
Front
Back
Align the
marks.
How to tighten the screws
Allen key
• Put an attachment screw on the edge
of the allen key and tighten the screw
horizontally to the hole.
• Screw may be damaged if you tighten
the screw inserted into the hole
crookedly using an allen key.
22
3
3


