


23
MAINTENANCE AND CLEANING
OREGON® Cordless Tool System
TRIMMER/EDGER MODEL ST250
AE 1212 - F/N 558937
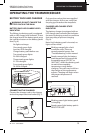
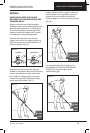
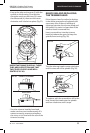
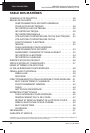
•Line up the tabs on the cover () with the
eyelets on the housing () so that the
triangular notch on the cover () is near
the release tab (), then turn the cover
clockwise until it locks into place (Fig. ).
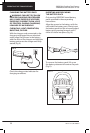
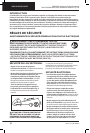
IMPORTANT: MAKE SURE ALL THREE
TABS ARE IN POSITION AND THAT
THE COVER IS LEVEL AND WELL
SEATED FIG. 28.
•Turn the trimmer head by hand and
make sure the cover rotates evenly. If it
rotates unevenly, remove and replace
the cover so it is level with the rest of the
trimmer housing.
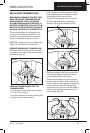
REMOVING AND REPLACING
THE TRIMMER HEAD
If the trimmer head is cracked or broken,
it should be removed and replaced with
a new one. Also, if there is buildup of
clippings between the trimmer head and
the guard, it is easier to clean them if the
trimmer head is removed first.
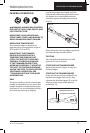
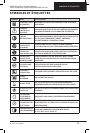
Insert a screwdriver into the trimmer
head lock above the guard to keep the
spindle from turning (Fig. ).
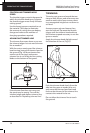
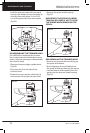
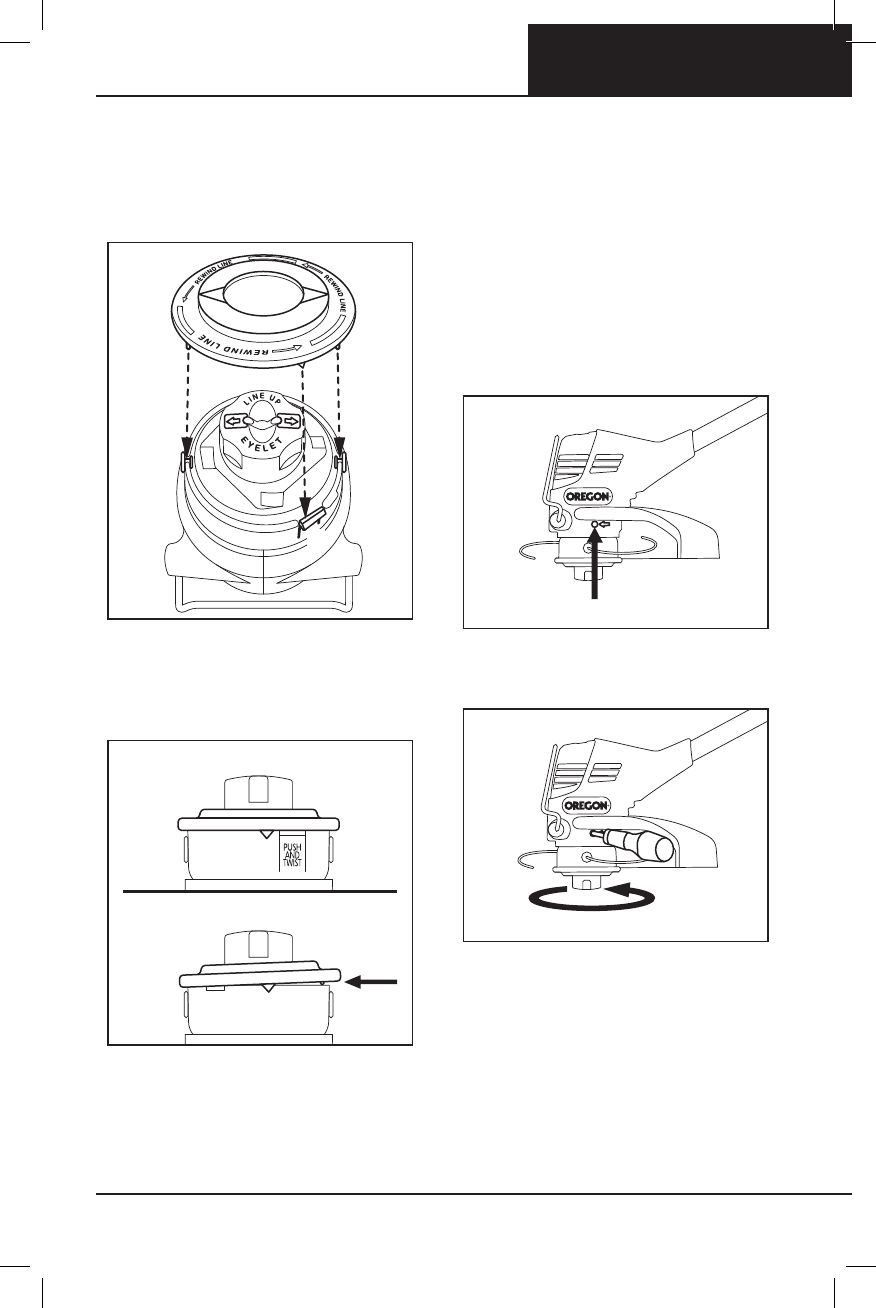
Turn the trimmer head counter-clockwise
until it comes off of the spindle (Fig. ).
To replace, with the screwdriver still in the
hole, thread the head onto the spindle
and turn clockwise until it stops.
4
FIG. 27
1
3
1
22
CORRECT ALIGNMENT
MISALIGNED
FIG. 28
FIG. 29
FIG. 30