


21
MAINTENANCE AND CLEANING
OREGON® Cordless Tool System
TRIMMER/EDGER MODEL ST250
AE 1212 - F/N 558937
REPLACING TRIMMER LINE
WARNING: REMOVE THE BATTERY
PACK FROM THE TRIMMER/EDGER
BEFORE INSPECTING, CLEANING,
OR PERFORMING MAINTENANCE. A
BATTERY OPERATED TOOL WITH THE
BATTERY PACK INSERTED IS ALWAYS
ON AND CAN START ACCIDENTALLY.
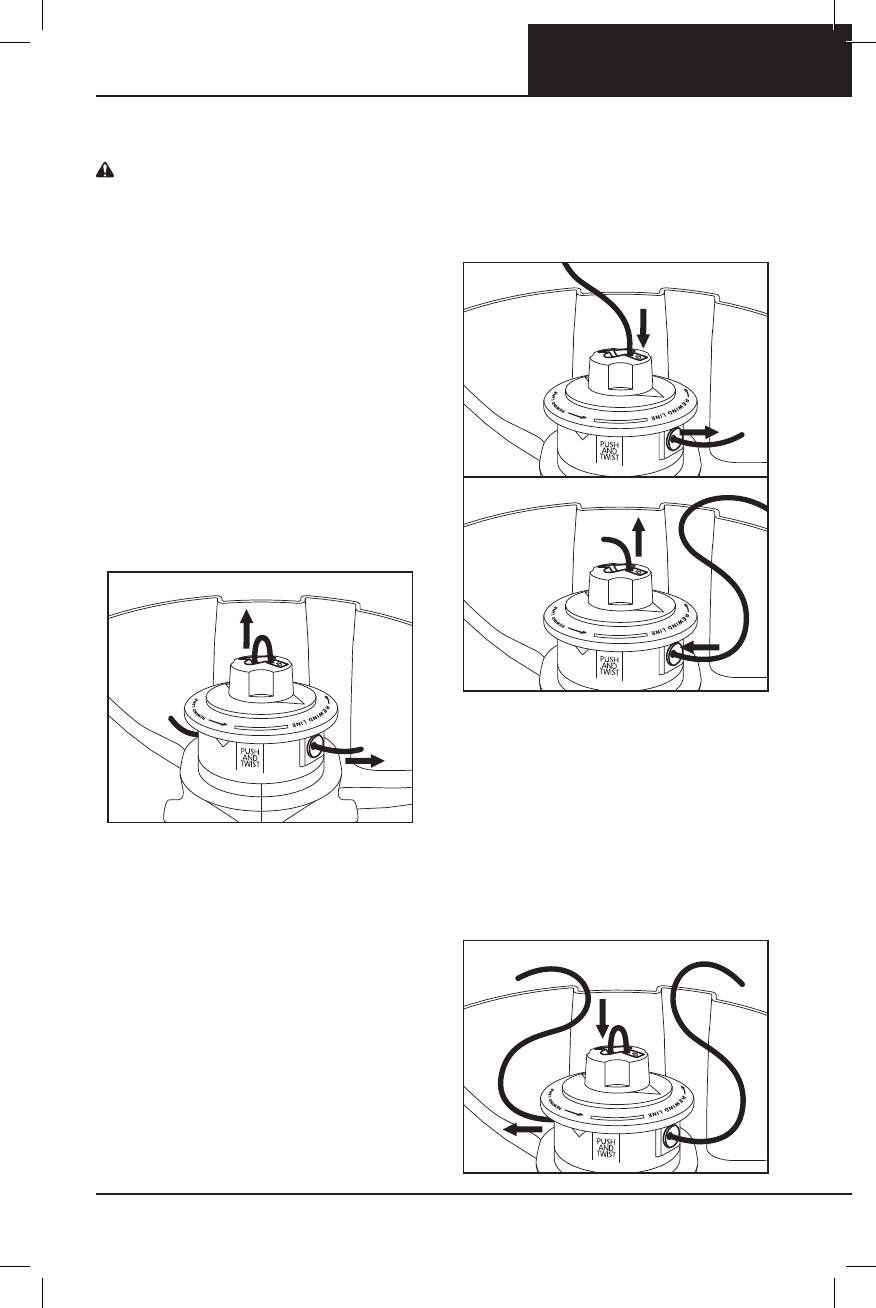
The trimmer/edger is equipped with
an easy reload trimmer head. It is not
necessary to disassemble the head in
order to replenish the trimmer line.
OREGON® recommends rewinding with
. in ( mm) Platinum Gatorline™.
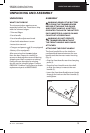
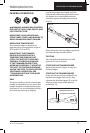
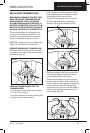
REMOVE REMAINING TRIMMER LINE
Pull any remaining trimmer line through
an eyelet or from the top of the trimmer
head knob (Fig. )
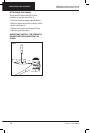
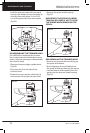
THREAD TRIMMER LINE INTO THE
TRIMMER HEAD
•Cut a length of new trimmer line about
– ft (–. m) long.
•Turn the knob so the arrows point to the
eyelets on the trimmer head.
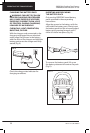
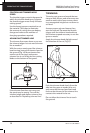
•Insert trimmer line through one hole in
the knob and feed it through an eyelet
in the side of the trimmer head
(Fig. A). Alternatively, insert trimmer
line through one eyelet and feed it
through a hole in the knob (Fig. B).
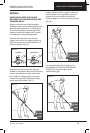
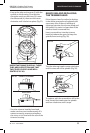
•Pull the leading end of the trimmer line
until the leading end and the trailing
end are about the same length.
•Thread the leading end of the trimmer
line through the other hole in the knob.
It will come out through the other eyelet
in the trimmer head. Pull the leading
end of the trimmer line until the leading
end and the trailing end are about the
same length (Fig. ).
FIG. 20
FIG. 21B
FIG. 21A
FIG. 22