


HEQIEQG
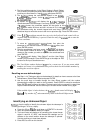
I-StarAlign
SynScanTM
SynScanTM
Successfui".
w
One
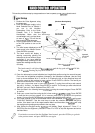
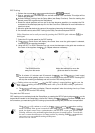
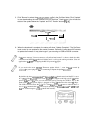
RA
3"
Dec.
J
60" Dec.
Tmo
stcv
"to
"in Dec. Dec (<30°).
Dec 50".
Dec. 140'
>Abs(Dec 1)+Abs(Dec2)>6O0
Pointing
The
SynScanT"
The
area(s) star(s)
SynScanTM.
SynScanTM
planetal-ium
goto
SynScanT"
thc ncxt
One
-
Star Alignment
It requires only one alignment star but, without accurate polar alignment and cone error calibration (see
Appendix A), it may produce lesser pointing accuracy than the other alignment methods. Refer to the
manual for information on how to perform accurate polar alignment. Below describes a step
-
by
-
step procedure on how to perform the One
-
Star Alignment:
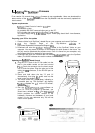
1.
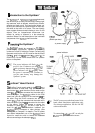
Make sure the telescope has been polar aligned.
2.
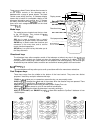
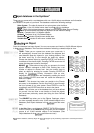
In the alignment screen, select using the scroll keys. Press ENTER to confirm.
3. The
will provide a list of stars available in your current sky for alignment. Using the
scroll keys, choose a star you are most familiar with and press ENTER. When the telescope
stops slewing, adjust its position with the directional keys until the star is centered on the
crosshairs in the finderscope. Now look through the eyepiece and adjust the telescope so that the
object is centred in the field of view of the eyepiece. Press ENTER to confirm.
4.
Once completed, will display "Alignment
Following is some pointers on how to choose appropriate alignment stars:
Star:
Choose a star closer to the Celstrial Equator (smaller declination absolute value).
Two Star: Choose two stars that are on the same side of the meridian. and at least
3
hours apart in
and apart
in
If ou suspect that the polar alignment is off by
l
o
and above, choose
two stars that are well more than 3
"
but less than apart in
Three Star For the first two alignment stars, follow the same guideline as choosing for the
Star
Alignment. For the third alignment star, choose a star that is on the opposite side of the
meridian of the first two stars. Both first alignment star and third alignment
should
have an absolute value of 30
70 If the first chosen star has a small
the of the third star should be at least The following formula can be used as a
guideline when determining the correlation between the first and third stars in
Accuracy Enhancement (PAE)
three star alignment methods provide alignment adequate for any visual observing purpose. For
applications that require extra high precision in a particular part of the sky, the
provides a
Pointing Accuracy Enhancement (PAE) function to further improve the accuracy.
PAE can be
performed in up to
85
zones to cover the whole sky. The where the chosen alignment is located
should be already mapped out accurately by the Further accuracy enhancement is not necessary.
The following provides a step
-
by
-
step procedure on how to perform PAE:
1.
Choose a star as reference object from a star chart or planetarium software. This star should be a
known, bright object that is currently located in the same part of the sky with the object of your interest.
2.
Find the reference object in the hand control database and go
-
to the object. If the mount
is under the control of the planetarium software, click on the object to slew to it.
3. Adjust the telescope so that the reference object is in the center of the eyepiece or CCD view.
4.
Press and hold down the ESC key for
2
seconds. The hand control will display "Re
-
center" and the
name of the reference object will appear in a blinking mode (3 times). If the go
-
to command is sent
software, instead of the name of the object, the hand control will display "Last
5.
Make sure that the reference object is still in the center of the view and press ENTER. If you do not
wish to record the result, press ESC to abort the operation. After pressing ENTER, the
will record the amount of pointing inaccuracy and recalculate the model of the sky. Now the pointing
accuracy of this particular part of the sky should be greatly improved.
The result for the star alignments and PAE is stored in the hand control even after the power has
been shut off. You will only need to perform the star alignment once as long as these two criteria
are met: 1 The telescope is moved to its home position
(Park
the telescope) before turning off the
power. 2. The telescope setup. including the mount, has not been moved. Accessory change is
acceptable as long as it is done with great caution. When hand control is turned on for the
time. make sure that the time entered during initial setup is based on the same source as last time.
For example, if you enter the time on your watch during this observing session, the time you enter
next time should also be read from your watch.
from the
object".