


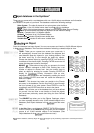
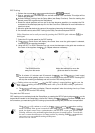

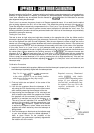

(Fig.A-2)
Dec Dec
(Fig.A-3).
Wlthout
(Fig.A-4). Dec
9.
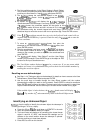
180" (Fig.A-5).
10. Dec
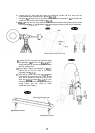
Fig.A-3).
11.
mount~ng
lock~ng (Fig.A-6).
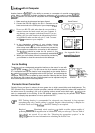
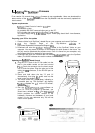
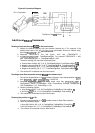
6. Loosen the R.A. lock knob and rotate the telescope around the R.A. axis until the
counterweight shaft is parallel to the ground.
7.
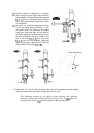
Using the direction key on the hand control, adjust the telescope in so Polaris sits
on the R.A. lines of the reticle eyepiece
8. moving the R.A. axis, adjust the azimuth control knobs to bring Polaris to the center
of the eyepiece Adjustment in
axis using the hand control may be necessary.
Place Polaris on the
R.A.
line
Loosen the R.A. lock knob and carefully rotate
the telescope
in R.A. axis This
should be done as accurate as possible using
the R.A. setting circle.
Once again, adjust the telescope in so
Polaris sits on the R.A. lines of the reticle
eyepiece (see
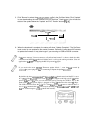
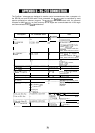
Now take a closer look at the plate
underneath the telescope tube. There should
be a set of screws on each end, next to the
tube ring
screws (If your
mounting plate does not have these screws or
screw holes, you will need to make
modification to the plate.)
tube ring locking screw
adjustment screws