


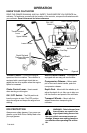

SERVICE AND ADJUSTMENT
18
F-051302L
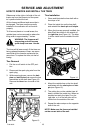
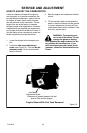
HOW TO REMOVE AND INSTALL THE TINES
References to the right or left side of the cul-
tivator are from the viewpoint of the opera-
tor’s position behind the unit.
All four tines are different and cannot be in-
terchanged. The tines must be correctly
installed or the cultivator will not function
properly.
To till around plants or in small areas, the
outside tines can be removed to reduce the
tilling width to approximately 7 inches.
WARNING: The tines are self
sharpening and will become
quite sharp from use. Handle
carefully.
The tines will all wear evenly. If the tines are
being replaced because of wear, we recom-
mend that all four tines be replaced at the
same time. To replace the tines, do the fol-
lowing:
Tine Removal
1. Put the on-off switch in the OFF posi-
tion.
2. Disconnect the spark plug wire from the
spark plug.
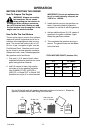
3. While wearing gloves, remove the hair-
pins and clevis pins that secure the tine
assemblies to the shaft (see Figure 13).
Remove the tines from one side of the
unit.
Figure 13
Clevis
Pins
Hair Pins
Tines
Tine Installation
1. Clean and lubricate the tine shaft with a
few drops of oil.
2. Place the inside tine on the tine shaft
and reinstall the clevis pin and hairpin.
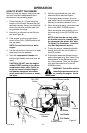
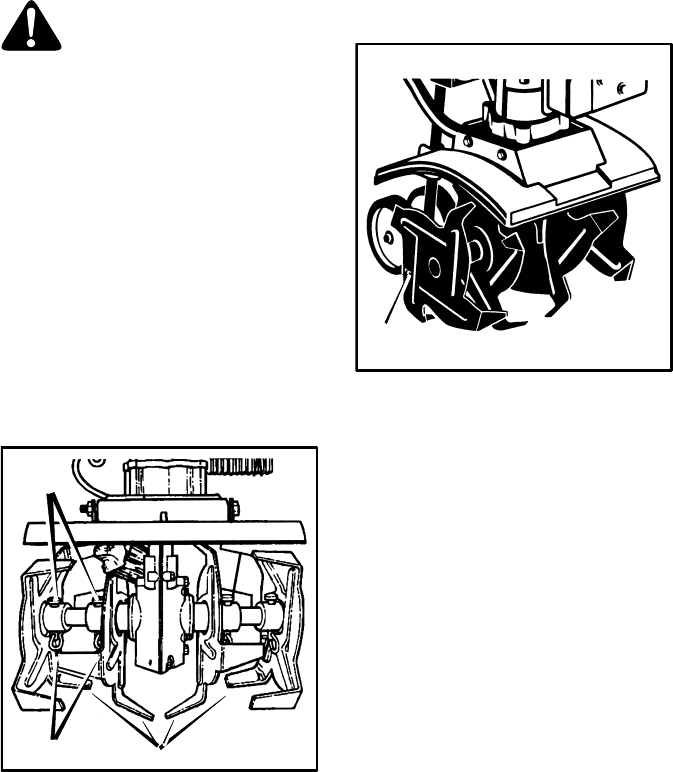
3. When the tines are properly installed, the
letter R will be visible on the outside of
the right tine (see Figure 14). The letter
L will be visible on the outside of the left
tine.
Figure 14
R
4. Mount the outside tine on the tine shaft
and fasten with the clevis pin and hair-
pin (see Figure 13).
5. The cutting tips on the outside tines all
bend in toward the inside tine. When as-
sembled correctly, the letter R on the
right side, or L on the left side, will be
visible from the outside of the unit.
6. Repeat the above steps on the opposite
side of the unit.
NOTE: Make sure the tines are installed
on the correct side of the unit.