


MAINTENANCE
16
F-051302L
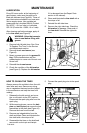
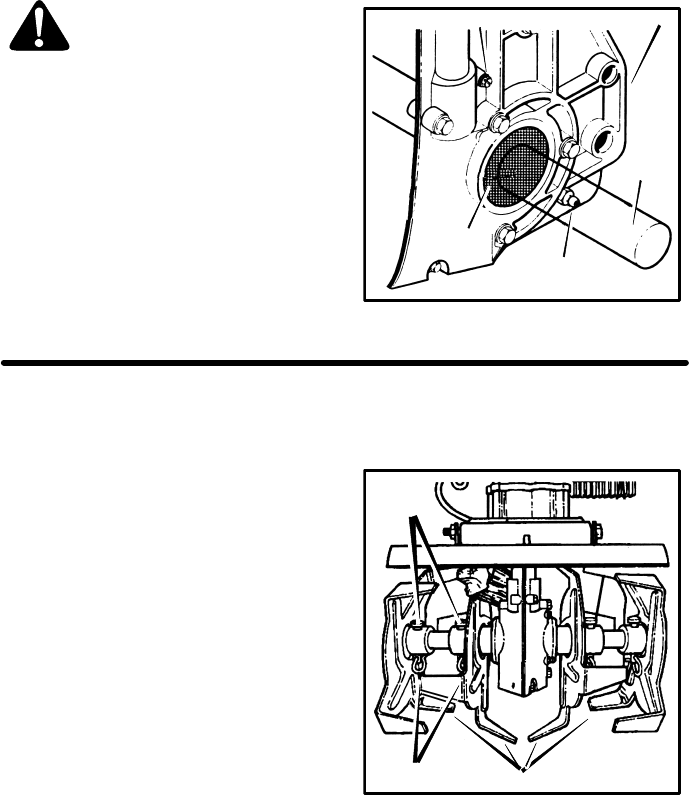
LUBRICATION
Every 25 hours and/or at the beginning of
each season, make sure the gear box is
filled with lubricant (see Figure 9). Tubes of
gear lubricant are available from most auto-
motive supply stores. Use portable tool
grease such as Lubriplate 630AA (Product
No. 06787, 1-3/4 oz. tube) or Lubriplate
GR-132 (Product No. 15892, 10 oz. tube).
After cleaning and before storage, apply oil
to the tine shaft (see Figure 9).
WARNING: Allow the transmis-
sion to cool before filling with
grease.
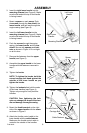
1. Remove both left side tines. See “How
To Replace The Tines” in the Service
and Adjustments section.
2. Remove the air vent screw (see
Figure 9).
3. Mount a grease gun onto the grease fit-
ting. Fill the transmission until the
grease begins to come out of the air vent
screw hole.
4. Reinstall the air vent screw.
5. Check the condition of the felt washer
(see Figure 9). Replace the felt washer
if it is damaged (see the Repair Parts
section in this manual).
6. Clean and lubricate the tine shaft with a
few drops of oil.
7. Reinstall the left side tines.
8. Remove the right side tines. Check the
felt washer for damage. Clean and oil
the tine shaft. Reinstall the right side
tines.
Figure 9
Grease Fitting
Tine
Shaft
Air Vent Screw
Felt
Washer
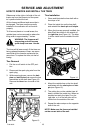
HOW TO CLEAN THE TINES
Always remove dirt and debris from the culti-
vator after each use. Remove any string,
wire or vegetation that may become lodged
in the mechanism and stop the tines from
rotating.
1. Release the throttle control and move
the on-off switch to the OFF position.
Disconnect the spark plug wire from the
spark plug.
2. While wearing gloves, remove the hair-
pins and clevis pins that secure the tine
assemblies to the shaft (see Figure 10).
Remove the tines from the shaft.
3. Remove any lodged debris from the
shaft and tines. Clean and lubricate the
tine shaft with a few drops of oil.
4. Reassemble the tines on the shaft and
secure with a clevis pin and hairpin.
5. Connect the spark plug wire to the spark
plug.
Figure 10
Clevis
Pins
Hair Pins
Tines