


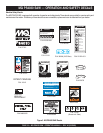
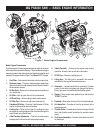


PAGE 26 — MQ PS4030 SAW • OPERATION MANUAL — REV. #0 (02/29/08)
A
B
MQ PS4030 SAW — INSTALLING THE BLADE
Installing the Blade
The blade can be mounted on either side of the saw to accomodate
different cutting jobs. With the proper sized blade selected, install
the new blade referring to the following procedure.
Failure to properly tighten the Blade Mounting Bolt can result
in the bolts coming loose with the Blade Flange potentially
falling off the rotating Blade Shaft Assembly. The Blade and
other parts coming loose from the saw during operation pose
a high risk of serious injury or even death!
WARNINGWARNING
WARNINGWARNING
WARNING
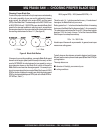
NOTE
Ensure the flange faces are kept
clean and smooth as well as the
inside diameter of the Blade Shaft.
1. Raise the saw so the blade will clear the ground when
installed.
2. Remove the blade flange bolt. This bolt is LEFT-HAND
thread on the RIGHT side of the saw and RIGHT-HAND
thread on the LEFT side of the saw.
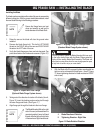
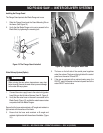
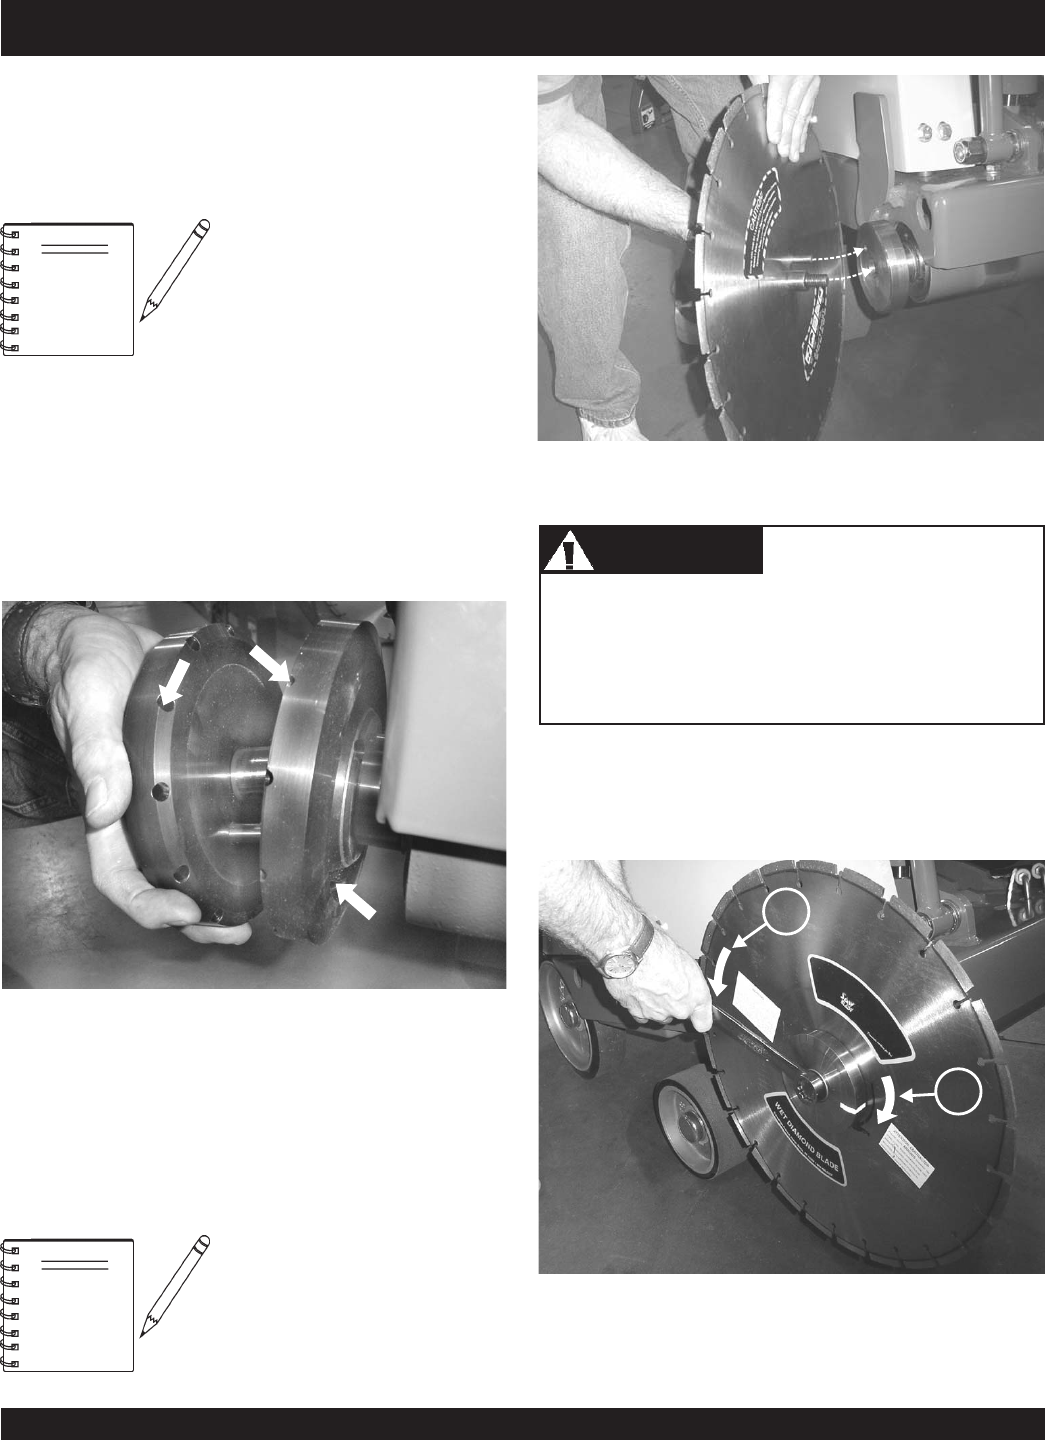
3. Verify the blade flanges are clean and not damaged. Pay
particular attention to all holes and recesses. (Figure 10.)
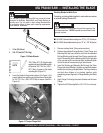
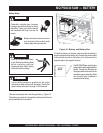
5. With the Blade still off the ground, tighten mounting bolt as
tight as can be achieved until blade spins.
(Item B, Figure
12 shows tightening direction for blade mounted on RIGHT
side of saw.)
NOTE
The Blade Mounting Bolt on the right
side of the saw (as viewed from the
operator's position), has a
Left-hand
thread, while the bolt on the left side
of the saw has a
Right-hand
thread.
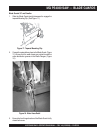
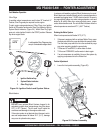
Figure 11. Aligning Flange Pin Through Blade
(Standard Blade Flange System shown)
3. Taking note of the direction of rotation of the blade, (Item A,
Figure 12) insert the bushing and mounting bolt through
the outer flange and blade. (See Figure 11.)
4. Align flange pin through the blade into the inner flange.
Figure 10. Inspect and Clean Flange
(Optional Blade Flange System shown)
Figure 12. Blade Rotation Direction
A. Blade Direction of Rotation
B. Tightening Direction - Right Side