


GLOBUG LIGHTING SYSTEM — OPERATION & PARTS MANUAL — REV. #3 (03/22/06) — PAGE 33
Ballast Box Removal
Dangerous conditions exists inside the ballast
compartment. Please use extreme caution when
performing maintenance on the ballast box.
NEVER touch the ballast or ballast cover while
the lamp is on. These components generate an
extreme amount of heat, which makes their surfaces very
hot!.
ALWAYS allow the ballast box and cover surface to cool down
before servicing.
WARNING - HOT SURFACE (BALLAST)
The electronic components of the ballast
generate high voltage conditions. These
conditions can be
lethal and cause bodily
harm, even death.
When performing
maintenance or troubleshooting, have only
experienced personnel work on the ballast.
DANGER - HIGH VOLTAGE (BALLAST)
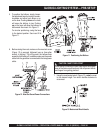
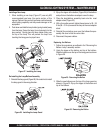
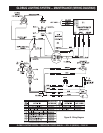
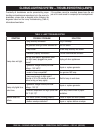
The ballast electronics are located within the cart frame of the
GloBug. To gain access to the ballast (Figure 40), remove the 6
retaining screws (M8 X 25) that secure the ballast cover to the
cart.
Figure 40. Removing the Ballast
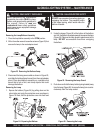
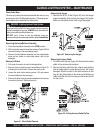
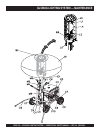
Installation of Winch
1. Reinstall the three retaining screws (Figure 31) and washers
that secure the winch to the mast. Tighten screws between
24~ 33 ft-lbs. (33 ~ 45 N-m).
2. Install the four retaining screws and washers (Figure 31) that
secure the winch cover. Tighten securely.
3. Turning the winch handle clockwise, wind the cable tightly
around the winch shaft.
4. Raise, extend, retract and lower the mast several times to
verify correct operation.
5. If the winch malfunctions, such as defective brake mecha-
nism, replace entire winch assembly immediately.
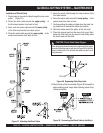
Installing the Hanger
1. Reinstall the M12 x 40 bolt (Figure 32) that supports the
hanger onto the main mast. Tighten bolt between 28~ 38
ft-lbs. (38 ~ 51 N-m).
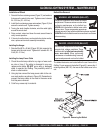
Installing the Lamp Power Cable
1. Check the entire lamp cable for any signs of wear, such
as cuts or frays. If the cable is damaged in any way,
replace entire cable. DO NOT use a worn or damaged
cable to operate the GloBug. The possibility exists of
shock or electrocution.
2. Using zip ties connect the lamp power cable to the vari-
ous mast sections as shown in Figure 33. Remember to
connect the lamp cables to the mast in the same order
that they were removed.
3. Cutoff any excess zip tie material.
GLOBUG LIGHTING SYSTEM — MAINTENANCE