


English Operating Manual for Wood Splitter
6
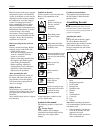
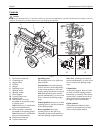
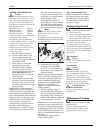
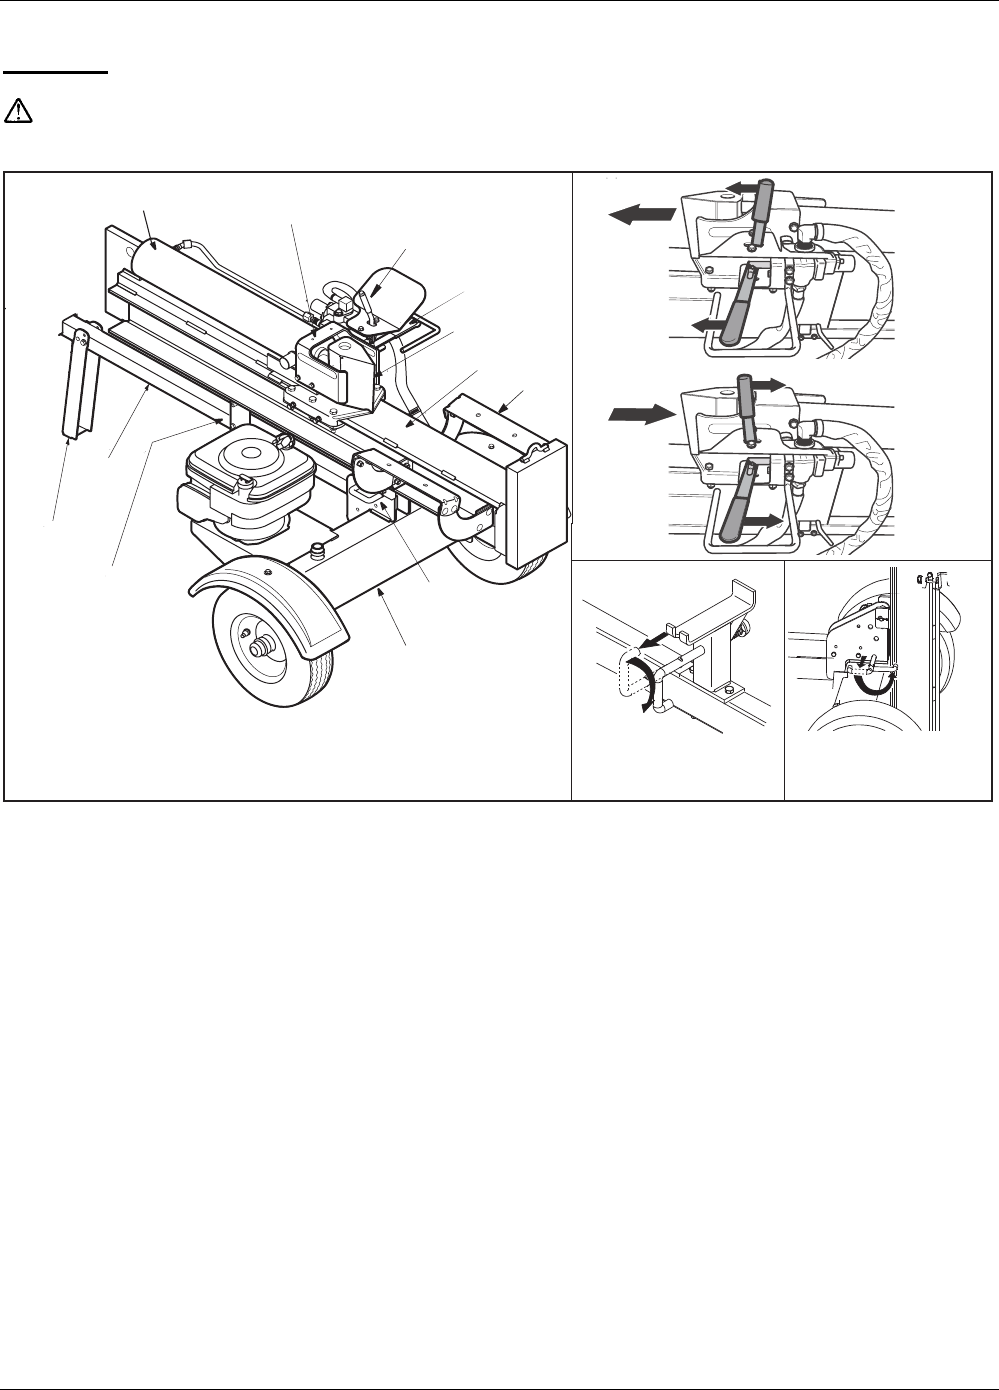
Controls
Fig. 11
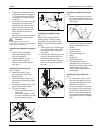
Caution
Compare the diagram in Fig. 11 with the controls on your unit and familiarise yourself with their functions before you start
work. In an emergency you must know how to switch off the unit quickly.
1 Horizontal column lock
2 Connecting rod
3 Support block
4 Cylinder
5 Stripper
6 Operating levers
7 Splitting wedge
8 Splitting column
9 Wood support
10 Vertical column lock
11 Hydraulic tank
12 Feed position = forward
movement of the splitting wedge
to split the wood.
Note: Both levers (A and B) must
be pressed simultaneously.
13 Reverse position = backward
movement of the splitting wedge.
Note: Both levers (A and B) must
be pressed simultaneously.
14 Horizontal column lock
15 Vertical column lock
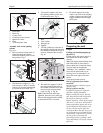
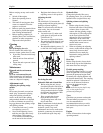
Operating levers
The operating levers (6 or A/B) have
three positions.
Feed position: Press both operating
levers to the left or down (depending
on the column position) to drive the
splitting wedge into the piece of wood.
Note: Both operating levers must be
pressed simultaneously; as soon as one
lever is released, the splitting wedge
stops.
Neutral position: Release one or both
operating levers to stop the movement
of the splitting wedge.
Reverse position: Press both
operating levers to the right or up
(depending on the column position) to
move the splitting wedge backwards.
Note: Both operating levers must be
pressed simultaneously; as soon as one
lever is released, the splitting wedge
stops.
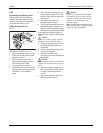
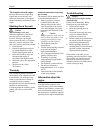
Column locks
As the name suggests, these two locks
are used to lock the splitting column
horizontally or vertically. The vertical
column lock is situated next to the oil
filter, the horizontal column lock on
the support of the column holder.
Engine controls
The positions and functions of the
controls for the engine can be found
in the enclosed engine manual.
Fig.11
1
11
10
9
7
6
5
4
3
2
14
15
8
6
12
13
B
A
B
A