


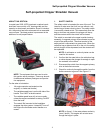
Self-propelled Chipper Shredder Vacuum
10
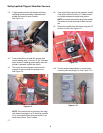
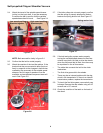
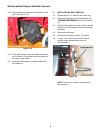
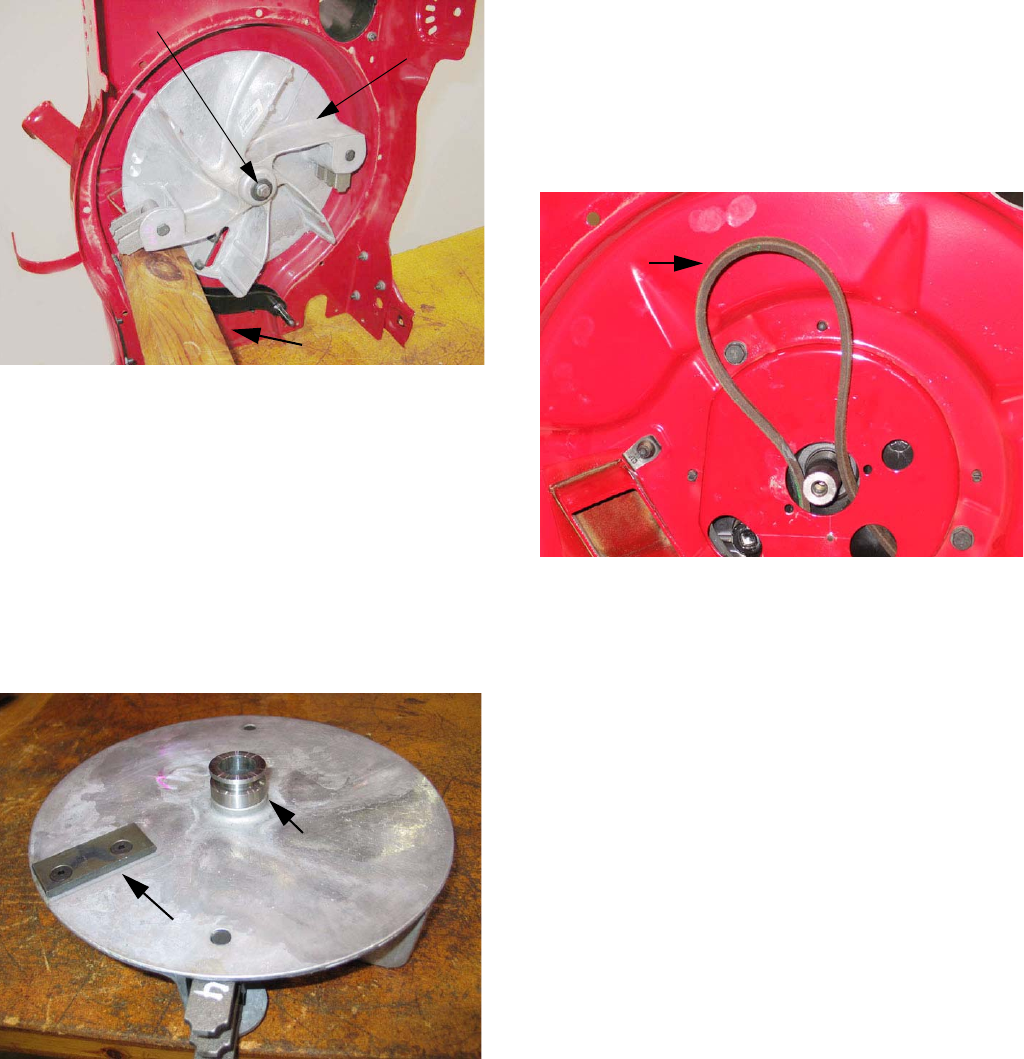
4.11. Block the impeller with a chock, to keep it from
rotating. Using a 9/16” socket, remove the bolt,
lock washer, and flat washer securing the impel-
ler to the crankshaft. See Figure 4.11.
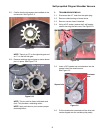
4.12. Lubricate the impeller removal tool (part number
753-0638). Thread the tool into the crankshaft
until the impeller assembly can easily slide off
the crankshaft.
NOTE: Push the belt forward to create slack,
releasing the belt from the groove in the pulley
hub.
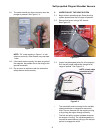
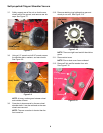
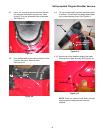
4.13. Inspect impeller, pulley hub, chipper blade, and
flails for any damage, replace as needed.
4.14. Do not use an impeller that shows any signs of
damage. A burst hazard will result.
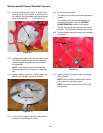
4.15. In servicing the impeller:
• The pulley hub can be pried off and replaced or
reused.
• The Chipper blade can be replaced with out
removing the impeller. Refer to CHIPPER
BLADE REMOVAL section of the manual.
• The roll pins secure the clevis pins that mount
the flails. The roll pins are shielded by pin clips.
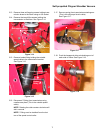
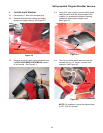
4.16. Pull belt though hole surrounding the crankshaft
to remove it.
4.17. Install a new belt though the hole surrounding
the crankshaft.
NOTE: When installing impeller make certain
belt is seated in the pulley groove.
NOTE: Torque the impeller bolt to 375 to 425
inch pounds.
Figure 4.11
Chock
Impeller
Bolt
Figure 4.13
Chipper blade
Pulley hub
Figure 4.16
Drive belt