


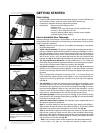


10
located and centered in the eyepiece, you may wish to switch to a higher power eye-
piece to enlarge the image as much as practical for prevailing seeing conditions.
NOTE:
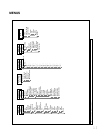
Seeing conditions vary widely from night-to-night and site-to-site.
Turbulence in the air, even on an apparently clear night, can distort
images. If an image appears fuzzy and ill-defined, back off to a lower
power eyepiece for a more well-resolved image (Figs. 11a and 11b).
The power, or magnification of a telescope is determined by the focal length of the tel-
escope and the focal length of the eyepiece being used.To calculate eyepiece power,
divide the telescope's focal length by the eyepiece's focal length.
E.g
., a 25mm eye-
piece is used with a NGC60 telescope.The focal length of the NGC60 is 700mm (see
SPECIFICATIONS, page 21).
Focal length ÷ Eyepiece focal length = Power
700mm ÷ 25mm = 28
The eyepiece power, or magnification is therefore 28x.
Simple Observations
If you wish to observe a distant land object, such as a mountain top, you can observe
by merely pointing the telescope and looking through the eyepiece.
• Move your telescope to observe distant street signs, mountains, trees and other
structures. Use your viewfinder to help site-in on an object.
• Practice focusing objects with the focus knob (10, Fig. 1).
• Once you get a feel for how your telescope moves and focuses, try to view some-
thing more challenging, like a bird or a distant moving train.
You can also observe stars and objects in the night sky using this method, but note
that objects begin to slowly drift across the eyepiece field. This motion is caused by
the rotation of the Earth.You'll find that you will need to reposition your telescope from
time to time to keep an object in the eyepiece field of view.This is especially true when
using high-power eyepieces.
Viewing terrestrial objects requires looking along the Earth's surface through heat
waves. These heat waves often cause loss of image quality. Lower power eyepieces,
such as 25mm or 26mm eyepieces, magnify these heat waves less than higher power
eyepieces.Therefore, lower power eyepieces provide a steadier, higher quality image.
If the image is fuzzy or ill-defined, reduce to a lower power eyepiece, where the heat
waves do not have such an effect on image quality. Observing in early morning hours,
before the ground has built up internal heat, produces better viewing conditions than
during late afternoon hours.
If you have an NGC model telescope, you can locate stars and other celestial objects
(over 1400 objects in all) using the control panel. In order to do so, you must initialize
the control panel, set the telescope in the home position, and align the telescope.The
control panel uses this information to determine the location of celestial objects.
Initializing the Control Panel (NGC Models Only)
1. Make sure that you have installed a 9v battery in the battery compartment.
2. Press ON/OFF to turn the power on.
The control panel display lights up and a copyright message displays briefly.
3. The next screen requests the status of Daylight Savings Time. Use UP/DOWN to
move between the "Yes" and "No" settings. Select the desired setting by pressing
ENTER.
NOTE:
Daylight Savings Time may be referred to by a different name in
various areas of the world.
NOTE:
When multiple choices are available within a menu option, the cur-
rent option is usually displayed first and highlighted by a right pointing
arrow (>).
3. The Location screen displays. This screen asks you if you wish to choose either
the zip code of your observing location or the location (
i.e.,
entering the city and
state or country of your observing location). Press Up to the zip code option or
down to enter the city and state.
NOTE: If you have
some familiarity with
“Go To” telescopes,
you might be wonder-
ing why you you
weren’t asked to enter
the time and date, the
two most important
factors in a Go To
system.
The reason is that your
telescope contains a
high-precision internal
clock that is set at the
factory. The clock has
a battery that will hold
the time and date
information for about 5
years.
If you wish to set the
time manually or
change the battery,
see Appendix B for
more information.
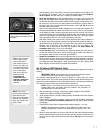
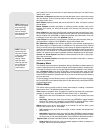
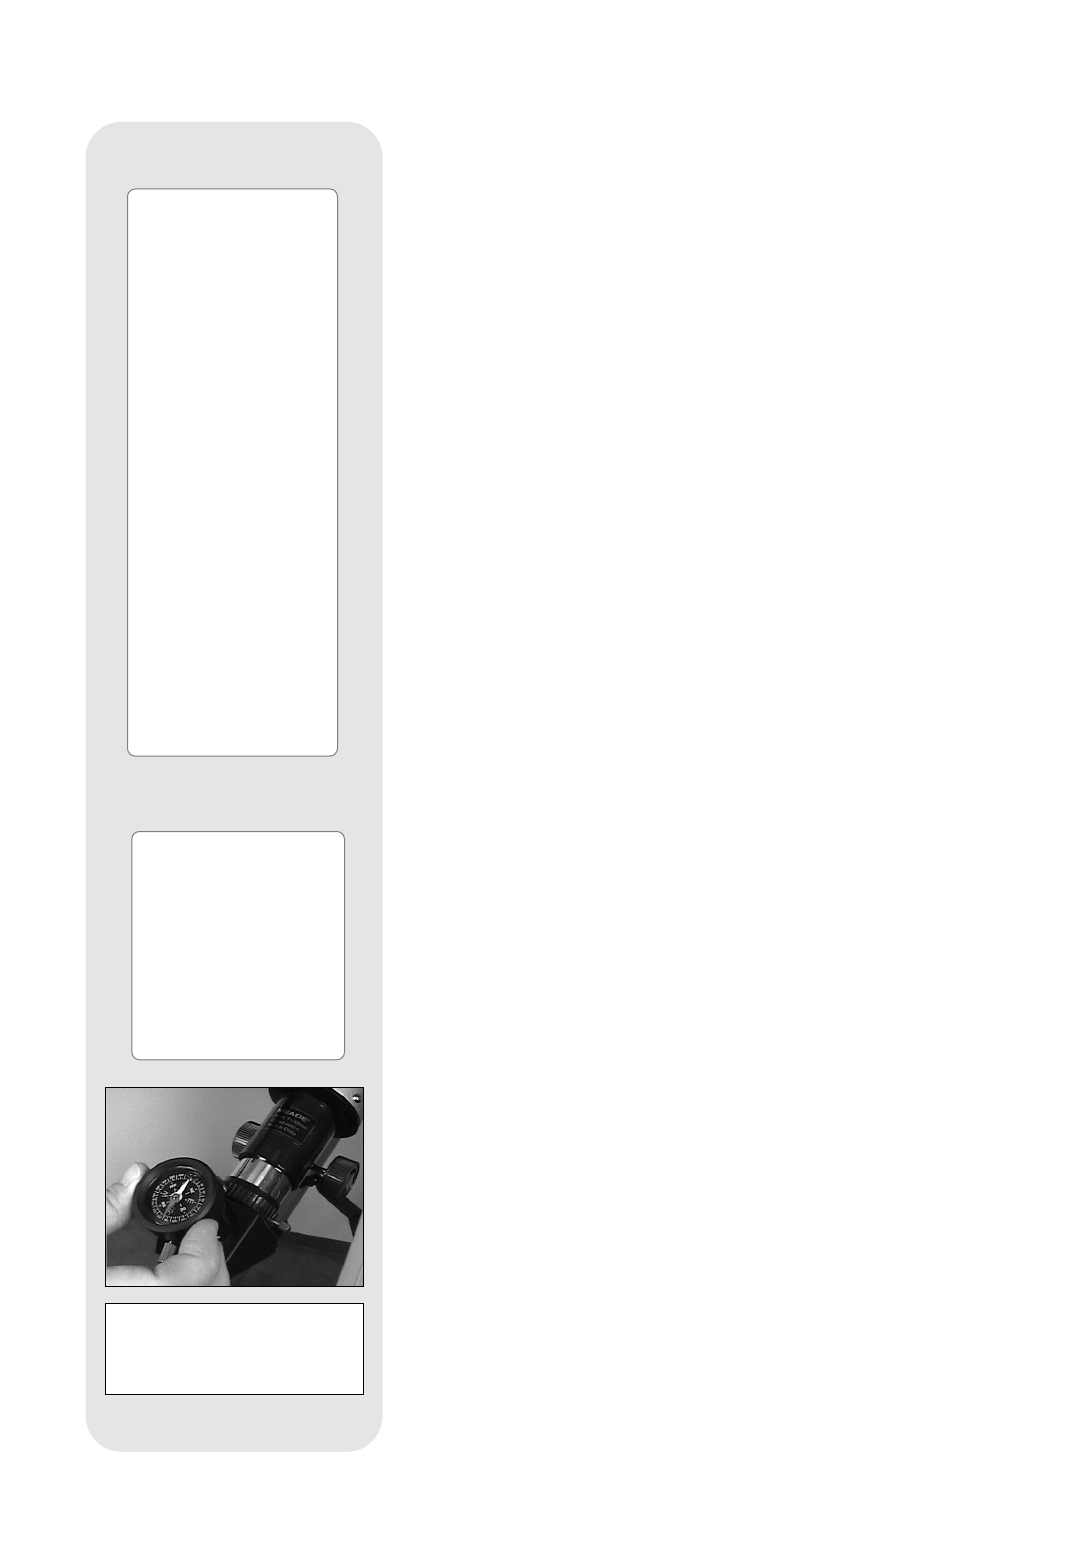
NOTE: Sometimes air
gets trapped below the
compass dial causing
the compass to not
work properly.
Gently tap the compass
to insure that no air is
trapped below the
compass dial.
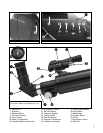
Fig. 12:
Remove the eye-
piece and slide in the com-
pass/ bubble level.