


(–) sign (e.g., the Dec. of the South celestial pole is –90°). Any point on the celestial equator (such as
the the constellations of Orion, Virgo, and Aquarius) is said to have a Declination of zero, shown as 0°
0' 0."
With all celestial objects therefore capable of being specified in position by their celestial coordinates of
Right Ascension and Declination, the task of finding objects (in particular, faint objects) in the telescope
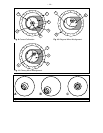
can be simplified. The setting circles, R.A. (27, Fig. 1c) and Dec. (28, Fig. 1c) of the Meade 114ST EQ-D
telescope may be dialed, in effect, to read the object’s coordinates, positioning the object in the vicinity of
the telescope’s telescopic field of view. However, these setting circles may be used to advantage only if
the telescope is first properly aligned with the North Celestial Pole.
LINING UP WITH THE CELESTIAL POLE
Objects in the sky appear to revolve around the celestial pole. (Actually, celestial objects are essentially
“fixed,” and their apparent motion is caused by the Earth’s axial rotation). During any 24 hour period, stars
make one complete revolution about the pole, making concentric circles with the pole at the center. By
lining up the telescope’s polar axis with the North Celestial Pole (or for observers located in Earth’s
Southern Hemisphere with the South Celestial Pole), astronomical objects may be followed, or tracked, by
moving the telescope about one axis, the polar axis.
If the telescope is reasonably well aligned with the pole, therefore, very little use of the telescope’s
Declination flexible cable control is necessary and virtually all of the required telescope tracking will be in
Right Ascension. (If the telescope were perfectly aligned with the pole, no Declination tracking of stellar
objects would be required). For the purposes of casual visual telescopic observations, lining up the
telescope’s polar axis to within a degree or two of the pole is more than sufficient: with this level of pointing
accuracy, the telescope can track accurately by slowly turning the telescope’s R.A. flexible cable control
and keep objects in the telescopic field of view for perhaps 20 to 30 minutes.
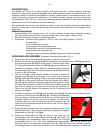
1. Release the Azimuth lock (30, Fig. 1a and 1e) of
the Azimuth base, so that the entire telescope-
with-mounting may be rotated in a horizontal
direction. Rotate the telescope until the polar axis
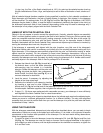
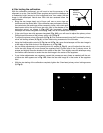
(10, Fig. 1c) points due North. Use a compass or
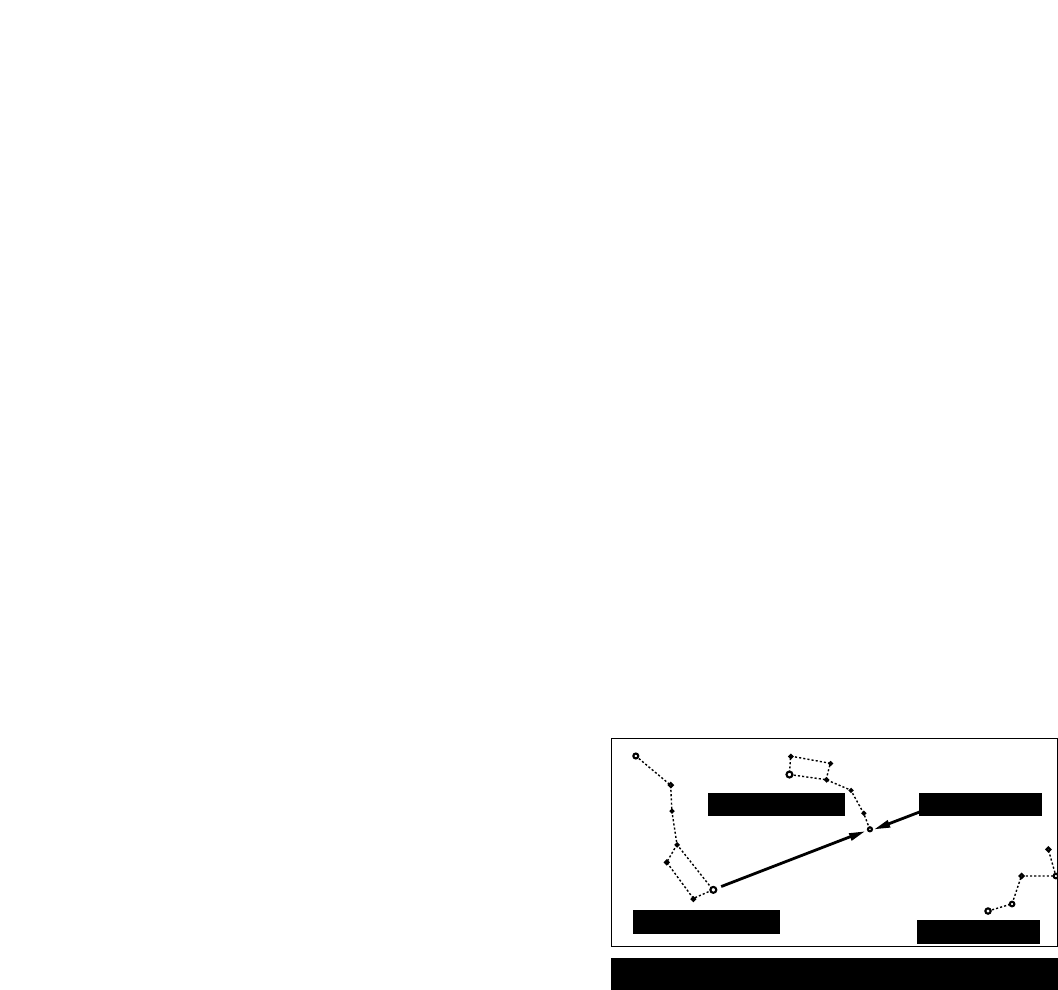
locate Polaris, the North Star (see Fig. 5), as an
accurate reference for due North.
2. Level the mount, if necessary, by adjusting the
heights of the three tripod legs.
3. Determine the latitude of your observing location
by checking a road map or atlas. Release the
latitude lock (11, Fig. 1a and 1e) and tilt the telescope mount so that the star “Polaris” is centered in
the telescope’s viewfinder eyepiece, then re-tighten the latitude lock.
4. If steps (1) - (3) above were performed with reasonable accuracy, your telescope is now sufficiently
well-aligned to the North Celestial Pole for visual observations.
Once the mount has been polar-aligned as described above, the latitude angle need not be adjusted again,
unless you move to a different geographical location (i.e. a different latitude). The only polar alignment
procedure that you need to perform each time you use the telescope is to point the polar axis due North,
as described in step 1 above.
USING THE TELESCOPE
With the telescope assembled, balanced and polar aligned as described above, you are ready to begin
observations. Decide on an easy-to-find object such as the Moon, if it is visible, or a bright star to become
accustomed to the functions and operations of the telescope. For the best results during observations,
follow the suggestions below:
• To center an object in the main telescope, loosen the telescope’s R.A. lock (22, Fig. 1c) and Dec. lock
(23, Fig. 1c). The telescope can now turn freely on its axes. Use the aligned viewfinder to first sight-in
on the object you wish to observe; with the object centered on the viewfinder’s crosshairs, re-tighten the
R.A. and Dec. locks.
– 9 –
Polaris
Little Dipper
Big Dipper
Cassiopeia
Fig. 5: Locating Polaris.
Little Dipper Polaris
Big Dipper
Cassiopeia