20
Section 2: Adjustments
RCF2784 Rotary Cutters 326-364M
12/15/15
Table of Contents
3-Point Leveling & Cutting Height
There are four primary adjustments that should be made
prior to actual field operation:
1. Deck Leveling
2. Cutting Height Adjustment
3. Single & Dual Tailwheel Adjustment
4. Center 3-Point Link Adjustment
Proper adjustment of each of these items will provide for
higher efficiency, improved cutting performance, and
longer blade life. Pliable tape measure, spirit or
carpenters level, set of wrenches, and protective gloves
will be needed.
Always disengage PTO, put tractor in park or set park brake,
shut tractor engine off, remove ignition key, and wait for all
moving parts to stop before dismounting from tractor.
Deck Leveling
Figure 2-1
Deck Leveling
Refer to Figure 2-1:
1. Locate tractor with Rotary Cutter on a flat, level
surface.
2. Use tractor’s 3-Point control lever to lower cutter until
tailwheel(s) makes contact with ground surface.
Section 2: Adjustments
3-Point Deck Leveling & Cutting Height
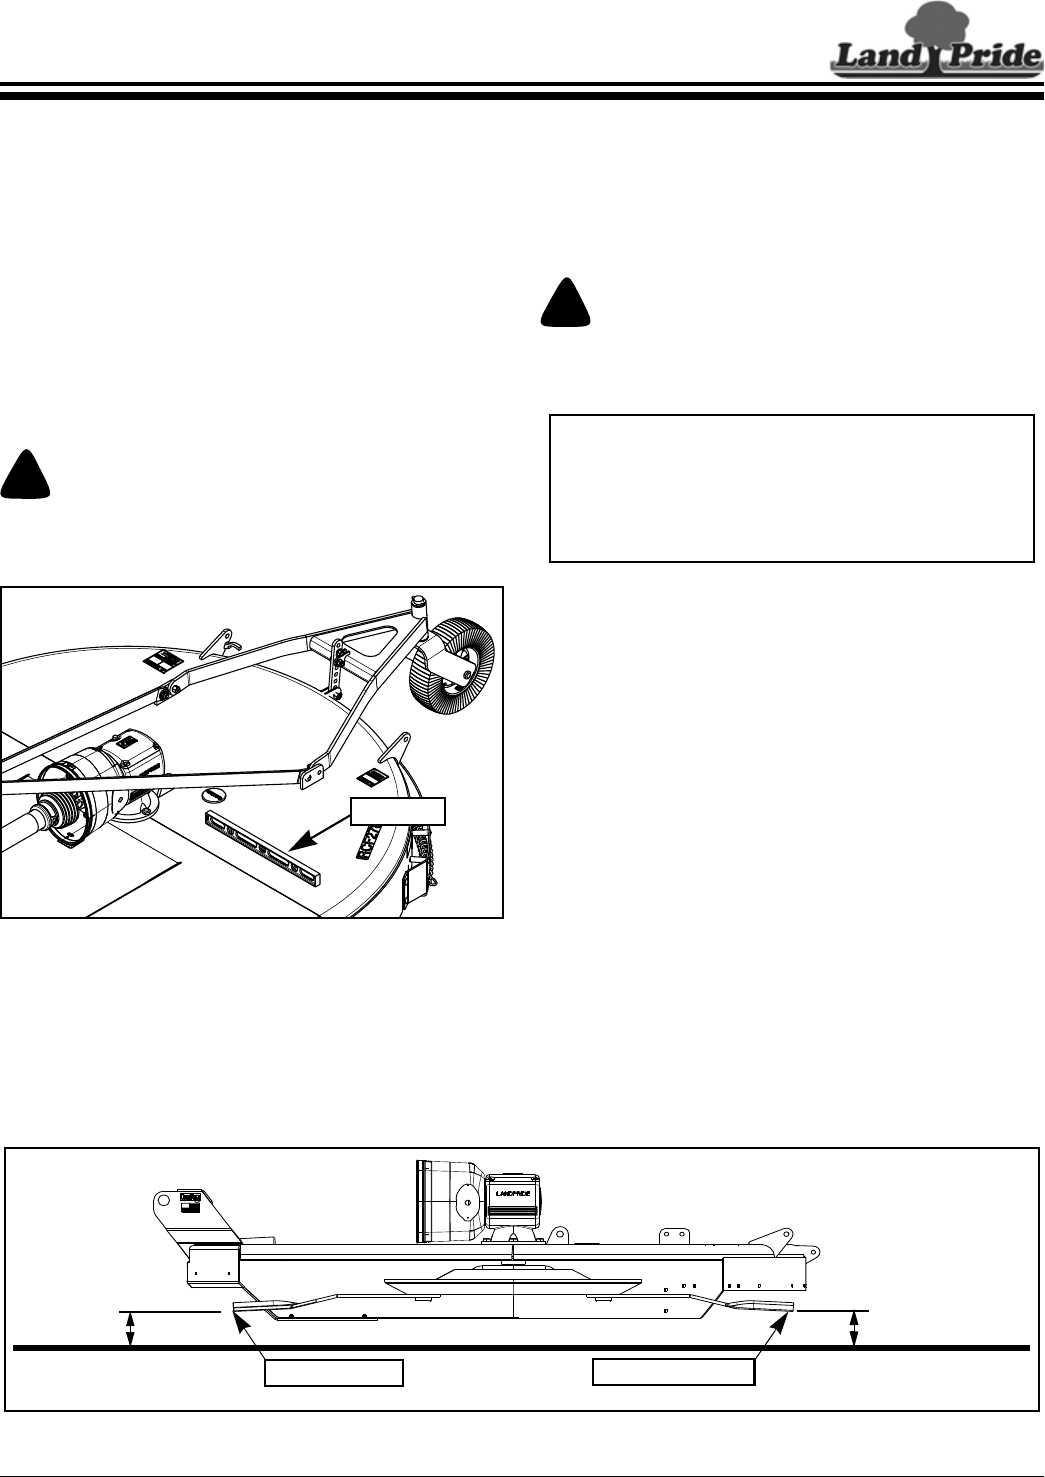
Figure 2-2
Set Front Blade Tip
At Cutting Height
Front Blade
Rear Blade Tip
Set Rear Blade Tip Slightly
Higher Than Cutting Height
33039
3. Place a level on the cutter deck as shown. Manually
adjust one or both lower 3-Point lift arms vertically
until deck is level from left to right. On some tractors,
only one arm can be adjusted.
Cutting Height Adjustment
Refer to Figure 2-2:
Avoid direct contact with cutter blades by wearing a pair of
gloves. Cutter blades have sharp edges and burrs that can
cause injuries.
1. With gloves on, carefully rotate blades and stump
jumper until blade tips are in the position shown.
2. Measure distance from cutting tip of front blade to
ground surface. This distance is the cutting height.
3. Using tractor’s 3-Point hydraulic control, raise or
lower 3-Point lift arms until the front blade tip is at the
desired cutting height.
4. The 3-Point center link should be loose when deck
rear is supported by the tailwheel. If not, lengthen 3-
Point center link until loose. Final adjustment will be
made later.
5. Measure distance from cutting tip of rear blade to
ground. This distance should be slightly higher than
the front blade but not more than 1" higher.
6. If rear blade is lower than front blade or more than 1"
higher than the front blade, then tailwheel height
must be adjusted. If needed, see “Single & Dual
Tailwheel Adjustment” instructions on page 21.
7. Repeat steps 1 through 6 until tailwheel and 3-Point
arms are adjusted to the desired cutting height.
8. Set tractor’s 3-Point hydraulic control stop once the
tailwheel and 3-Point arms are adjusted properly.
IMPORTANT: The front blade tip should be lower
than rear blade tip by approximately 1". The cutter is
subject to continuous material flow under the deck if
the rear blade is at the same height or lower than the
front blade causing horsepower loss, grass clumps,
blade wear, and frequent blade sharpening.
