


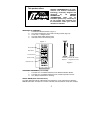

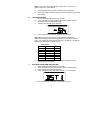
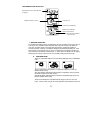

9
conducts a WWVB search every night between these hours, and overrides any manually set
time. The WWVB tower icon (appearing in the TIME LCD) will flash when a signal-search is in
progress and a signal is being received, and will remain steady when the signal has been
received. If the WWVB time has not been received after 10 minutes of battery installation, you
may manually set the time or leave the time function alone (reception will occur regardless).
After a successful reception, no more reception attempt would be made until the following day.
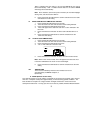
B. MANUAL TIME SETTING
Note: When in the 12-hour format “P.M.” will appear to the left of the hour in the
time LCD between the hours of noon and midnight.
1. Press and hold the SET button for 5 seconds.
2. “LCD” will show in the time LCD and the number setting will flash.
3. Press and release the SET button five times.
4. The time will flash in the time LCD.
5. Press and release the IN button to advance the hours.
6. Press and release the OUT button to advance the minutes.
7. Press and release the SET button to confirm and advance to the year
setting.
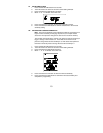
IX. SETTING THE YEAR, DAY AND MONTH
Note: Reception of the WWVB signal will also set the date and day. The
reception of the signal will override any programmed date and day.
1. Press and hold the SET button for 5 seconds.
2. “LCD” will show in the time LCD and the number setting will flash.
3. Press and release the SET button six times.
4. The year will flash in the date LCD.
5. Press and release the IN button to advance the year.
6. Press and release the SET button to confirm and advance to the day/month
setting.
7. The day and month will flash in the date LCD.
8. Press and release the IN button to advance the day.
9. Press and release the OUT button to advance the month.
10. Press and release the SET button to confirm and advance to the snooze
setting.
X. SETTING THE SNOOZE
Note: This is an unused function of the Wireless Weather Station and should be
disregarded. The setting has no bearing on the operation. Please press and release
the SET button to advance to select the temperature format.