


13
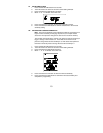
2. Press the IN button again (once while “MIN” is still displayed, twice
otherwise). “MAX” appears above the indoor temperature and the LCD
will flash, indicating that the maximum temperature (along with the
humidity measured at that time) and the time and date of occurrence
are displayed.
3. While “MAX” is still displayed press the IN button again to return to the
current data display. Or you can wait 30 seconds, during either the
minimum or the maximum readings, and the unit will automatically
return to current data readings.
B. VIEWING THE OUTDOOR TEMPERATURE RECORDS
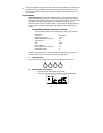
1. Press the OUT button once. “MIN” appears above the outdoor
temperature and the LCD will flash, indicating that the minimum
temperature, and the time and date of occurrence are displayed. The
minimum records will display for 30 seconds before returning to the
normal display mode.
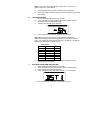
2. Press the OUT button again (once while “MIN” is still displayed, twice
otherwise). “MAX” appears above the outdoor temperature and the
LCD will flash, indicating that the maximum temperature and the time
and date of occurrence are displayed.
3. While “MAX” is still displayed press the OUT button again to return to
the current data display. Or you can wait 30 seconds, during either the
minimum or the maximum readings, and the unit will automatically
return to current data readings.
C. RESETTING THE MIMIMUM AND MAXIMUM RECORDS
1. All the Indoor records (minimum and maximum) will be reset after the
IN button is pressed and held for 5 seconds.
2. All the Outdoor records (minimum and maximum) will be reset after the
OUT button is pressed and held for 5 seconds.
V. ADDING REMOTE TEMPERATURE SENSORS (OPTIONAL)
The WS-7014U-IT is able to receive signals from 2 additional temperature sensors.
The following are instructions for the set-up of temperature sensor units with the WS-
7014U-IT. These extra sensors can be purchased through the same dealer as this
unit.
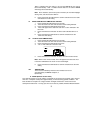
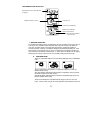
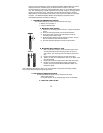
1. Remove all the batteries from the receiver and sensor(s) and wait 60 seconds.
During these 60 seconds, press any button 20 times to discharge any excess
power.
2. Insert the batteries to the first temperature sensor.
3. Within 2 minutes of powering up the first sensor, insert the batteries to the
Weather Station. Once the batteries are in place, all segments of the LCD will
light up briefly. Following the indoor/outdoor temperature and indoor humidity,
time as 12:00, calendar, weather icons will be displayed. If they are not shown in